6.Fasten the shutoff valve to the cold water pipe with the pipe clamp. Be sure the outlet end is solidly in the ¹⁄₄" drilled hole in the water pipe and that the washer is under the pipe clamp. Tighten the packing nut. Tighten the pipe clamp screws slowly and evenly so washer makes a watertight seal. Do not overtighten or you may crush the copper tubing.

7.Slip the compression sleeve and compression nut onto the copper tubing as shown. Insert the end of the tubing into the outlet end squarely as far as it will go. Screw compression nut onto outlet end with adjustable wrench. Do not overtighten.

8.Place the free end of the tubing in a container or sink, and turn ON the main water supply. Flush the tubing until water is clear. Turn OFF the shutoff valve on the water pipe. Coil the copper tubing.

4.Turn shutoff valve ON.

5.Check for leaks. Tighten any nuts or connections (including connections at the valve) that leak.

Style 3

1.Unplug refrigerator or disconnect power.

2.Remove the shipping tape from the gray, coiled water tubing on the rear of the refrigerator.

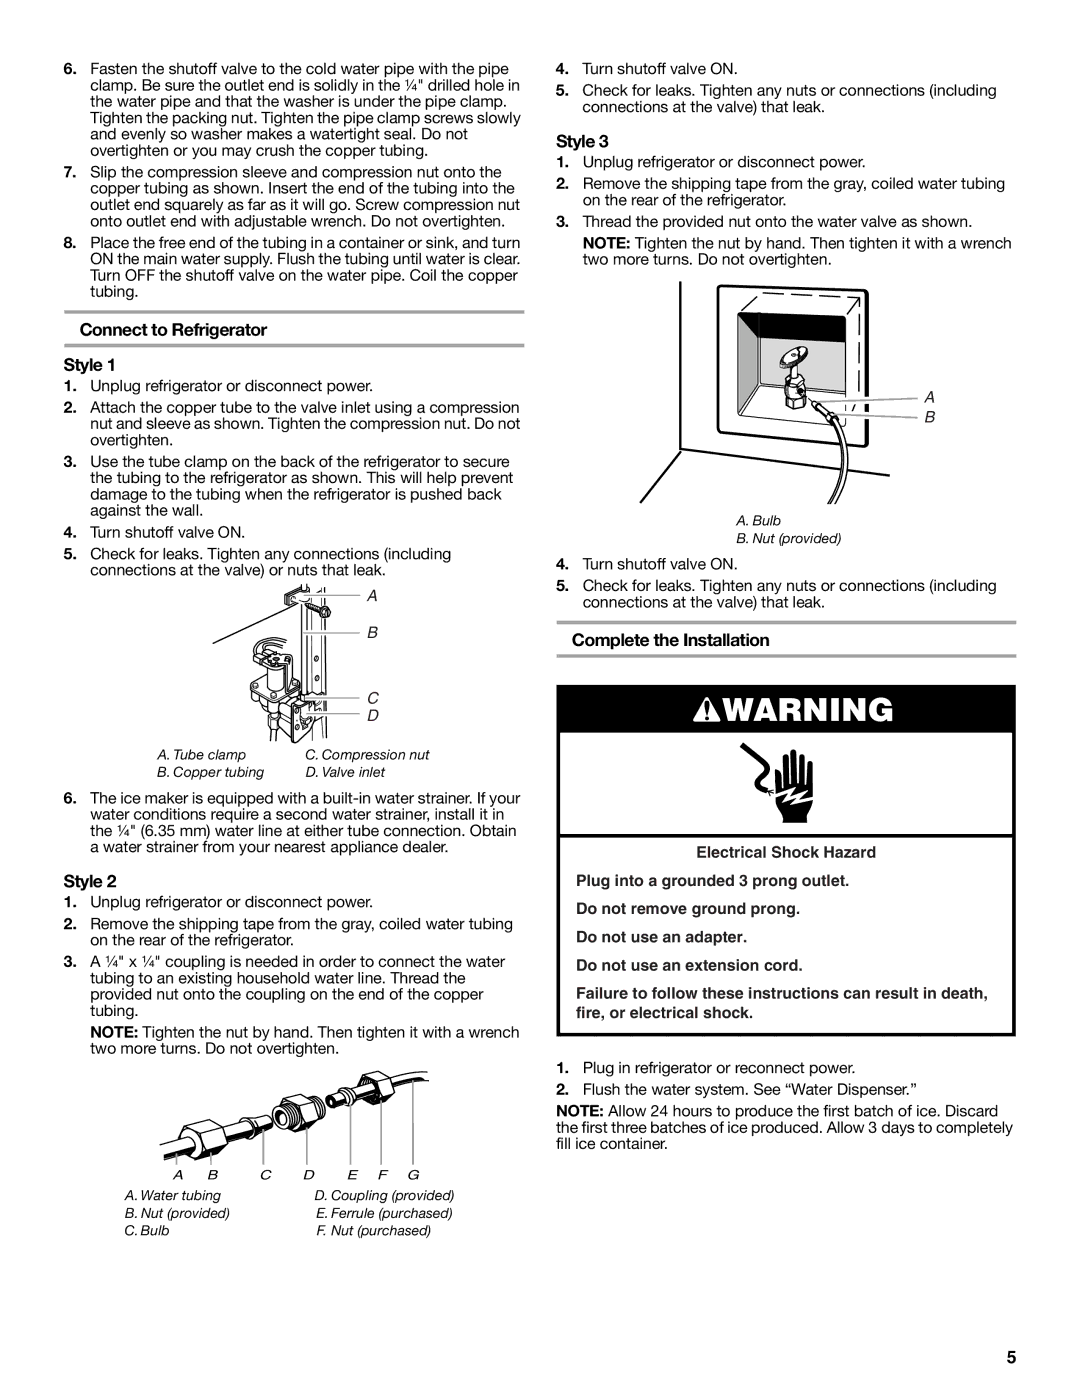
3.Thread the provided nut onto the water valve as shown.

NOTE: Tighten the nut by hand. Then tighten it with a wrench two more turns. Do not overtighten.

Connect to Refrigerator

Style 1

1.Unplug refrigerator or disconnect power.

2.Attach the copper tube to the valve inlet using a compression nut and sleeve as shown. Tighten the compression nut. Do not overtighten.

3.Use the tube clamp on the back of the refrigerator to secure the tubing to the refrigerator as shown. This will help prevent damage to the tubing when the refrigerator is pushed back against the wall.

4.Turn shutoff valve ON.

5.Check for leaks. Tighten any connections (including connections at the valve) or nuts that leak.

A

B

C

D

A. Tube clamp

C. Compression nut

B. Copper tubing

D. Valve inlet

6.The ice maker is equipped with a built-in water strainer. If your water conditions require a second water strainer, install it in the ¹⁄₄" (6.35 mm) water line at either tube connection. Obtain a water strainer from your nearest appliance dealer.

Style 2

1.Unplug refrigerator or disconnect power.

2.Remove the shipping tape from the gray, coiled water tubing on the rear of the refrigerator.

3.A ¹⁄₄" x ¹⁄₄" coupling is needed in order to connect the water tubing to an existing household water line. Thread the provided nut onto the coupling on the end of the copper tubing.

NOTE: Tighten the nut by hand. Then tighten it with a wrench two more turns. Do not overtighten.

A

B

C

D

E F G

A. Water tubing


D. Coupling (provided)

B. Nut (provided)


E. Ferrule (purchased)

C. Bulb


F. Nut (purchased)

A

B

A.Bulb

B.Nut (provided)

4.Turn shutoff valve ON.

5.Check for leaks. Tighten any nuts or connections (including connections at the valve) that leak.

Complete the Installation

WARNING

Electrical Shock Hazard

Plug into a grounded 3 prong outlet.

Do not remove ground prong.

Do not use an adapter.

Do not use an extension cord.

Failure to follow these instructions can result in death, fire, or electrical shock.

1.Plug in refrigerator or reconnect power.

2.Flush the water system. See “Water Dispenser.”

NOTE: Allow 24 hours to produce the first batch of ice. Discard the first three batches of ice produced. Allow 3 days to completely fill ice container.

5

Page 5
Image 5
KitchenAid 2314464 warranty Connect to Refrigerator Style, Complete the Installation

2314464 specifications

The KitchenAid 2314464 is an innovative and versatile kitchen appliance designed to elevate your cooking and baking experience. This product stands out for its robust construction, intuitive design, and a range of features that streamline food preparation.

One of the main features of the KitchenAid 2314464 is its powerful motor, which provides ample strength for mixing, kneading, and whipping. This allows users to tackle a variety of recipes, from dense bread dough to fluffy meringues, with ease and efficiency. The motor is designed to operate quietly, ensuring a pleasant kitchen environment during use.

The appliance comes equipped with a 5-quart stainless steel bowl, offering generous capacity for large batches. The bowl features a handle for easy pouring and transferring of mixtures, making it a practical choice for bakers who frequently work in larger quantities. Additionally, the bowl is dishwasher-safe, simplifying cleanup after culinary creations.

KitchenAid has incorporated a unique planetary mixing action in the 2314464, which means the beater moves in one direction while the bowl rotates in the opposite direction. This design ensures thorough mixing and eliminates the need for manual scraping of the bowl sides, making it a time-saving feature for busy cooks.

Versatility is another hallmark of the KitchenAid 2314464. It is compatible with a wide range of attachments and accessories, allowing users to explore various cooking techniques. From pasta makers to food grinders, the possibilities are endless, transforming the mixer into a multi-functional kitchen hub.

For safety, the appliance includes a tilt-head design, allowing for easy access to the bowl and beaters. This feature also enhances stability during operation, as users can lock the head in place for secure mixing. The base of the unit features suction cups that prevent slipping, further enhancing safety during use.

In terms of aesthetics, the KitchenAid 2314464 is available in multiple color options, allowing it to fit seamlessly into any kitchen decor. Its classic design not only adds a touch of elegance but also reflects the brand's commitment to quality and craftsmanship.

Overall, the KitchenAid 2314464 is a must-have for any serious home cook or baking enthusiast. With its reliable performance, impressive versatility, and user-friendly features, it is designed to inspire creativity and simplify the joys of cooking and baking.