Style 2

1.Unplug refrigerator or disconnect power.

2.Remove and discard the shipping tape and the black nylon plug from the gray, coiled water tubing on the rear of the refrigerator.

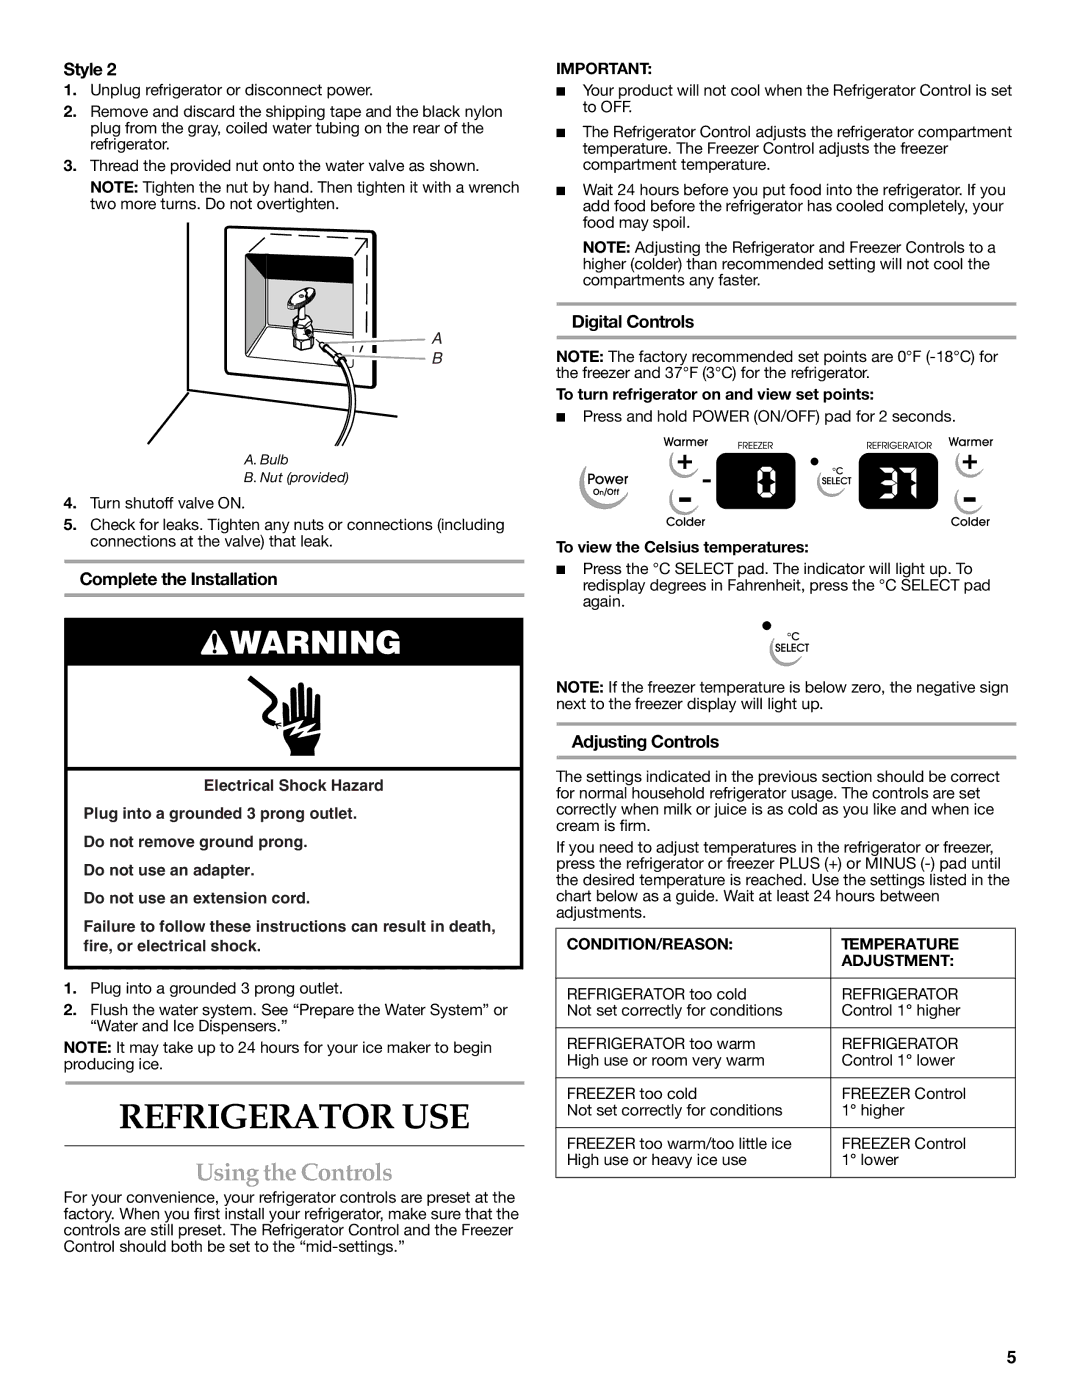
3.Thread the provided nut onto the water valve as shown.

NOTE: Tighten the nut by hand. Then tighten it with a wrench two more turns. Do not overtighten.

A

B

A.Bulb

B.Nut (provided)

4.Turn shutoff valve ON.

5.Check for leaks. Tighten any nuts or connections (including connections at the valve) that leak.

Complete the Installation

WARNING

Electrical Shock Hazard

Plug into a grounded 3 prong outlet.

Do not remove ground prong.

Do not use an adapter.

Do not use an extension cord.

Failure to follow these instructions can result in death, fire, or electrical shock.

1.Plug into a grounded 3 prong outlet.

2.Flush the water system. See “Prepare the Water System” or “Water and Ice Dispensers.”

NOTE: It may take up to 24 hours for your ice maker to begin producing ice.

REFRIGERATOR USE

Using the Controls

For your convenience, your refrigerator controls are preset at the factory. When you first install your refrigerator, make sure that the controls are still preset. The Refrigerator Control and the Freezer Control should both be set to the “mid-settings.”

IMPORTANT:

Your product will not cool when the Refrigerator Control is set to OFF.

The Refrigerator Control adjusts the refrigerator compartment temperature. The Freezer Control adjusts the freezer compartment temperature.

Wait 24 hours before you put food into the refrigerator. If you add food before the refrigerator has cooled completely, your food may spoil.

NOTE: Adjusting the Refrigerator and Freezer Controls to a higher (colder) than recommended setting will not cool the compartments any faster.

Digital Controls

NOTE: The factory recommended set points are 0°F (-18°C) for the freezer and 37°F (3°C) for the refrigerator.

To turn refrigerator on and view set points:

Press and hold POWER (ON/OFF) pad for 2 seconds.

To view the Celsius temperatures:

Press the °C SELECT pad. The indicator will light up. To redisplay degrees in Fahrenheit, press the °C SELECT pad again.

NOTE: If the freezer temperature is below zero, the negative sign next to the freezer display will light up.

Adjusting Controls

The settings indicated in the previous section should be correct for normal household refrigerator usage. The controls are set correctly when milk or juice is as cold as you like and when ice cream is firm.

If you need to adjust temperatures in the refrigerator or freezer, press the refrigerator or freezer PLUS (+) or MINUS (-) pad until the desired temperature is reached. Use the settings listed in the chart below as a guide. Wait at least 24 hours between adjustments.

CONDITION/REASON:

TEMPERATURE


ADJUSTMENT:


REFRIGERATOR too cold

REFRIGERATOR

Not set correctly for conditions

Control 1° higher


REFRIGERATOR too warm

REFRIGERATOR

High use or room very warm

Control 1° lower


FREEZER too cold

FREEZER Control

Not set correctly for conditions

1° higher


FREEZER too warm/too little ice

FREEZER Control

High use or heavy ice use

1° lower


5

Page 5
Image 5
KitchenAid 2318586 Refrigerator USE, Using the Controls, Complete the Installation, Digital Controls, Adjusting Controls

2318586 specifications

The KitchenAid 2318586 is an exceptional kitchen appliance that exemplifies quality, versatility, and performance. This model is part of KitchenAid’s renowned lineup of kitchen products, catering to both home cooks and professional chefs who seek reliability and innovation in their culinary endeavors.

One of the standout features of the KitchenAid 2318586 is its powerful motor, which delivers an impressive performance for various mixing tasks. The robust motor ensures that even the thickest doughs and mixtures are effortlessly blended, reducing preparation time and enhancing efficiency in the kitchen. This appliance is characterized by its multiple speed settings, allowing users to customize the mixing speed according to their specific needs. Whether folding ingredients, whipping cream, or kneading bread dough, the KitchenAid 2318586 provides precision control and optimal results.

Additionally, the KitchenAid 2318586 is equipped with a 4.5-quart mixing bowl made of durable stainless steel. This generous capacity is ideal for preparing large batches of ingredients, making it perfect for family gatherings, holidays, and baking sessions. The stainless steel construction not only adds a touch of elegance to the kitchen but also ensures longevity and resistance to wear and tear.

Another notable technology featured in the KitchenAid 2318586 is the Planetary Mixing Action. This innovative design rotates the mixing attachments around the bowl, ensuring that all ingredients are thoroughly combined without the need for manual intervention. This feature guarantees even mixing and minimizes the chances of unmixed ingredients remaining at the bottom of the bowl.

The appliance also comes with a variety of mixing attachments, including a flat beater, dough hook, and wire whip. Each attachment is designed to tackle specific tasks, from beating eggs to kneading tough dough, ensuring that the user has the right tool for any recipe. The ease of switching between attachments allows for a seamless cooking experience, elevating the overall efficiency in the kitchen.

Furthermore, the KitchenAid 2318586 boasts a sleek and iconic design that complements any kitchen decor. Available in a range of colors, it can match personal styles while adding an aesthetic appeal to the countertop. With its user-friendly interface and sturdy build, the KitchenAid 2318586 is a reliable appliance that enhances the culinary experience, making it a coveted addition to kitchens around the world.

Overall, the KitchenAid 2318586 stands out for its powerful performance, innovative design, and versatile capabilities, making it an indispensable tool for cooking enthusiasts.