Electrical Shock Hazard
l Electrical ground is required on this appliance.
l Do Not ground to a gas pipe.
l Do Not have a fuse in the neutral or grounding circuit. A fuse in the neutral or grounding circuit could result in electrical shock.
l Check with a qualified electrician if you are in doubt as to whether the appliance is properly grounded.
Failure to follow these instructions could result in serious injury or death.
If codes permit and a separate grounding wire is used, it is recommended that a qualified electrician determine that the grounding path is adequate.
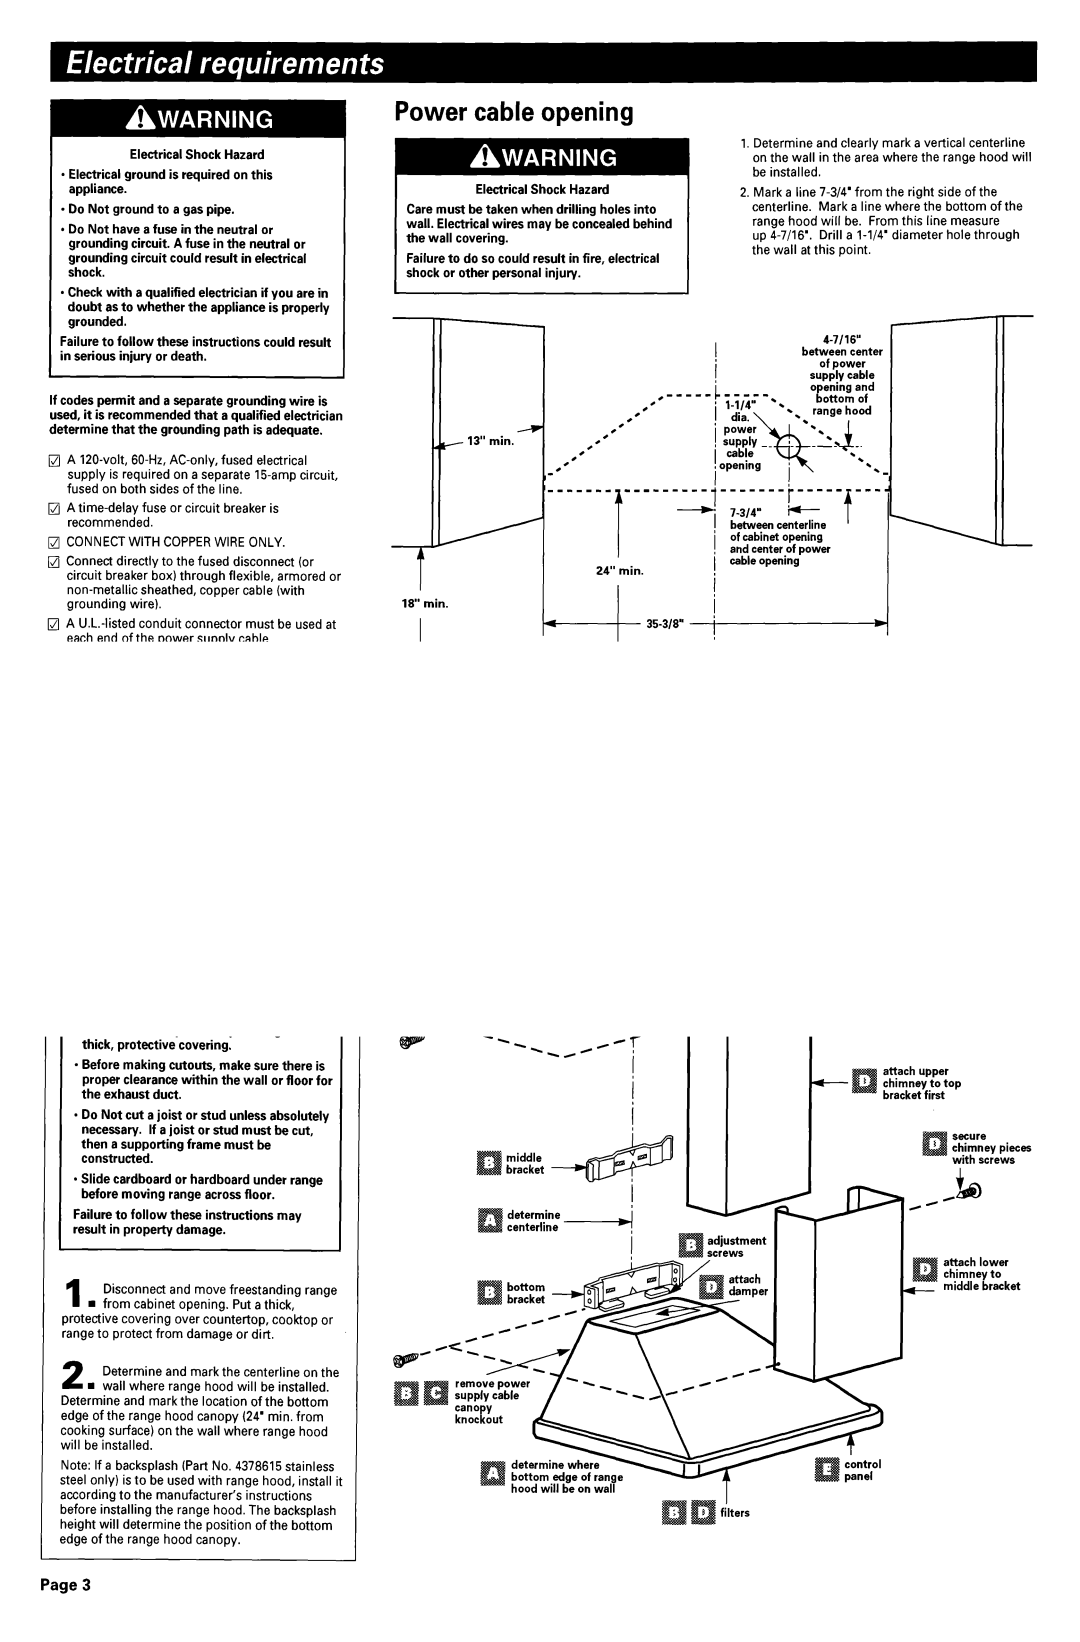
Power cable opening
Electrical Shock Hazard
Care must be taken when drilling holes into wall. Electrical wires may be concealed behind the wall covering.
Failure to do so could result in fire, electrical shock or other personal injury.
- 13” min. -
1.Determine and clearly mark a vertical centerline on the wall in the area where the range hood will be installed.
2.Mark a line
up
| ||
| between | center |
| of power | |
| supply cable | |
opening | and | |
|
| |
q A 120~volt,
q A
q CONNECT WITH COPPER WIRE ONLY.
q Connect directly to the fused disconnect (or circuit breaker box) through flexible, armored or
q A
q Allow some slack in the cable so appliance can be moved if servicing is ever necessary.
Wire sizes (COPPER ONLY) must conform with the rating of the appliance, as specified on the serial/rating plate, and to the requirements of the National Electrical Code, ANSVNFPA 70 - latest edition (* Page II, and all local codes and ordinances.
Wiring diagram is shown on the back cover of these instructions.
|
| mmwmmmm | ||
|
|
| ||
|
| + | f | |
|
| between centerline | ||
|
|
| ||
| of cabinet | opening |
| |
| and center | of power |
| |
| / |
|
| |
| 24” min. | cable opening |
| |
|
|
|
| |
18” min. |
| I |
|
|
|
|
|
| |
| j- |
|
| |
| iI |
|
| |
Preparation
Property Damage
l Cover countertop, cooktop or range with a thick, protective covering.
l Before making cutouts, make sure there is proper clearance within the wall or floor for the exhaust duct.
l Do Not cut a joist or stud unless absolutely necessary. If a joist or stud must be cut, then a supporting frame must be constructed.
l Slide cardboard or hardboard under range before moving range across floor.
Failure to follow these instructions may result in property damage.
1 Disconnect and move freestanding range n from cabinet opening. Put a thick,
protective covering over countertop, cooktop or range to protect from damage or dirt.
2 Determine and mark the centerline on the n wall where range hood will be installed.
Determine and mark the location of the bottom edge of the range hood canopy (24’ min. from cooking surface) on the wall where range hood will be installed.
Note: If a backsplash (Part No. 4378615 stainless steel only) is to be used with range hood, install it according to the manufacturer’s instructions before installing the range hood. The backsplash height will determine the position of the bottom edge of the range hood canopy.
install ductwork to canopy
attach upper chimney to top bracket first
secure
chimney pieces
middlewith screws bracket 4
adjustment |
|
|
|
|
screws | I | I | attach | lower |
|
|
| ||
|
|
| chimney to | |
bottom |
| + | middle | bracket |
bracket |
|
|
|
|
hood will be on wall
I
filters
Page 3