Complete Installation
1.Check that all parts are now installed. If there is an extra part, go back through the steps to see which step was skipped.
2.Dispose of/recycle all packaging materials.
3.Check that range is correctly positioned in countertop cutout and that the range is level. See “Level Range.”
4.Check that the specified distances to cabinet surfaces were maintained. See “Location Requirements.”
5.Check that burner caps are positioned properly on sealed burner bases.
6.Check that backguard or island trim is installed. (If horizontal clearance to combustible materials behind cooking surface is less than 1" [2.5 cm]).
7.Check that the range is connected only to the type of gas for which it is certified for use.
8.Use a mild solution of liquid household cleaner and warm water to remove waxy residue caused by shipping material. Dry thoroughly with a soft cloth. For more information, see the “Range Care” section of the Use and Care Guide.
9.Read “Range Use” in the Use and Care Guide.
10.Turn on surface burners and oven. See the Use and Care Guide for specific instruction on range operation.
If range does not operate, check the following:
■Household fuse has not blown, or circuit breaker has not tripped.
■Gas valves are turned to the “open” position.
■If the gas supply line shutoff valve is open, turn to “closed” and contact a qualified technician.
■Electrical supply is connected.
■See “Troubleshooting” in the Use and Care Guide.
WIRING DIAGRAMS
CAUTION: Label all wires prior to disconnection when servicing controls. Wiring errors can cause improper and dangerous operation.
The power cord on this appliance is equipped with a 3 prong grounding plug which mates with standard 3 prong
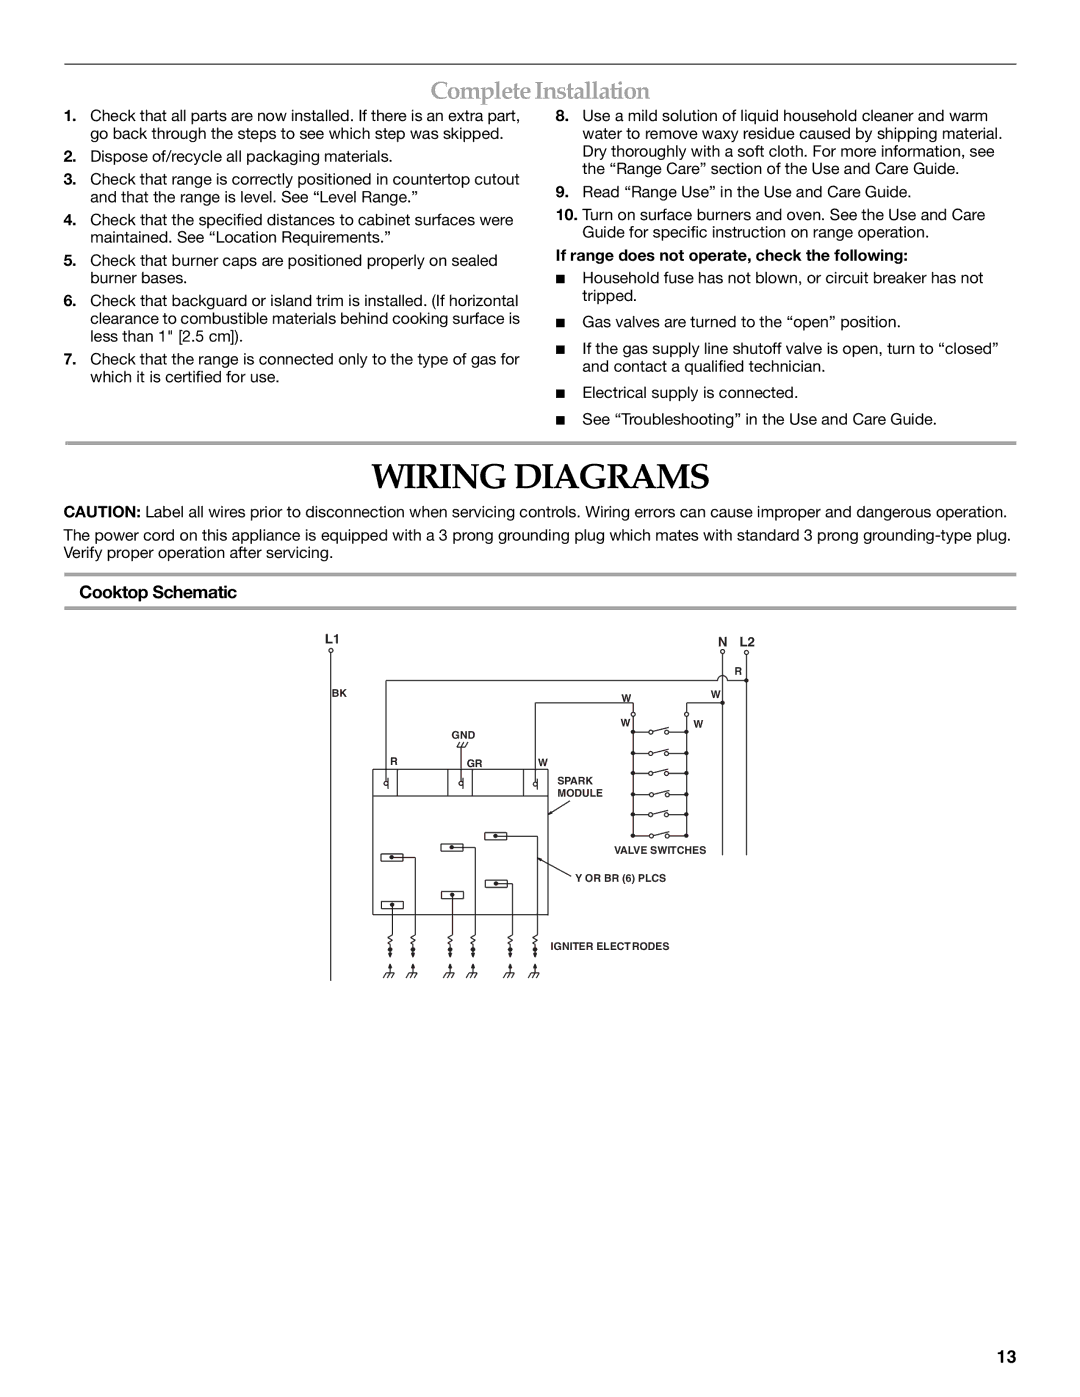
Cooktop Schematic
L1 |
|
| N L2 |
|
|
| R |
BK |
| W | W |
|
|
| |
| GND | W | W |
|
|
| |
R | GR | W |
|
|
| SPARK |
|
|
| MODULE |
|
VALVE SWITCHES
Y OR BR (6) PLCS
IGNITER ELECTRODES
13