arb
TO ASSEMBLE:
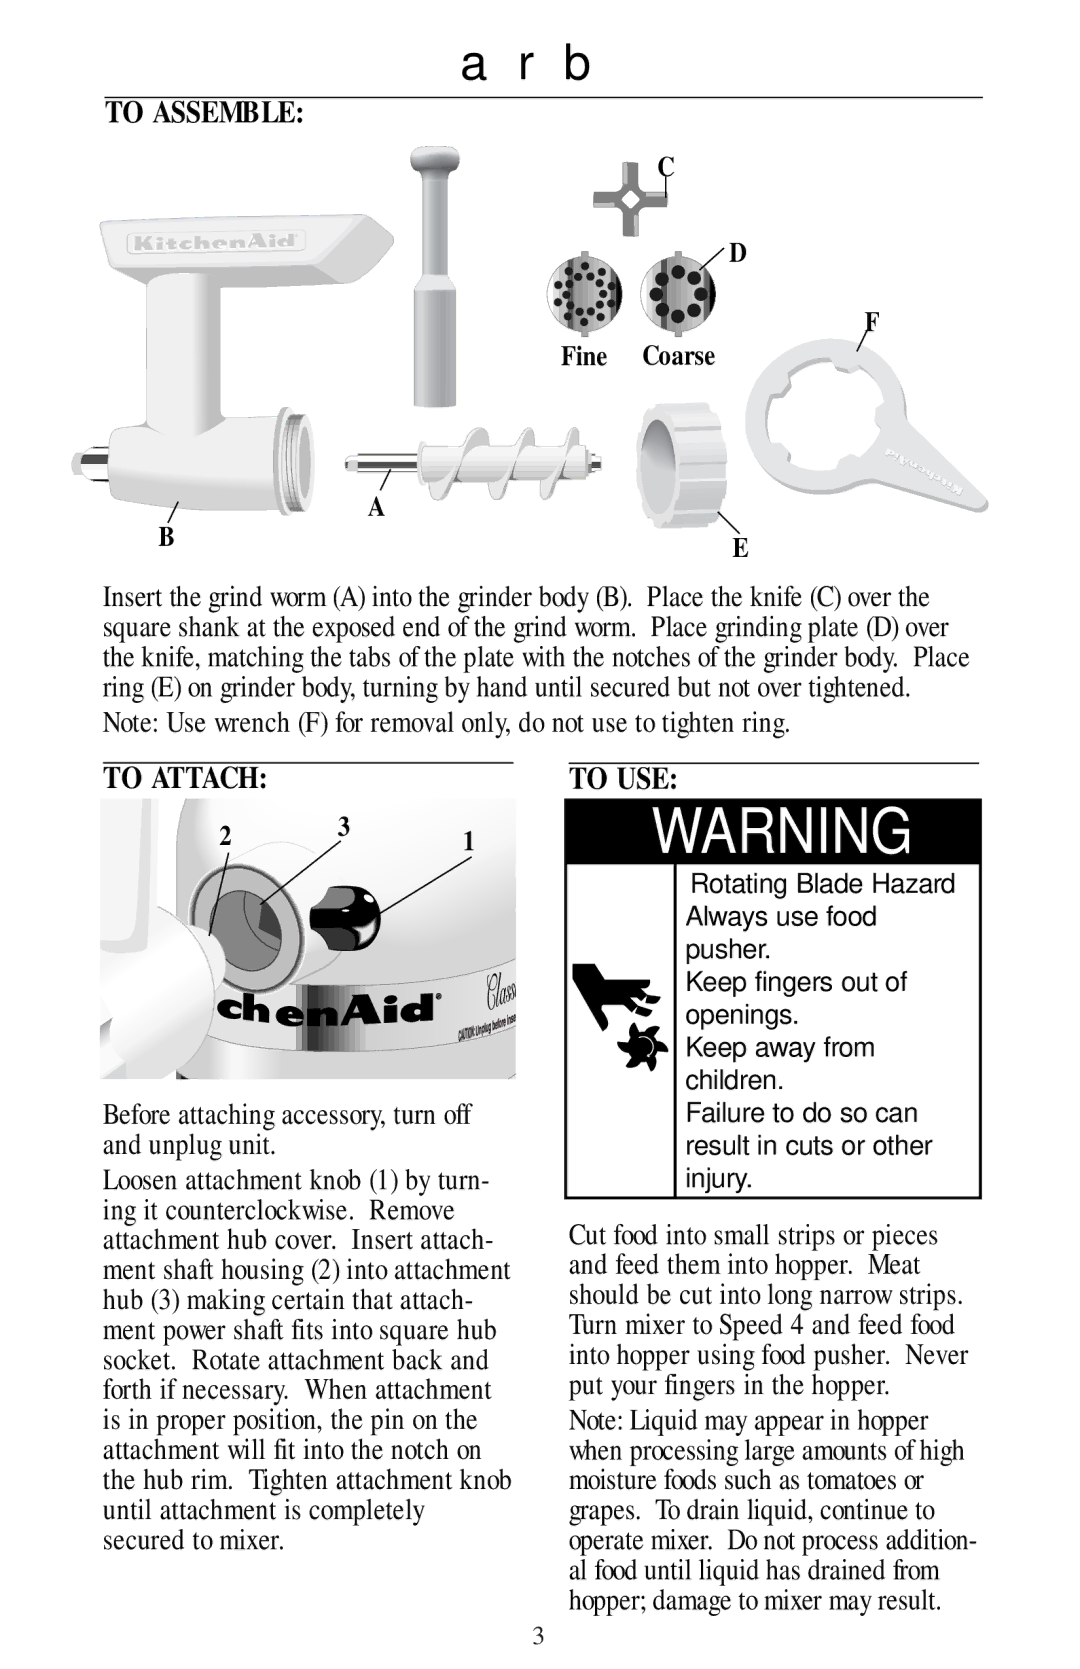
C
D
F
Fine Coarse
A
BE
Insert the grind worm (A) into the grinder body (B). Place the knife (C) over the square shank at the exposed end of the grind worm. Place grinding plate (D) over the knife, matching the tabs of the plate with the notches of the grinder body. Place ring (E) on grinder body, turning by hand until secured but not over tightened.
Note: Use wrench (F) for removal only, do not use to tighten ring.
TO ATTACH:
2 3 1
Before attaching accessory, turn off and unplug unit.
Loosen attachment knob (1) by turn- ing it counterclockwise. Remove attachment hub cover. Insert attach- ment shaft housing (2) into attachment hub (3) making certain that attach- ment power shaft fits into square hub socket. Rotate attachment back and forth if necessary. When attachment is in proper position, the pin on the attachment will fit into the notch on the hub rim. Tighten attachment knob until attachment is completely secured to mixer.
TO USE:
! | WARNING | |||
| ý |
| Rotating Blade Hazard |
|
|
|
| ||
|
|
|
| |
|
|
| Always use food |
|
|
|
| pusher. |
|
|
|
| Keep fingers out of |
|
|
|
| openings. |
|
|
|
| Keep away from |
|
|
|
| children. |
|
|
|
| Failure to do so can |
|
|
|
| result in cuts or other |
|
|
|
| injury. |
|
|
|
|
|
|
Cut food into small strips or pieces and feed them into hopper. Meat should be cut into long narrow strips. Turn mixer to Speed 4 and feed food into hopper using food pusher. Never put your fingers in the hopper.
Note: Liquid may appear in hopper when processing large amounts of high moisture foods such as tomatoes or grapes. To drain liquid, continue to operate mixer. Do not process addition- al food until liquid has drained from hopper; damage to mixer may result.
3