For service convenience, a
- CAUTION -
To prevent heat damage to the fill valve, ALL solder connections must be made BEFORE the water line is connected to the dishwasher.
DRAIN LINE
The drain line should be 9/16” ID (minimum) flexible hose or 5/l’ OD copper tubing. Flexible hose must be resistant to heat and detergent and may be obtained from a plumbing, hardware, or automotive supply outlet. DO NOT use any fittings anywhere in the drain line that are less than l/z” ID. The access hole for the drain line should be 1”.
If drain line is copper, clamp a 12” length of s6” ID flexible hose (heat and detergent resistant) to the end of the copper tubing. This will facilitate connection of the drain line to dishwasher check valve.
If the drain line is going to be connected to a food waste disposer, BE SURE to remove the knockout or plug from the fitting on the disposer before connecting drain line. Rubber adapter fitting may be required. (KitchenAid part number 115729 or available from local hardware or plumbing stores.)
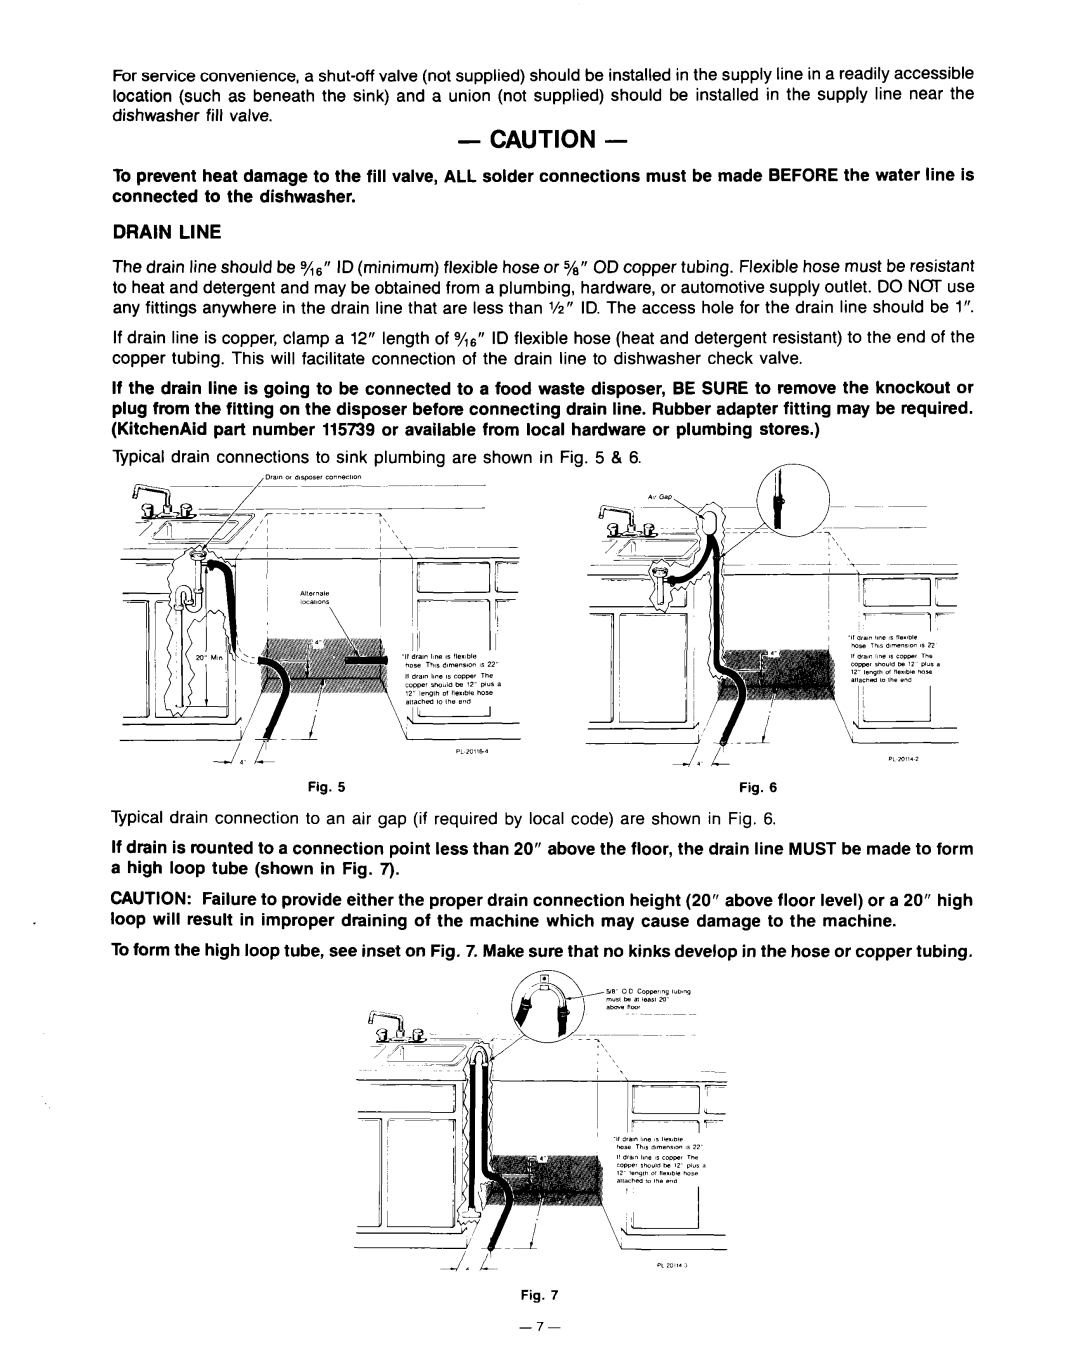
Typical drain connections to sink plumbing are shown in Fig. 5 & 6.
Illal”01d,sprerconnecllon
Fig. 5 | Fig. 6 |
Typical drain connection to an air gap (if required by local code) are shown in Fig. 6.
If drain is rounted to a connection point less than 20” above the floor, the drain line MUST be made to form a high loop tube (shown in Fig. 7).
CAUTION: Failure to provide either the proper drain connection height (20” above floor level) or a 20” high loop will result in improper draining of the machine which may cause damage to the machine.
To form the high loop tube, see inset on Fig. 7. Make sure that no kinks develop in the hose or copper tubing.
Fig. 7