
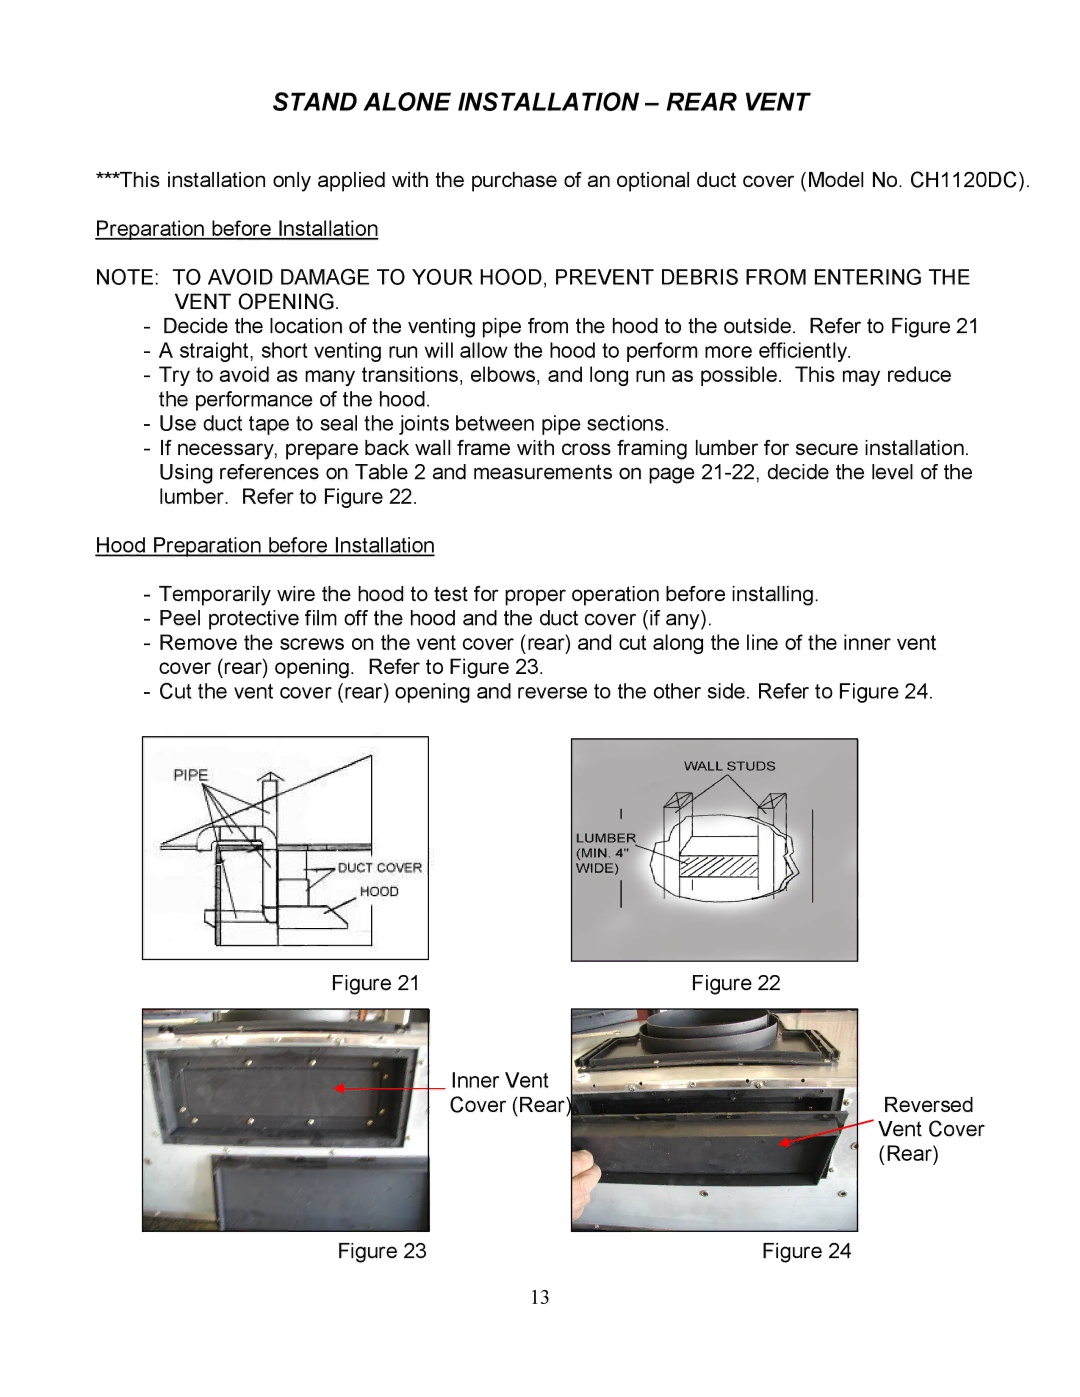
CH7942SQ, CH7948SQ, CH7930SQ, CH7936SQ specifications
Kobe Range Hoods is renowned for producing high-quality kitchen ventilation solutions, and their series of range hoods, including the CH7936SQ, CH7930SQ, CH7948SQ, and CH7942SQ models, are prime examples of innovative design and outstanding performance. Each model in this lineup brings its unique features, technologies, and characteristics, catering to different needs in the kitchen.The CH7936SQ model boasts a sleek, contemporary design, suited for modern kitchens. This 36-inch range hood is fitted with powerful, energy-efficient cooking power and operates at multiple speeds, allowing users to adjust the ventilation based on cooking requirements. The QuietMode technology ensures that even at high speeds, the noise level remains minimal, creating a peaceful cooking environment.
The CH7930SQ is another excellent option, characterized by its 30-inch size that fits well in smaller kitchens. Similar to the CH7936SQ, it offers multiple speed settings and employs the same QuietMode technology, ensuring efficient ventilation without disruptive noise. This model also includes an easy-to-clean stainless steel surface and dishwasher-safe baffle filters, making maintenance a breeze.
Moving on to the CH7948SQ, this 48-inch model is designed for larger cooking spaces, providing exceptional ventilation coverage. It incorporates powerful suction capabilities, ensuring that smoke, steam, and odors are efficiently removed from the kitchen. The advanced LED lighting illuminates the cooking area, enhancing visibility and safety while preparing meals. Its modern aesthetic complements a variety of kitchen decors while providing high performance.
Lastly, the CH7942SQ model combines functionality with style, featuring a 42-inch design that fits perfectly in mid-sized kitchens. Like its counterparts, this model utilizes QuietMode technology and offers superior airflow. It also benefits from a user-friendly control panel, making it easy to operate and adjust settings while cooking. The durable stainless steel construction ensures longevity, while the professional-grade baffle filters capture grease and particulate matter with efficiency.
Each of these Kobe range hood models is engineered for performance, efficiency, and aesthetics. With features like energy-efficient motors, easy-to-maintain surfaces, and whisper-quiet operation, they enhance the cooking experience while maintaining a clean and comfortable kitchen environment. Whether equipped with advanced technologies or classic designs, the CH7936SQ, CH7930SQ, CH7948SQ, and CH7942SQ stand out as reliable choices for discerning home chefs.