KODAK
THE LENS OPENING
Set the shutter at its lowest speed. Use the B setting if your camera has one. Set the lens opening at its largest opening. Open the camera back and hold the camera up as you did before. Press the shutter release and notice how big the opening is when light comes through the lens.
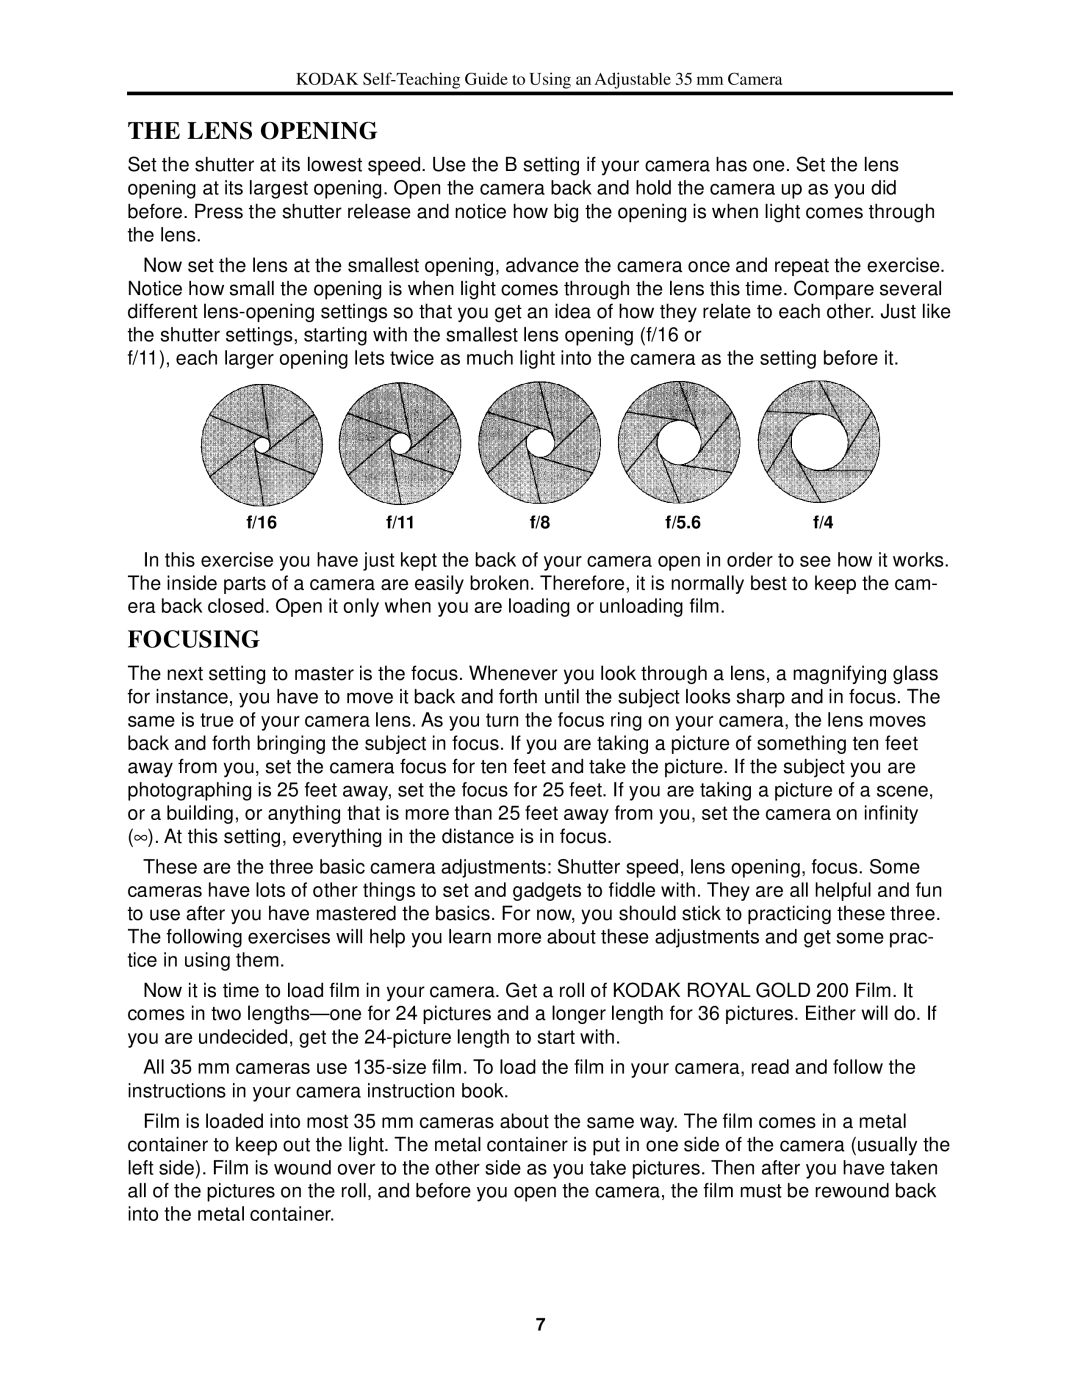
Now set the lens at the smallest opening, advance the camera once and repeat the exercise. Notice how small the opening is when light comes through the lens this time. Compare several different
f/11), each larger opening lets twice as much light into the camera as the setting before it.
f/16 | f/11 | f/8 | f/5.6 | f/4 |
In this exercise you have just kept the back of your camera open in order to see how it works. The inside parts of a camera are easily broken. Therefore, it is normally best to keep the cam- era back closed. Open it only when you are loading or unloading film.
FOCUSING
The next setting to master is the focus. Whenever you look through a lens, a magnifying glass for instance, you have to move it back and forth until the subject looks sharp and in focus. The same is true of your camera lens. As you turn the focus ring on your camera, the lens moves back and forth bringing the subject in focus. If you are taking a picture of something ten feet away from you, set the camera focus for ten feet and take the picture. If the subject you are photographing is 25 feet away, set the focus for 25 feet. If you are taking a picture of a scene, or a building, or anything that is more than 25 feet away from you, set the camera on infinity (∞). At this setting, everything in the distance is in focus.
These are the three basic camera adjustments: Shutter speed, lens opening, focus. Some cameras have lots of other things to set and gadgets to fiddle with. They are all helpful and fun to use after you have mastered the basics. For now, you should stick to practicing these three. The following exercises will help you learn more about these adjustments and get some prac- tice in using them.
Now it is time to load film in your camera. Get a roll of KODAK ROYAL GOLD 200 Film. It comes in two
All 35 mm cameras use
Film is loaded into most 35 mm cameras about the same way. The film comes in a metal container to keep out the light. The metal container is put in one side of the camera (usually the left side). Film is wound over to the other side as you take pictures. Then after you have taken all of the pictures on the roll, and before you open the camera, the film must be rewound back into the metal container.
7