KODAK
EXERCISE #2
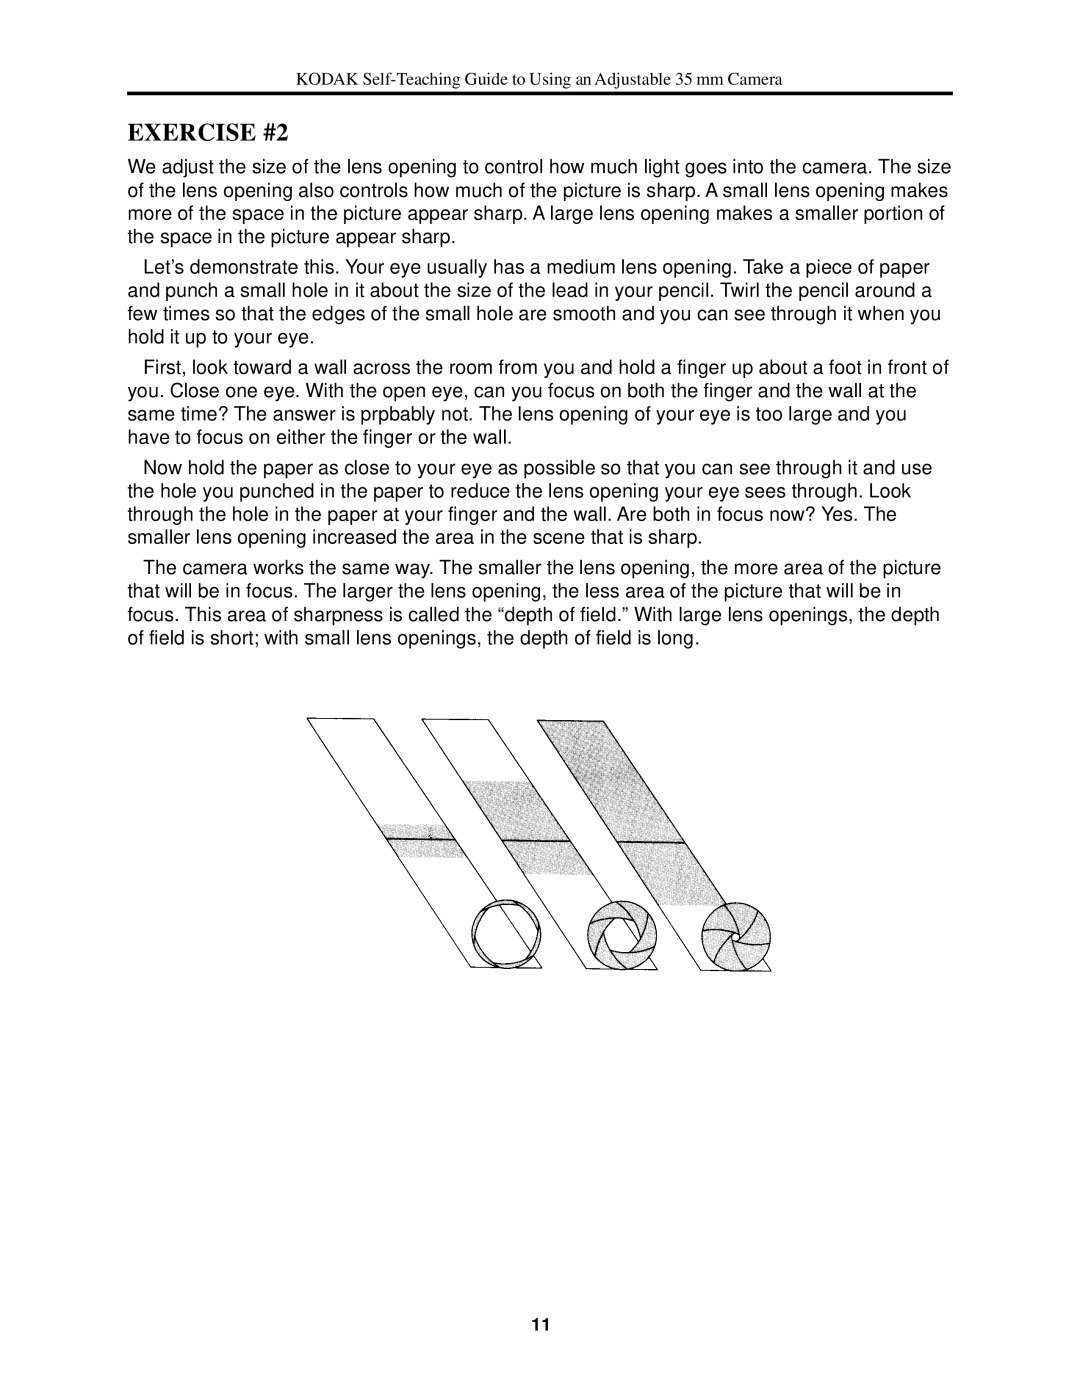
We adjust the size of the lens opening to control how much light goes into the camera. The size of the lens opening also controls how much of the picture is sharp. A small lens opening makes more of the space in the picture appear sharp. A large lens opening makes a smaller portion of the space in the picture appear sharp.
Let’s demonstrate this. Your eye usually has a medium lens opening. Take a piece of paper and punch a small hole in it about the size of the lead in your pencil. Twirl the pencil around a few times so that the edges of the small hole are smooth and you can see through it when you hold it up to your eye.
First, look toward a wall across the room from you and hold a finger up about a foot in front of you. Close one eye. With the open eye, can you focus on both the finger and the wall at the same time? The answer is prpbably not. The lens opening of your eye is too large and you have to focus on either the finger or the wall.
Now hold the paper as close to your eye as possible so that you can see through it and use the hole you punched in the paper to reduce the lens opening your eye sees through. Look through the hole in the paper at your finger and the wall. Are both in focus now? Yes. The smaller lens opening increased the area in the scene that is sharp.
The camera works the same way. The smaller the lens opening, the more area of the picture that will be in focus. The larger the lens opening, the less area of the picture that will be in focus. This area of sharpness is called the “depth of field.” With large lens openings, the depth of field is short; with small lens openings, the depth of field is long.
11
