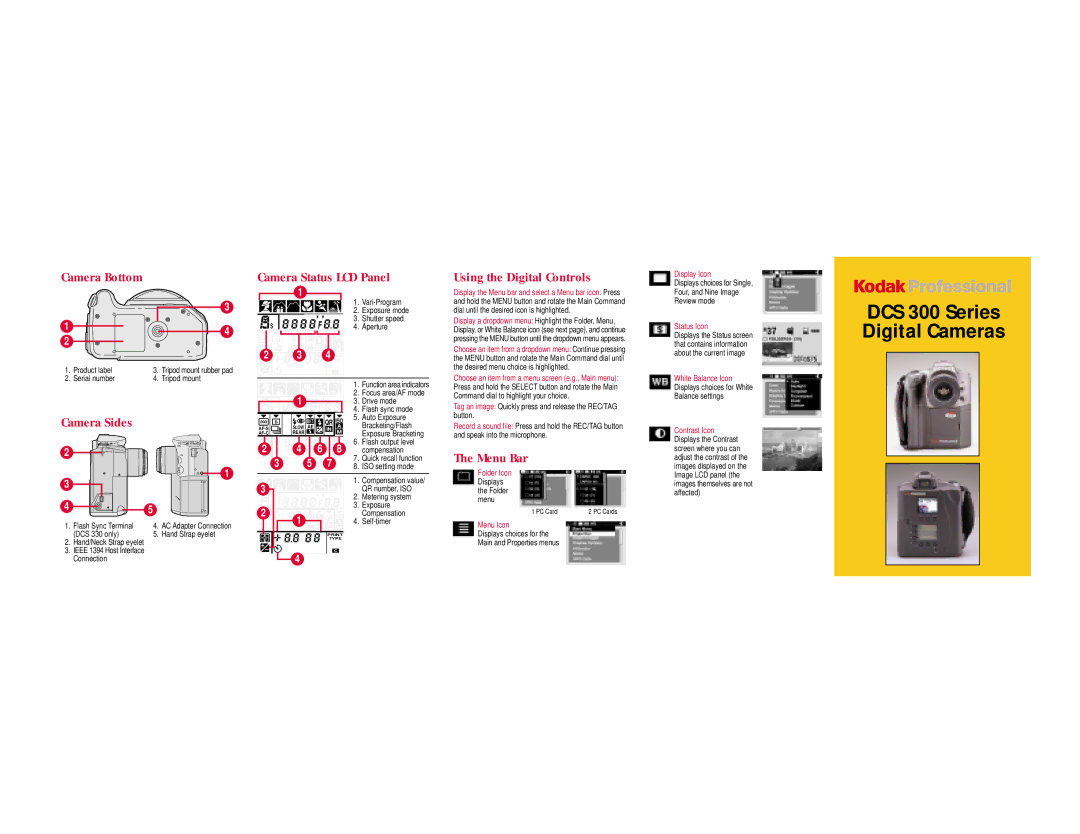
Camera Bottom
|
|
| 3 |
1 |
|
| 4 |
2 |
|
| |
|
|
| |
1. | Product label | 3. | Tripod mount rubber pad |
2. | Serial number | 4. | Tripod mount |
Camera Sides
2
3 |
| 1 |
|
| |
4 | 5 |
|
|
| |
1. Flash Sync Terminal | 4. | AC Adapter Connection |
(DCS 330 only) | 5. | Hand Strap eyelet |
2.Hand/Neck Strap eyelet
3.IEEE 1394 Host Interface Connection
Camera Status LCD Panel
| 1 |
|
|
| 1. | |
|
|
|
|
| ||
|
|
|
|
| 2. | Exposure mode |
S |
|
| F |
| 3. | Shutter speed |
|
|
| 4. | Aperture | ||
S |
| BKT | QR ISO |
|
| |
SLOW AE | IN | A |
|
| ||
REAR |
|
| M |
|
| |
2 | 3 |
| 4TYPE |
|
| |
|
|
|
|
| ||
|
|
|
| C |
|
|
|
|
|
|
| 1. | Function area indicators |
| 1 |
|
|
| 2. | Focus area/AF mode |
|
| F |
| 3. | Drive mode | |
S |
|
|
| 4. | Flash sync mode | |
S |
| BKT | QR ISO | 5. | Auto Exposure | |
|
| Bracketing/Flash | ||||
SLOW AE | IN | A |
| |||
REAR |
|
| M |
| Exposure Bracketing | |
|
|
| 6. | Flash output level | ||
2 | 4 |
| TYPE | |||
| 6 | 8 |
| compensation | ||
3 |
| 5 | 7 | C | 7. | Quick recall function |
|
| |||||
|
| 8. | ISO setting mode | |||
3 |
|
|
|
| 1. | Compensation value/ |
|
|
|
| 2. | QR number, ISO | |
S |
|
| F |
| Metering system | |
|
|
| 3. | Exposure | ||
2 |
| BKT | QR ISO |
| Compensation | |
S |
| 4. | ||||
| SLOW AE |
| A | |||
1 |
| IN |
|
| ||
| M |
|
| |||
REAR |
|
|
|
| ||
|
|
|
|
| ||
|
|
| TYPE |
|
| |
| 4 |
|
| C |
|
|
|
|
|
|
|
| |
Using the Digital Controls
Display the Menu bar and select a Menu bar icon: Press and hold the MENU button and rotate the Main Command dial until the desired icon is highlighted.
Display a dropdown menu: Highlight the Folder, Menu, Display, or White Balance icon (see next page), and continue pressing the MENU button until the dropdown menu appears.
Choose an item from a dropdown menu: Continue pressing the MENU button and rotate the Main Command dial until the desired menu choice is highlighted.
Choose an item from a menu screen (e.g., Main menu): Press and hold the SELECT button and rotate the Main Command dial to highlight your choice.
Tag an image: Quickly press and release the REC/TAG button.
Record a sound file: Press and hold the REC/TAG button and speak into the microphone.
The Menu Bar
Folder Icon Displays the Folder menu
1 PC Card | 2 PC Cards |
Menu Icon
Displays choices for the
Main and Properties menus
Display Icon
Displays choices for Single, Four, and Nine Image Review mode
Status Icon
Displays the Status screen that contains information about the current image
White Balance Icon Displays choices for White Balance settings
Contrast Icon Displays the Contrast screen where you can adjust the contrast of the images displayed on the Image LCD panel (the images themselves are not affected)
