4 Installing the ESD Ceiling Speaker
This section explains how to install the ESD Ceiling Speaker, that is:
•Choosing the best place to locate your speaker (see Section 4.1)
•Connecting the wires (see Section 4.2)
•Determining the number of speakers (see Section 4.3)
•Preparing the speaker for operation (see Section 4.4)
•Installing the tile size speaker (see Section 4.5)
•Installing the
4.1Choosing the Best Location
Ideally, locate the speakers above the main listening area. Before doing so, be sure that:
•The desired location is free of obstructions, such as electrical piping, AC ducts or water lines, and so on
•There is enough space behind the mounting surface for the speaker
•The rear side of the speaker is not blocked by wall studs or other objects
4.2The Input Pinout
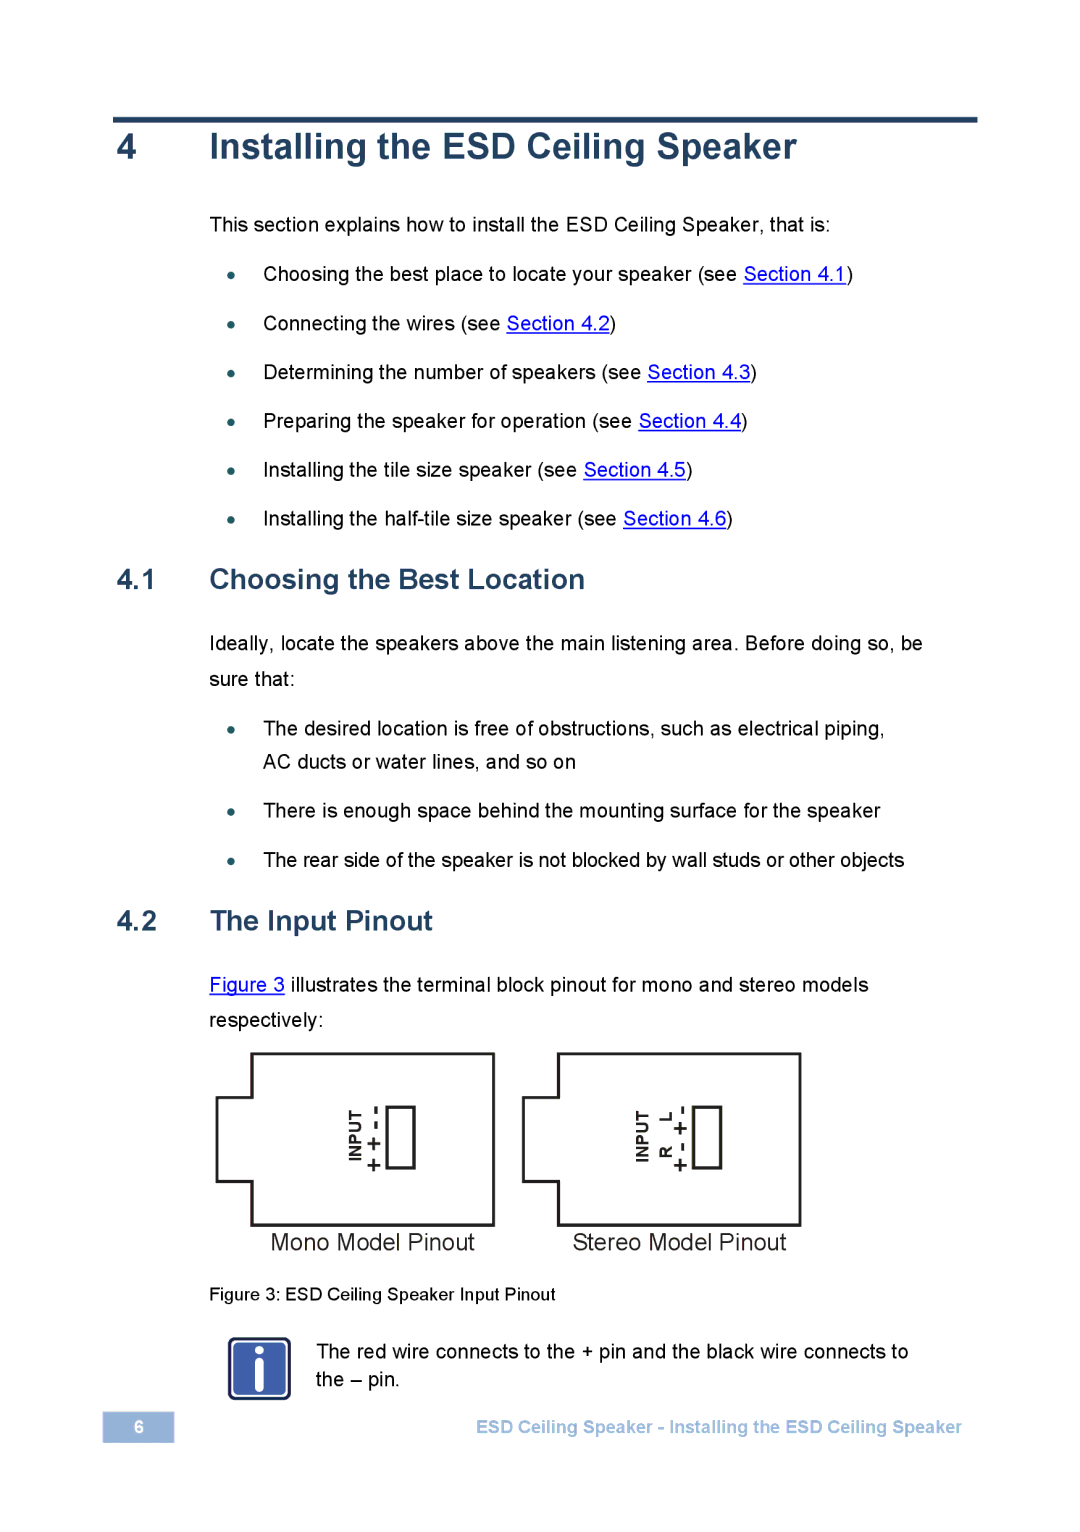
Figure 3 illustrates the terminal block pinout for mono and stereo models respectively:
|
| INPUT |
|
|
|
|
| INPUT R L |
|
|
|
|
|
|
|
|
|
|
|
|
|
| |||
|
|
|
|
|
| |||||||
|
| Mono Model Pinout | Stereo Model Pinout | |||||||||
| Figure 3: ESD Ceiling Speaker Input Pinout | |||||||||||
| i | The red wire connects to the + pin and the black wire connects to | ||||||||||
| the – pin. |
|
|
|
|
| ||||||
|
|
|
|
|
|
|
|
|
|
|
|
|
6 |
|
|
|
|
|
|
| ESD Ceiling Speaker - Installing the ESD Ceiling Speaker | ||||
|
|
|
|
|
|
|
|
|
|
|
|
|