
Quad 200 HD specifications
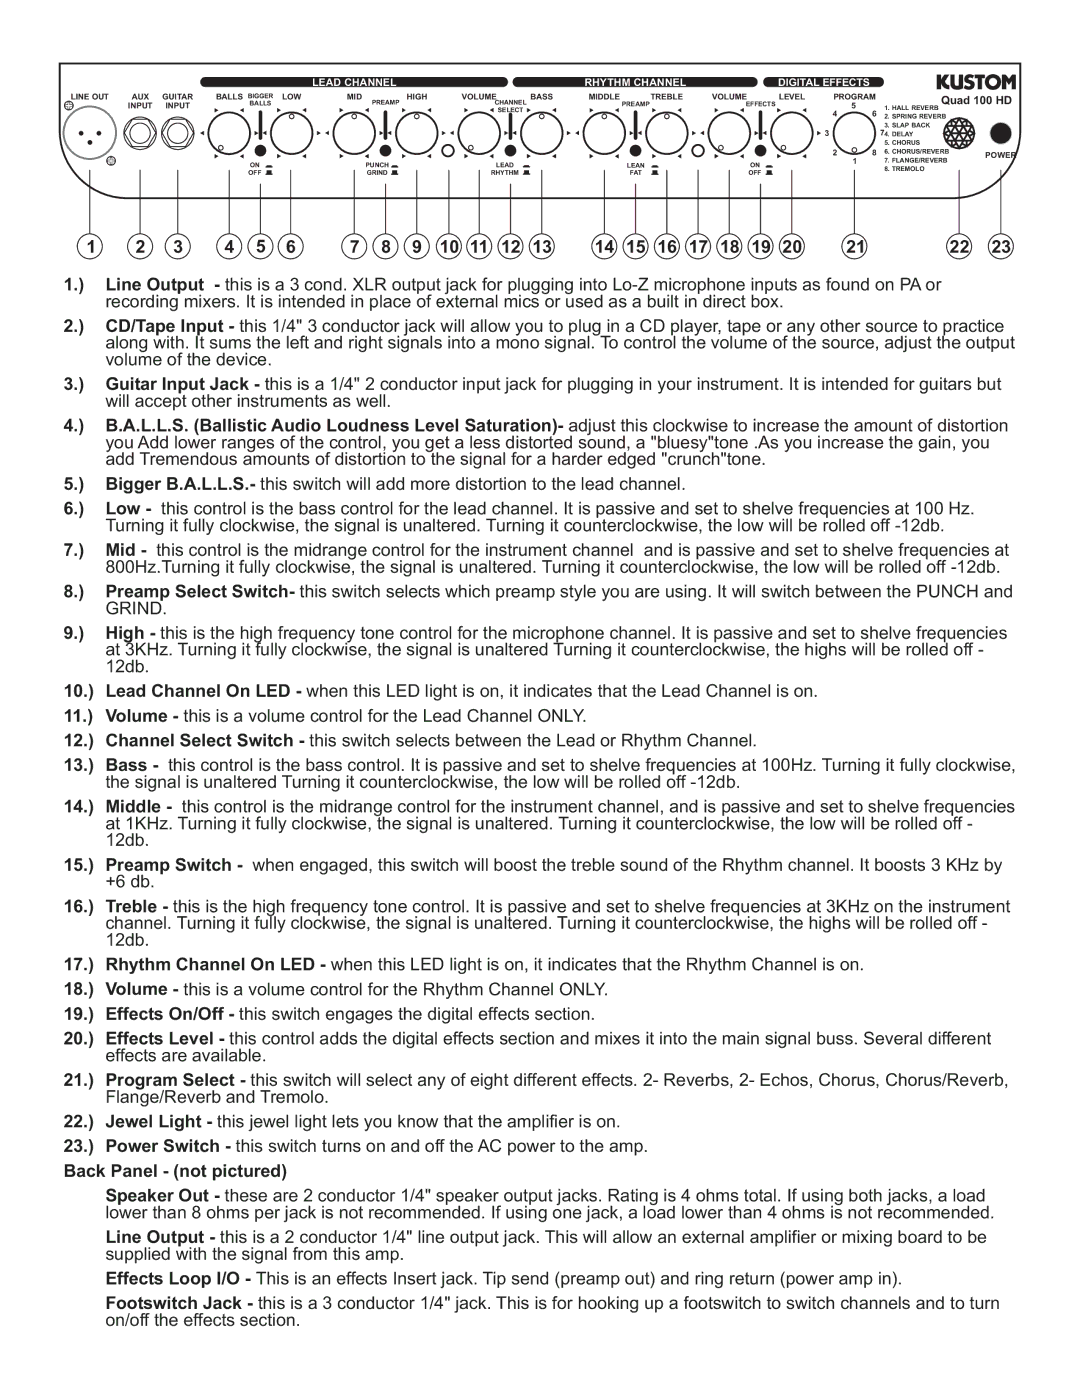
Introducing the Kustom Quad 200 HD, a powerful and versatile amplifier that is changing the way musicians approach live performances. With its unique design and cutting-edge technology, this amplifier delivers exceptional sound quality and flexibility, making it an essential tool for both seasoned professionals and budding artists alike.The Kustom Quad 200 HD features four independent channels, allowing musicians to create a variety of tones with ease. Each channel is equipped with its own EQ section, giving users complete control over their sound. The amplifier also includes a built-in effects loop, making it simple to integrate external effects pedals and processors. This feature enhances the overall versatility of the Quad 200 HD, enabling players to experiment with different sounds and achieve their desired tone.
Equipped with a powerful 200-watt RMS output, the Kustom Quad 200 HD can easily handle large venues, ensuring that your performance is heard clearly no matter the setting. The lightweight design of the amplifier also makes it highly portable, allowing musicians to transport it with ease. This is particularly advantageous for touring artists who require reliable gear that won’t bulk up their setup.
One of the standout technologies in the Quad 200 HD is Kustom's innovative DSP (Digital Signal Processing) system. This technology provides musicians with a range of preset amplifier models and effects that can be easily accessed and adjusted via the user-friendly interface. The DSP system also allows for on-the-fly modifications, ensuring that artists can adapt their sound as the performance evolves.
Durability and reliability are key characteristics of the Kustom Quad 200 HD. The robust construction of the amplifier ensures it can withstand the rigors of both studio and stage use, providing peace of mind for musicians who rely on their gear. Additionally, the included 4-ohm speaker output means that users have the option to connect additional cabinets, expanding their sound possibilities even further.
In summary, the Kustom Quad 200 HD is a feature-rich amplifier that combines power, flexibility, and durability. With its four independent channels, built-in effects loop, cutting-edge DSP technology, and rugged construction, the Quad 200 HD is designed to meet the needs of musicians at all levels, making it an invaluable addition to any performance rig.