Land Pride | Table of Contents |
Section 1: Assembly and Set-up
Tractor Requirements
Tractor horse power rating should be between 35 & 80 PTO horsepower. Tractors outside this horsepower range must not be used.
The rear power
A
NOTE: Ballast may need to be added to your tractor to maintain steering control. Refer to your tractor’s operator manual to determine if additional ballast is needed.
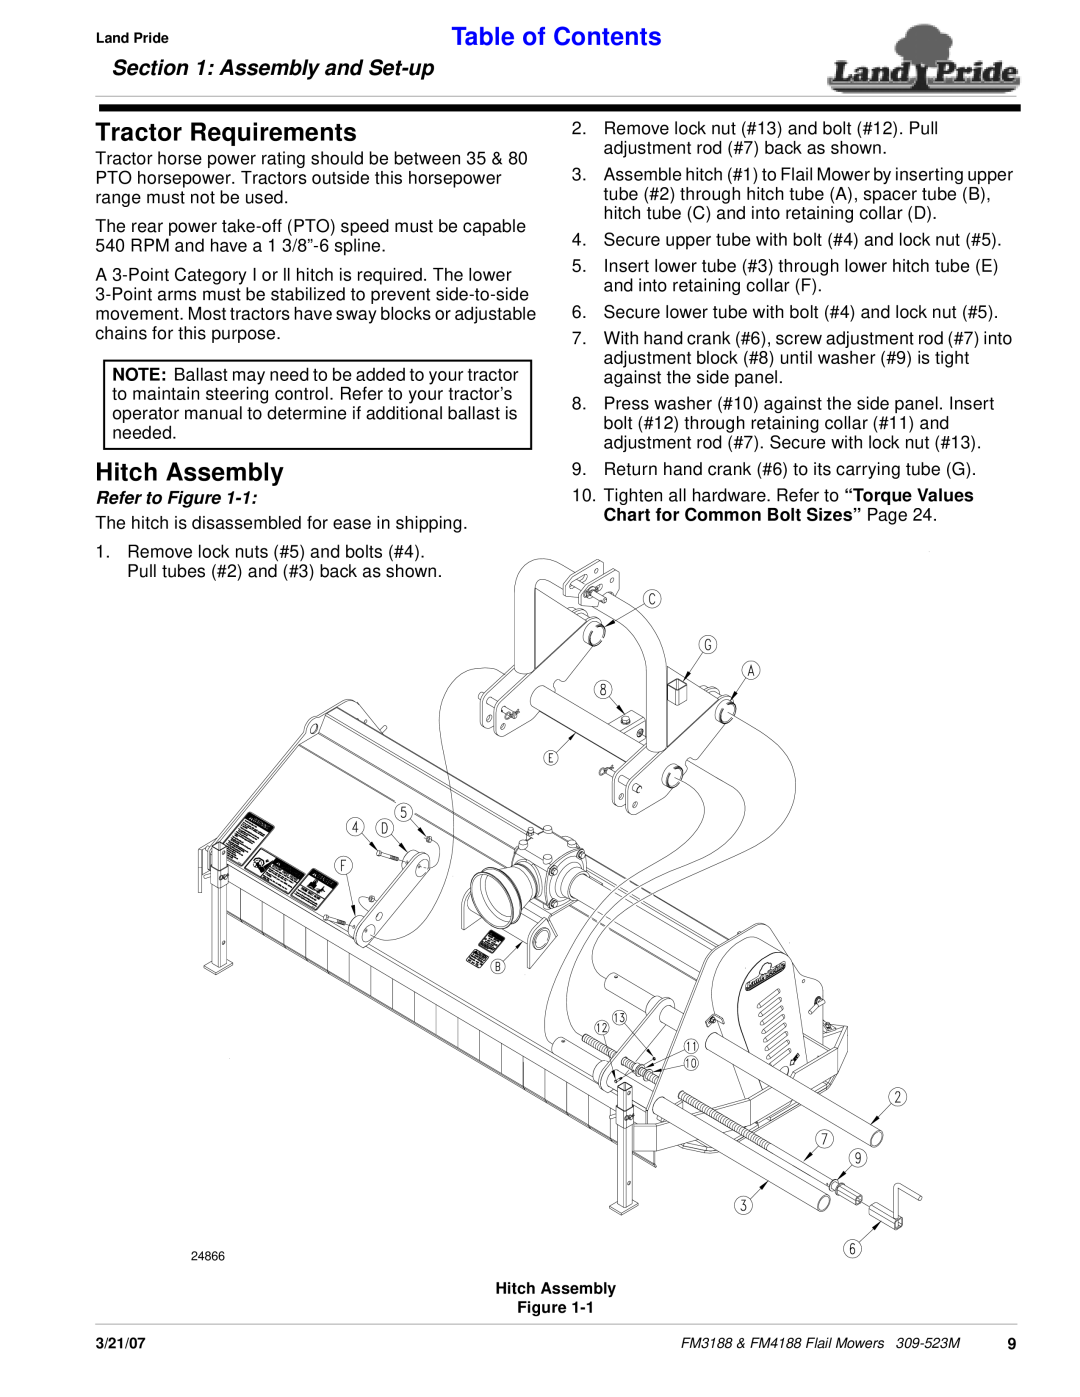
Hitch Assembly
Refer to Figure 1-1:
The hitch is disassembled for ease in shipping.
1.Remove lock nuts (#5) and bolts (#4). Pull tubes (#2) and (#3) back as shown.
2.Remove lock nut (#13) and bolt (#12). Pull adjustment rod (#7) back as shown.
3.Assemble hitch (#1) to Flail Mower by inserting upper tube (#2) through hitch tube (A), spacer tube (B), hitch tube (C) and into retaining collar (D).
4.Secure upper tube with bolt (#4) and lock nut (#5).
5.Insert lower tube (#3) through lower hitch tube (E) and into retaining collar (F).
6.Secure lower tube with bolt (#4) and lock nut (#5).
7.With hand crank (#6), screw adjustment rod (#7) into adjustment block (#8) until washer (#9) is tight against the side panel.
8.Press washer (#10) against the side panel. Insert bolt (#12) through retaining collar (#11) and adjustment rod (#7). Secure with lock nut (#13).
9.Return hand crank (#6) to its carrying tube (G).
10.Tighten all hardware. Refer to “Torque Values Chart for Common Bolt Sizes” Page 24.
24866
Hitch Assembly
Figure
3/21/07 | FM3188 & FM4188 Flail Mowers | 9 |