6955 GUD V2 3/19/07 9:47 AM Page 4
CLOCK SET
|
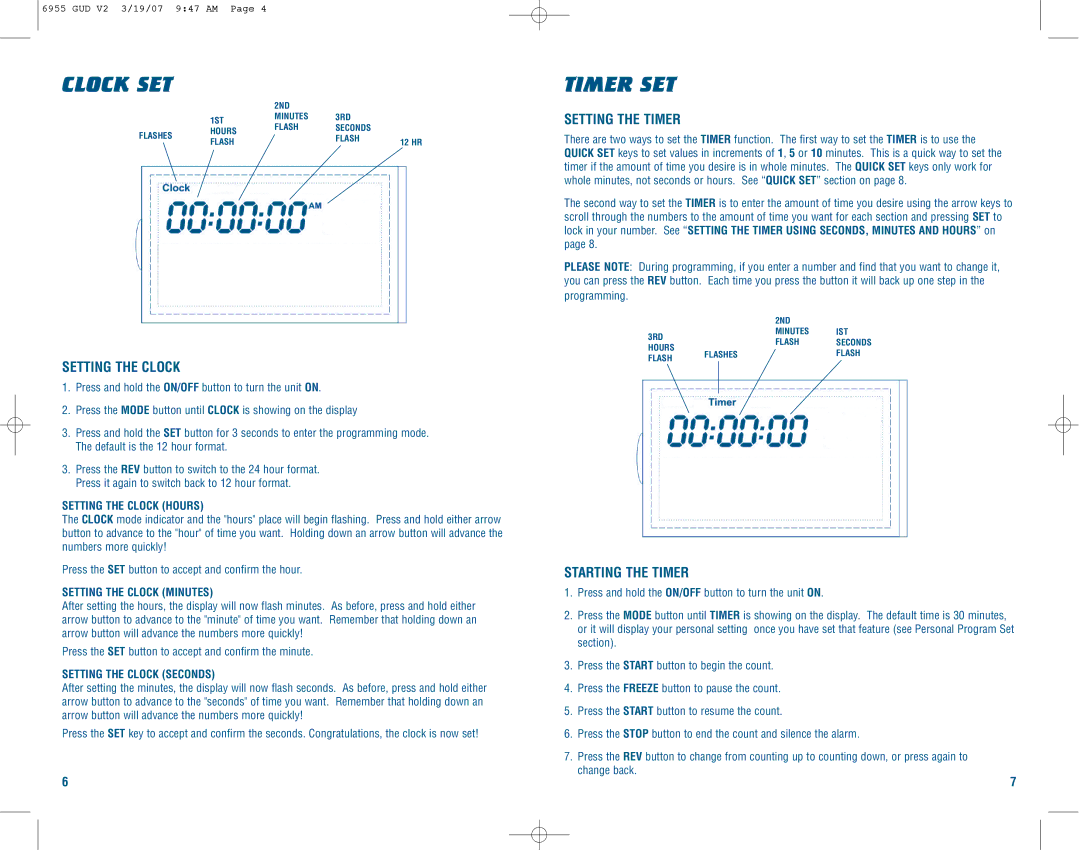
| 2ND |
|
|
| 1ST | MINUTES | 3RD |
|
| FLASH | SECONDS |
| |
FLASHES | HOURS |
| ||
| FLASH |
| ||
FLASH |
| 12 HR | ||
|
| |||
|
|
|
SETTING THE CLOCK
1.Press and hold the ON/OFF button to turn the unit ON.
2.Press the MODE button until CLOCK is showing on the display
3.Press and hold the SET button for 3 seconds to enter the programming mode. The default is the 12 hour format.
3.Press the REV button to switch to the 24 hour format. Press it again to switch back to 12 hour format.
SETTING THE CLOCK (HOURS)
The CLOCK mode indicator and the "hours" place will begin flashing. Press and hold either arrow button to advance to the "hour" of time you want. Holding down an arrow button will advance the numbers more quickly!
Press the SET button to accept and confirm the hour.
SETTING THE CLOCK (MINUTES)
After setting the hours, the display will now flash minutes. As before, press and hold either arrow button to advance to the "minute" of time you want. Remember that holding down an arrow button will advance the numbers more quickly!
Press the SET button to accept and confirm the minute.
SETTING THE CLOCK (SECONDS)
After setting the minutes, the display will now flash seconds. As before, press and hold either arrow button to advance to the "seconds" of time you want. Remember that holding down an arrow button will advance the numbers more quickly!
Press the SET key to accept and confirm the seconds. Congratulations, the clock is now set!
TIMER SET
SETTING THE TIMER
There are two ways to set the TIMER function. The first way to set the TIMER is to use the QUICK SET keys to set values in increments of 1, 5 or 10 minutes. This is a quick way to set the timer if the amount of time you desire is in whole minutes. The QUICK SET keys only work for whole minutes, not seconds or hours. See “QUICK SET” section on page 8.
The second way to set the TIMER is to enter the amount of time you desire using the arrow keys to scroll through the numbers to the amount of time you want for each section and pressing SET to lock in your number. See “SETTING THE TIMER USING SECONDS, MINUTES AND HOURS” on page 8.
PLEASE NOTE: During programming, if you enter a number and find that you want to change it, you can press the REV button. Each time you press the button it will back up one step in the programming.
| 2ND |
| ||
3RD | MINUTES | IST | ||
FLASH | SECONDS | |||
HOURS | ||||
FLASHES | FLASH | |||
FLASH | ||||
|
|
| ||
|
|
|
| |
|
|
|
| |
STARTING THE TIMER
1.Press and hold the ON/OFF button to turn the unit ON.
2.Press the MODE button until TIMER is showing on the display. The default time is 30 minutes, or it will display your personal setting once you have set that feature (see Personal Program Set section).
3.Press the START button to begin the count.
4.Press the FREEZE button to pause the count.
5.Press the START button to resume the count.
6.Press the STOP button to end the count and silence the alarm.
7.Press the REV button to change from counting up to counting down, or press again to change back.
6 | 7 |