System Setup

We urge you, at least the first time you set up your system, to take the time and thoroughly follow each of the following steps precisely. Even though this may take some time, it will guarantee that your system will function properly and offer the most rewarding results. If you “do it right” the first time, future changes will be easier to implement.

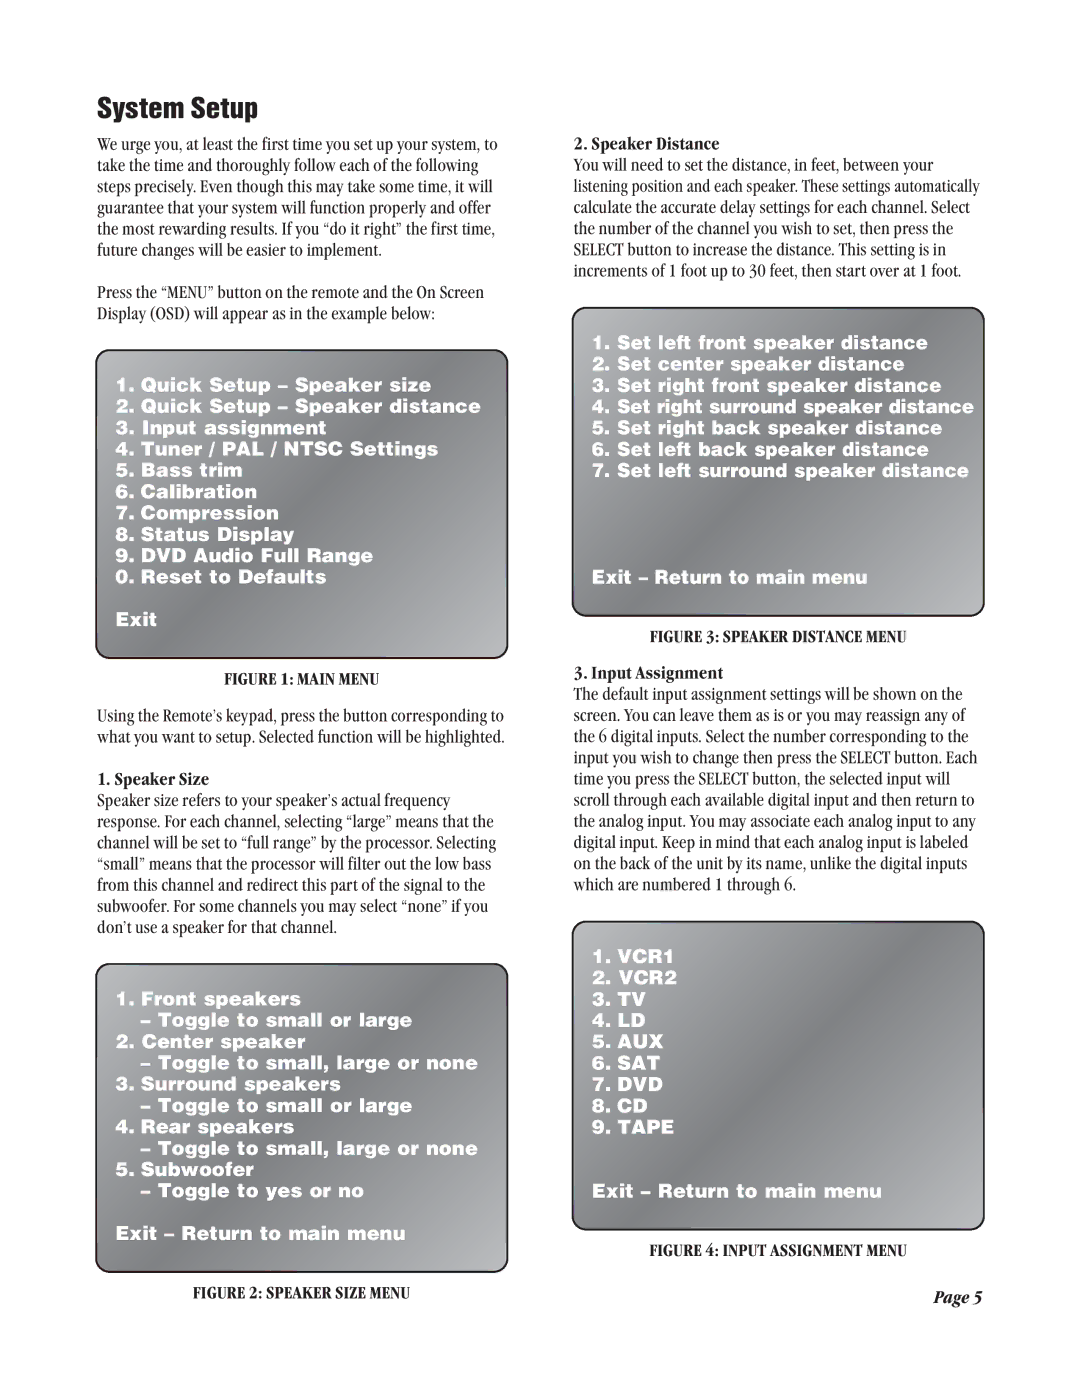
Press the “MENU” button on the remote and the On Screen Display (OSD) will appear as in the example below:

1.Quick Setup – Speaker size

2.Quick Setup – Speaker distance

3.Input assignment

4.Tuner / PAL / NTSC Settings

5.Bass trim

6.Calibration

7.Compression

8.Status Display

9.DVD Audio Full Range

0.Reset to Defaults Exit

FIGURE 1: MAIN MENU

Using the Remote’s keypad, press the button corresponding to what you want to setup. Selected function will be highlighted.

1. Speaker Size

Speaker size refers to your speaker’s actual frequency response. For each channel, selecting “large” means that the channel will be set to “full range” by the processor. Selecting “small” means that the processor will filter out the low bass from this channel and redirect this part of the signal to the subwoofer. For some channels you may select “none” if you don’t use a speaker for that channel.

1.Front speakers

Toggle to small or large

2.Center speaker

Toggle to small, large or none

3.Surround speakers

Toggle to small or large

4.Rear speakers

Toggle to small, large or none

5.Subwoofer

Toggle to yes or no

Exit – Return to main menu

FIGURE 2: SPEAKER SIZE MENU

2. Speaker Distance

You will need to set the distance, in feet, between your listening position and each speaker. These settings automatically calculate the accurate delay settings for each channel. Select the number of the channel you wish to set, then press the SELECT button to increase the distance. This setting is in increments of 1 foot up to 30 feet, then start over at 1 foot.

1.Set left front speaker distance

2.Set center speaker distance

3.Set right front speaker distance

4.Set right surround speaker distance

5.Set right back speaker distance

6.Set left back speaker distance

7.Set left surround speaker distance

Exit – Return to main menu

FIGURE 3: SPEAKER DISTANCE MENU

3. Input Assignment

The default input assignment settings will be shown on the screen. You can leave them as is or you may reassign any of the 6 digital inputs. Select the number corresponding to the input you wish to change then press the SELECT button. Each time you press the SELECT button, the selected input will scroll through each available digital input and then return to the analog input. You may associate each analog input to any digital input. Keep in mind that each analog input is labeled on the back of the unit by its name, unlike the digital inputs which are numbered 1 through 6.

1.VCR1

2.VCR2

3.TV

4.LD

5.AUX

6.SAT

7.DVD

8.CD

9.TAPE

Exit – Return to main menu

FIGURE 4: INPUT ASSIGNMENT MENU

Page 5

Page 5
Image 5
Legend Audio ATP 7500 manual System Setup, Speaker Size, Speaker Distance, Input Assignment

ATP 7500 specifications

The Legend Audio ATP 7500 is a standout audio powerhouse designed for audiophiles and professionals alike. Its impressive sound performance, combined with advanced technologies and elegant design, makes it an indispensable addition to any audio setup. This premium product boasts a plethora of features that elevate the listening experience to new heights.

At the heart of the ATP 7500 is a high-performance amplifier that delivers robust power output without compromising sound fidelity. With a total output power of 7500 watts, this amplifier can drive even the most demanding speakers effortlessly, ensuring crystal-clear sound reproduction across all frequencies. The built-in digital signal processing (DSP) allows users to tailor their audio experience, offering customizable presets for various genres and environments.

One of the standout features of the ATP 7500 is its cutting-edge Class D amplification technology. This design not only makes the amplifier lightweight and compact but also enhances energy efficiency. The resulting reduced heat generation means the ATP 7500 can run for extended periods without overheating, ensuring reliability during long listening sessions or live performances.

Connectivity is paramount in today’s audio landscape, and the Legend Audio ATP 7500 does not disappoint. It includes multiple input options, such as XLR, TRS, and RCA, enabling seamless integration with a variety of audio sources, from professional mixing consoles to home theater systems. Bluetooth connectivity further extends its versatility, allowing for wireless streaming from smartphones and tablets with ease.

Another important feature of the ATP 7500 is its advanced protection circuitry, designed to safeguard both the amplifier and connected speakers from damage during operation. This built-in technology prevents overheating, short-circuits, and DC offsets, ensuring peace of mind while pushing the system to its limits.

The build quality of the ATP 7500 is exceptional, featuring a rugged chassis that is both durable and aesthetically pleasing. The intuitive front panel includes clearly labeled controls and LED indicators, allowing for easy operation and adjustments on the fly.

In summary, the Legend Audio ATP 7500 stands out with its powerful output, advanced Class D technology, versatile connectivity, and exceptional build quality. Whether used in a home studio, live performance, or as part of a home theater system, it offers an unparalleled audio experience that will satisfy even the most discerning listeners.