PLANNING YOUR INSTALLATION
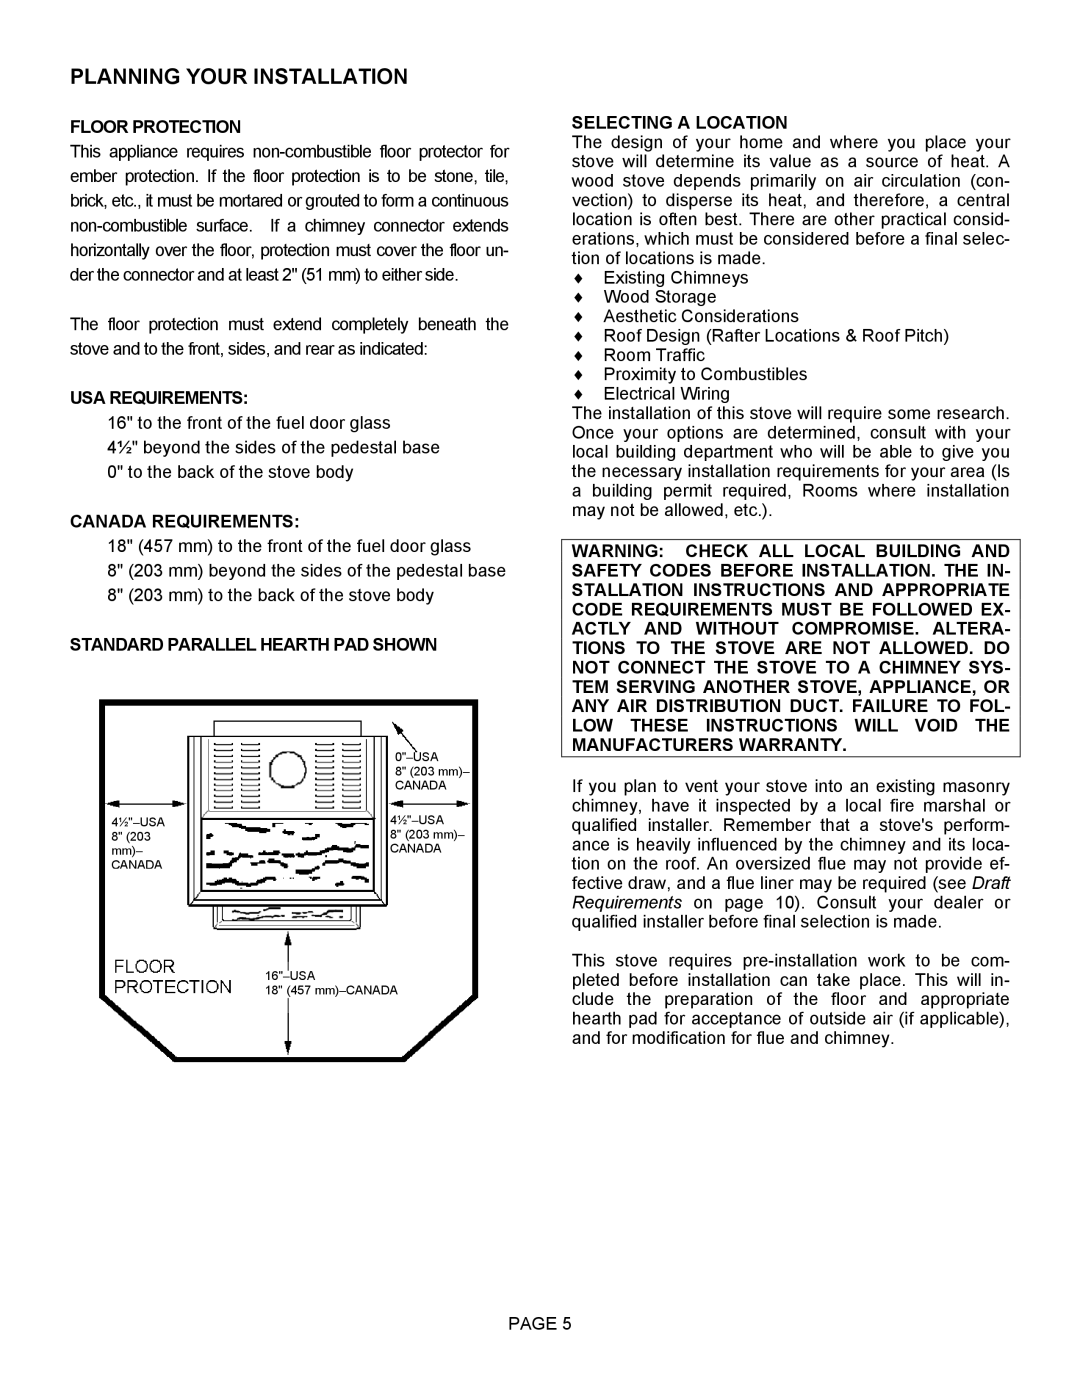
FLOOR PROTECTION
This appliance requires
The floor protection must extend completely beneath the stove and to the front, sides, and rear as indicated:
USA REQUIREMENTS:
16" to the front of the fuel door glass
4½" beyond the sides of the pedestal base 0" to the back of the stove body
CANADA REQUIREMENTS:
18" (457 mm) to the front of the fuel door glass
8" (203 mm) beyond the sides of the pedestal base 8" (203 mm) to the back of the stove body
STANDARD PARALLEL HEARTH PAD SHOWN
|
|
| ||
|
| 8" (203 mm)– | ||
|
| CANADA | ||
4 |
|
| ||
8" | (203 | 8" | (203 mm) | – |
mm)– | CANADA | |||
CANADA |
|
|
| |
18" (457
SELECTING A LOCATION
The design of your home and where you place your stove will determine its value as a source of heat. A wood stove depends primarily on air circulation (con- vection) to disperse its heat, and therefore, a central location is often best. There are other practical consid- erations, which must be considered before a final selec- tion of locations is made.
♦Existing Chimneys
♦Wood Storage
♦Aesthetic Considerations
♦Roof Design (Rafter Locations & Roof Pitch)
♦Room Traffic
♦Proximity to Combustibles
♦Electrical Wiring
The installation of this stove will require some research. Once your options are determined, consult with your local building department who will be able to give you the necessary installation requirements for your area (Is a building permit required, Rooms where installation may not be allowed, etc.).
WARNING: CHECK ALL LOCAL BUILDING AND SAFETY CODES BEFORE INSTALLATION. THE IN- STALLATION INSTRUCTIONS AND APPROPRIATE CODE REQUIREMENTS MUST BE FOLLOWED EX- ACTLY AND WITHOUT COMPROMISE. ALTERA- TIONS TO THE STOVE ARE NOT ALLOWED. DO NOT CONNECT THE STOVE TO A CHIMNEY SYS- TEM SERVING ANOTHER STOVE, APPLIANCE, OR ANY AIR DISTRIBUTION DUCT. FAILURE TO FOL- LOW THESE INSTRUCTIONS WILL VOID THE MANUFACTURERS WARRANTY.
If you plan to vent your stove into an existing masonry chimney, have it inspected by a local fire marshal or qualified installer. Remember that a stove's perform- ance is heavily influenced by the chimney and its loca- tion on the roof. An oversized flue may not provide ef- fective draw, and a flue liner may be required (see Draft Requirements on page 10). Consult your dealer or qualified installer before final selection is made.
This stove requires
PAGE 5