Once the pilot is lit, if your electronic appliance is equipped with an optional burner control switch kit the appliance main burner may be turned on and off using the optional switch (See optional accessories on Page 12 - Wall Switch, Wall Thermostat Or Remote Control Receiver).
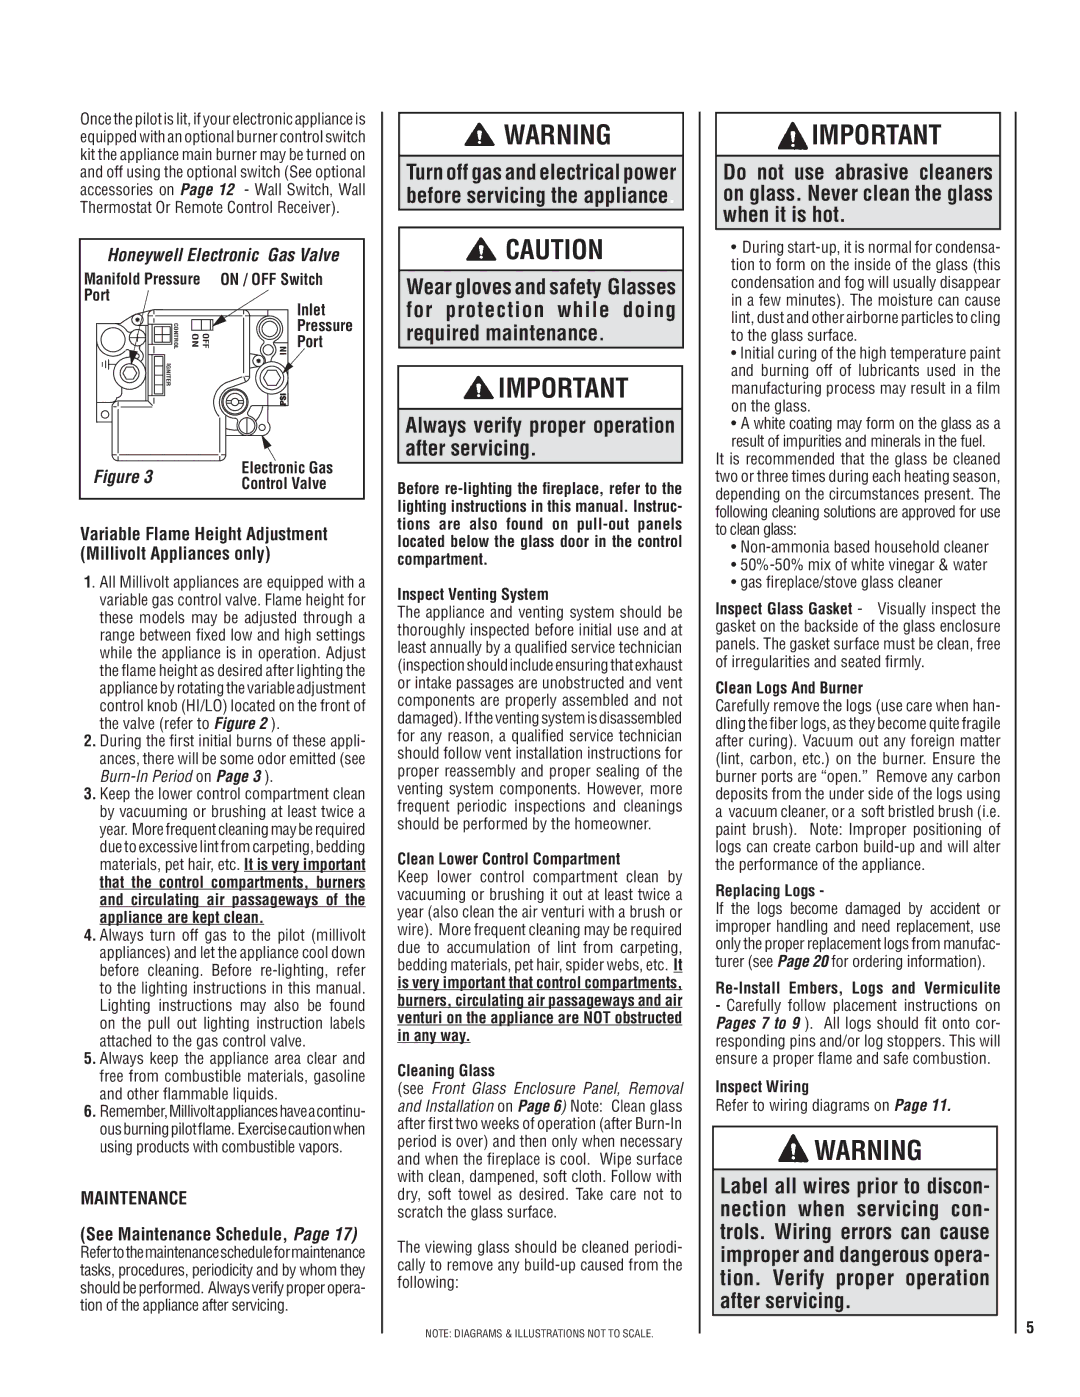
Honeywell Electronic Gas Valve
Manifold Pressure ON / OFF Switch Port
| | | Inlet |
C | | | Pressure |
ONTROL | OFF ON | N | Port |
| | I | |
IGNITER | | | |
| | ISP | |
| Figure 3 | Electronic Gas |
| Control Valve |
| |
Variable Flame Height Adjustment (Millivolt Appliances only)
1. All Millivolt appliances are equipped with a variable gas control valve. Flame height for these models may be adjusted through a range between fixed low and high settings while the appliance is in operation. Adjust the flame height as desired after lighting the appliance by rotating the variable adjustment control knob (HI/LO) located on the front of the valve (refer to Figure 2 ).
2.During the first initial burns of these appli- ances, there will be some odor emitted (see Burn-In Period on Page 3 ).
3.Keep the lower control compartment clean by vacuuming or brushing at least twice a year. More frequent cleaning may be required due to excessive lint from carpeting, bedding materials, pet hair, etc. It is very important that the control compartments, burners and circulating air passageways of the appliance are kept clean.
4.Always turn off gas to the pilot (millivolt appliances) and let the appliance cool down before cleaning. Before re-lighting, refer to the lighting instructions in this manual. Lighting instructions may also be found on the pull out lighting instruction labels attached to the gas control valve.
5.Always keep the appliance area clear and free from combustible materials, gasoline and other flammable liquids.
6.Remember,Millivoltapplianceshaveacontinu- ousburningpilotflame. Exercisecautionwhen using products with combustible vapors.
MAINTENANCE
(See Maintenance Schedule, Page 17)
Refertothemaintenancescheduleformaintenance tasks, procedures, periodicity and by whom they should be performed. Always verify proper opera- tion of the appliance after servicing.
 WARNING
Turn off gas and electrical power before servicing the appliance.
 CAUTION
Wear gloves and safety Glasses for protection while doing required maintenance.
 IMPORTANT
Always verify proper operation after servicing.
Before re-lighting the fireplace, refer to the lighting instructions in this manual. Instruc- tions are also found on pull-out panels located below the glass door in the control compartment.
Inspect Venting System
The appliance and venting system should be thoroughly inspected before initial use and at least annually by a qualified service technician (inspection should include ensuring that exhaust or intake passages are unobstructed and vent components are properly assembled and not damaged). If the venting system is disassembled for any reason, a qualified service technician should follow vent installation instructions for proper reassembly and proper sealing of the venting system components. However, more frequent periodic inspections and cleanings should be performed by the homeowner.
Clean Lower Control Compartment
Keep lower control compartment clean by vacuuming or brushing it out at least twice a year (also clean the air venturi with a brush or wire). More frequent cleaning may be required due to accumulation of lint from carpeting, bedding materials, pet hair, spider webs, etc. It is very important that control compartments, burners, circulating air passageways and air venturi on the appliance are NOT obstructed in any way.
Cleaning Glass
(see Front Glass Enclosure Panel, Removal and Installation on Page 6) Note: Clean glass after first two weeks of operation (after Burn-In period is over) and then only when necessary and when the fireplace is cool. Wipe surface with clean, dampened, soft cloth. Follow with dry, soft towel as desired. Take care not to scratch the glass surface.
The viewing glass should be cleaned periodi- cally to remove any build-up caused from the following:
NOTE: DIAGRAMS & ILLUSTRATIONS NOT TO SCALE.
 IMPORTANT
Do not use abrasive cleaners on glass. Never clean the glass when it is hot.
•During start-up, it is normal for condensa- tion to form on the inside of the glass (this condensation and fog will usually disappear in a few minutes). The moisture can cause lint, dust and other airborne particles to cling to the glass surface.
•Initial curing of the high temperature paint and burning off of lubricants used in the manufacturing process may result in a film on the glass.
•A white coating may form on the glass as a result of impurities and minerals in the fuel.
It is recommended that the glass be cleaned two or three times during each heating season, depending on the circumstances present. The following cleaning solutions are approved for use to clean glass:
•Non-ammonia based household cleaner
•50%-50% mix of white vinegar & water
•gas fireplace/stove glass cleaner
Inspect Glass Gasket - Visually inspect the gasket on the backside of the glass enclosure panels. The gasket surface must be clean, free of irregularities and seated firmly.
Clean Logs And Burner
Carefully remove the logs (use care when han- dling the fiber logs, as they become quite fragile after curing). Vacuum out any foreign matter (lint, carbon, etc.) on the burner. Ensure the burner ports are “open.” Remove any carbon deposits from the under side of the logs using
avacuum cleaner, or a soft bristled brush (i.e. paint brush). Note: Improper positioning of logs can create carbon build-up and will alter the performance of the appliance.
Replacing Logs -
If the logs become damaged by accident or improper handling and need replacement, use only the proper replacement logs from manufac- turer (see Page 20 for ordering information).
Re-Install Embers, Logs and Vermiculite
-Carefully follow placement instructions on Pages 7 to 9 ). All logs should fit onto cor- responding pins and/or log stoppers. This will ensure a proper flame and safe combustion.
Inspect Wiring
Refer to wiring diagrams on Page 11.
 WARNING
Label all wires prior to discon- nection when servicing con- trols. Wiring errors can cause improper and dangerous opera- tion. Verify proper operation after servicing.
5