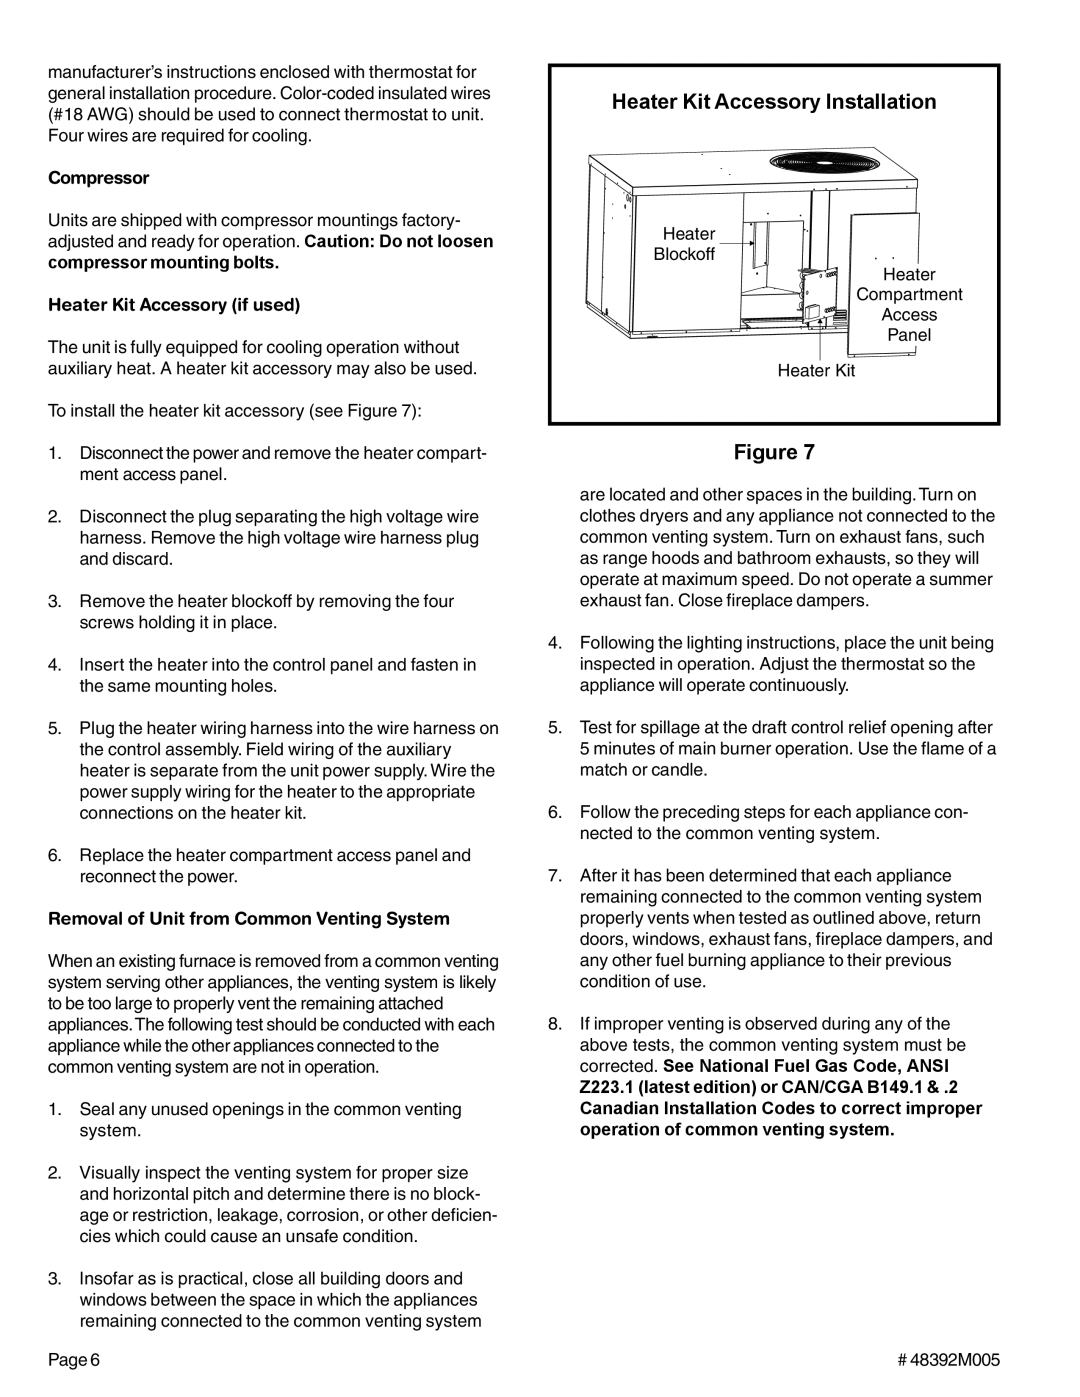
(2/4)SA13 specifications
Lennox International Inc. is a leading global provider of innovative climate control solutions for residential and commercial applications. Established in 1895 and headquartered in Richardson, Texas, Lennox has built a reputation for developing high-efficiency heating, ventilation, and air conditioning (HVAC) systems that prioritize energy savings and sustainability.At the core of Lennox's success is its commitment to technological advancement. The company has pioneered numerous technologies that have revolutionized HVAC systems, such as the introduction of variable-speed air conditioners and smart thermostats. Their Signature and Elite series products feature advanced cooling and heating technologies that optimize energy usage and enhance indoor comfort.
One of the standout features of Lennox products is their sustainability focus. Many of their systems are designed to achieve high Seasonal Energy Efficiency Ratios (SEER) and Annual Fuel Utilization Efficiency (AFUE) ratings, which help consumers save on energy costs and reduce their environmental impact. The company’s dedication to energy efficiency is further exemplified by its use of eco-friendly refrigerants, aligning with industry standards and environmental initiatives.
Lennox is also well-known for integrating smart home technologies into its HVAC systems. The iComfort S30 Smart Thermostat, for instance, offers users the ability to control their home climate remotely via a smartphone app. It utilizes advanced algorithms to learn user preferences and adjust settings accordingly, ensuring optimal comfort while maximizing energy savings.
Furthermore, Lennox’s robust offerings cater to a diverse range of residential and commercial needs, providing tailored solutions for both new construction and retrofit projects. Their broad product portfolio includes air conditioners, heat pumps, furnaces, indoor air quality products, and smart home systems, signifying their comprehensive approach to climate control.
Beyond product innovation, Lennox places a strong emphasis on customer service and support. The company provides extensive training programs for contractors, ensuring that their installations and maintenance services meet high standards of quality. This commitment to excellence has built strong relationships with customers and professionals alike.
Overall, Lennox International Inc. embodies a forward-thinking approach in the HVAC industry, combining cutting-edge technologies, sustainability, and exceptional customer service to deliver superior climate control solutions worldwide. As the demand for energy-efficient systems grows, Lennox is well-positioned to lead the way in transforming how we heat and cool our spaces.