V460 User Guide V1.0_en.book Page 35 Wednesday, March 24, 2010 4:59 PM
Appendix A. CRU instructions
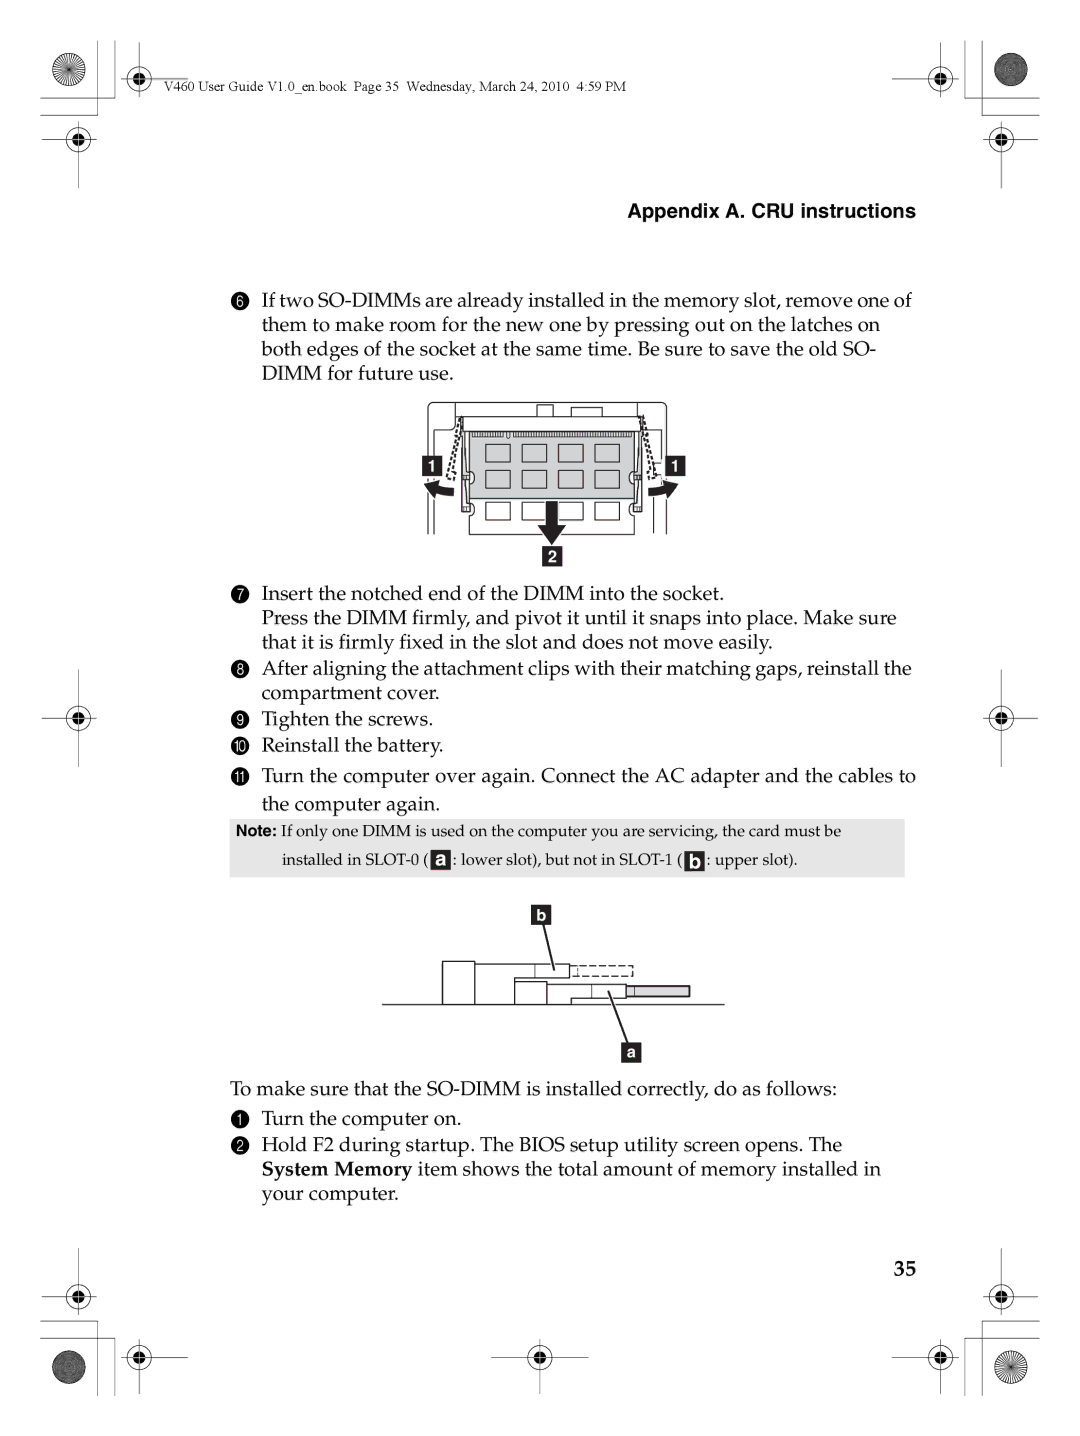
6If two
a
b
a
7Insert the notched end of the DIMM into the socket.
Press the DIMM firmly, and pivot it until it snaps into place. Make sure that it is firmly fixed in the slot and does not move easily.
8After aligning the attachment clips with their matching gaps, reinstall the compartment cover.
9Tighten the screws.
0Reinstall the battery.
ATurn the computer over again. Connect the AC adapter and the cables to
the computer again.
Note: If only one DIMM is used on the computer you are servicing, the card must be installed in ![]() : lower slot), but not in
: lower slot), but not in ![]() : upper slot).
: upper slot).
b
a
To make sure that the
1Turn the computer on.
2Hold F2 during startup. The BIOS setup utility screen opens. The System Memory item shows the total amount of memory installed in your computer.
35