5200 Series | www.lexmark.com | |
|
|
|
|
|
|
Safety information
•Use only the power supply provided with this product or the manufacturer's authorized replacement power supply.
•Connect the power supply cord to an electrical outlet that is near the product and easily accessible.
•Refer service or repairs, other than those described in the user documentation, to a professional service person.
CAUTION: Do not set up this product or make any electrical or cabling connections, such as the power supply cord or telephone, during a lightning storm.
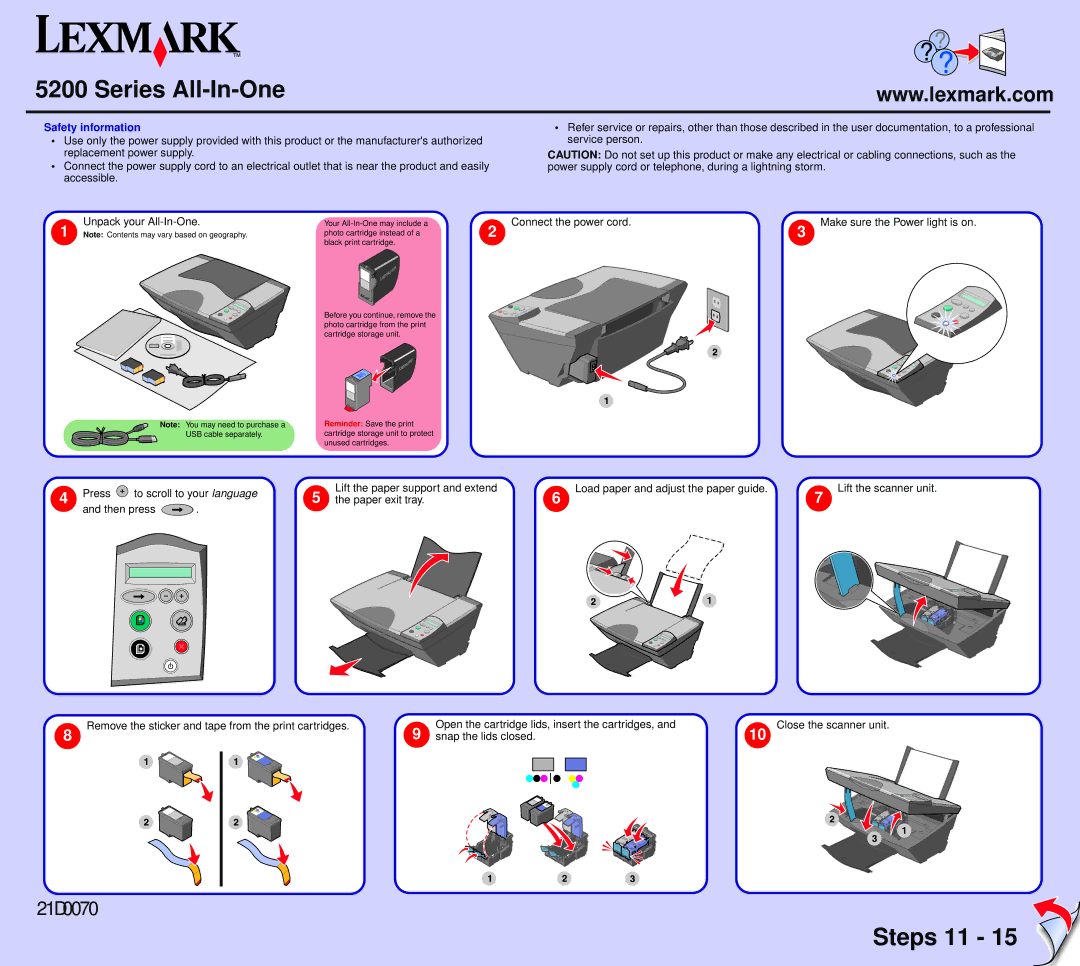
Unpack your
1 Note: Contents may vary based on geography.
Note: You may need to purchase a
USB cable separately.
Your | Connect the power cord. | Make sure the Power light is on. |
photo cartridge instead of a | 2 | 3 |
black print cartridge. |
|
|
Before you continue, remove the photo cartridge from the print cartridge storage unit.
Reminder: Save the print cartridge storage unit to protect unused cartridges.
| Press | to scroll to your language | Lift the paper support and extend | Load paper and adjust the paper guide. | Lift the scanner unit. | |
4 | 5 the paper exit tray. | 6 | 7 | |||
|
|
and then press ![]() .
.
8
Remove the sticker and tape from the print cartridges.
9 | Open the cartridge lids, insert the cartridges, and | Close the scanner unit. | ||||
snap the lids closed. | 10 | |||||
|
|
|
|
|
|
|
|
|
|
|
|
|
|
21D0070
