Note: The toner cartridge snaps into place when correctly installed.
7Reinstall the print cartridge assembly.
8Press and hold Stop for three seconds to reset photoconductor recount.
9Close the front cover.
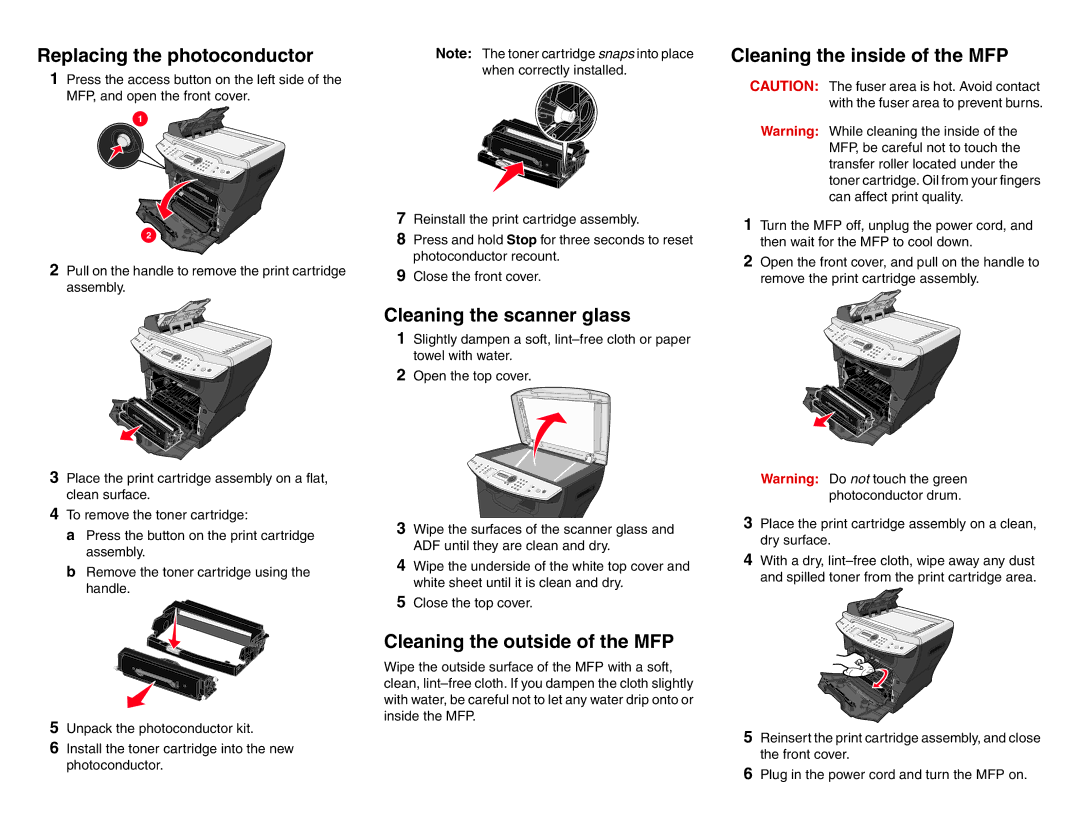
Cleaning the inside of the MFP
CAUTION: The fuser area is hot. Avoid contact with the fuser area to prevent burns.
Warning: While cleaning the inside of the MFP, be careful not to touch the transfer roller located under the toner cartridge. Oil from your fingers can affect print quality.
1Turn the MFP off, unplug the power cord, and then wait for the MFP to cool down.
2Open the front cover, and pull on the handle to remove the print cartridge assembly.
Cleaning the scanner glass
1Slightly dampen a soft,
2Open the top cover.
3Wipe the surfaces of the scanner glass and ADF until they are clean and dry.
4Wipe the underside of the white top cover and white sheet until it is clean and dry.
5Close the top cover.
Cleaning the outside of the MFP
Wipe the outside surface of the MFP with a soft, clean,
Warning: Do not touch the green photoconductor drum.
3Place the print cartridge assembly on a clean, dry surface.
4With a dry,
5Reinsert the print cartridge assembly, and close the front cover.
6Plug in the power cord and turn the MFP on.