Mechanical Installation
Mounting Methods
General Information
•Select the appropriate orientation to maximize sunlight exposure.
•Module should not be mounted or stored in a way that the front/top glass faces downward in order to prevent water from entering the junction box, which could cause a safety hazard.
•Clearance between the solar module frames and structures such as roofs or ground is required to prevent wiring damage and to allow air to circulate behind the solar module. The recommended standoff height is a minimum of 100mm
•When installed on a roof, the solar module must be mounted over a
•The solar module is only IEC listed for use when its factory frame is fully intact.
•Removal or alteration must be done by an authorized and qualified individual
•Creating additional mounting holes may damage the solar module and reduce the strength of the frame.
•We recommend a 6mm gap between module frames to avoid tension from thermal expansion.
•The fire rating of this module is valid only when mounted in the manner specified in the mechanical mounting instructions.
•The module is considered to be in compliance with UL1703 only when the module in mounted in the manner specified by the mounting instructions below.
•The solar module may be mounted by using the following methods: (*Torque:8~12Nm )
•When installing modules in heavy snow areas, it is recommended to be taken an appropriate countermeasure to prevent possible damages to the lower side frame by slipping snow .
(e.g. attach supporting part to the lowest modules)
Solar module
Supporting part
Roof
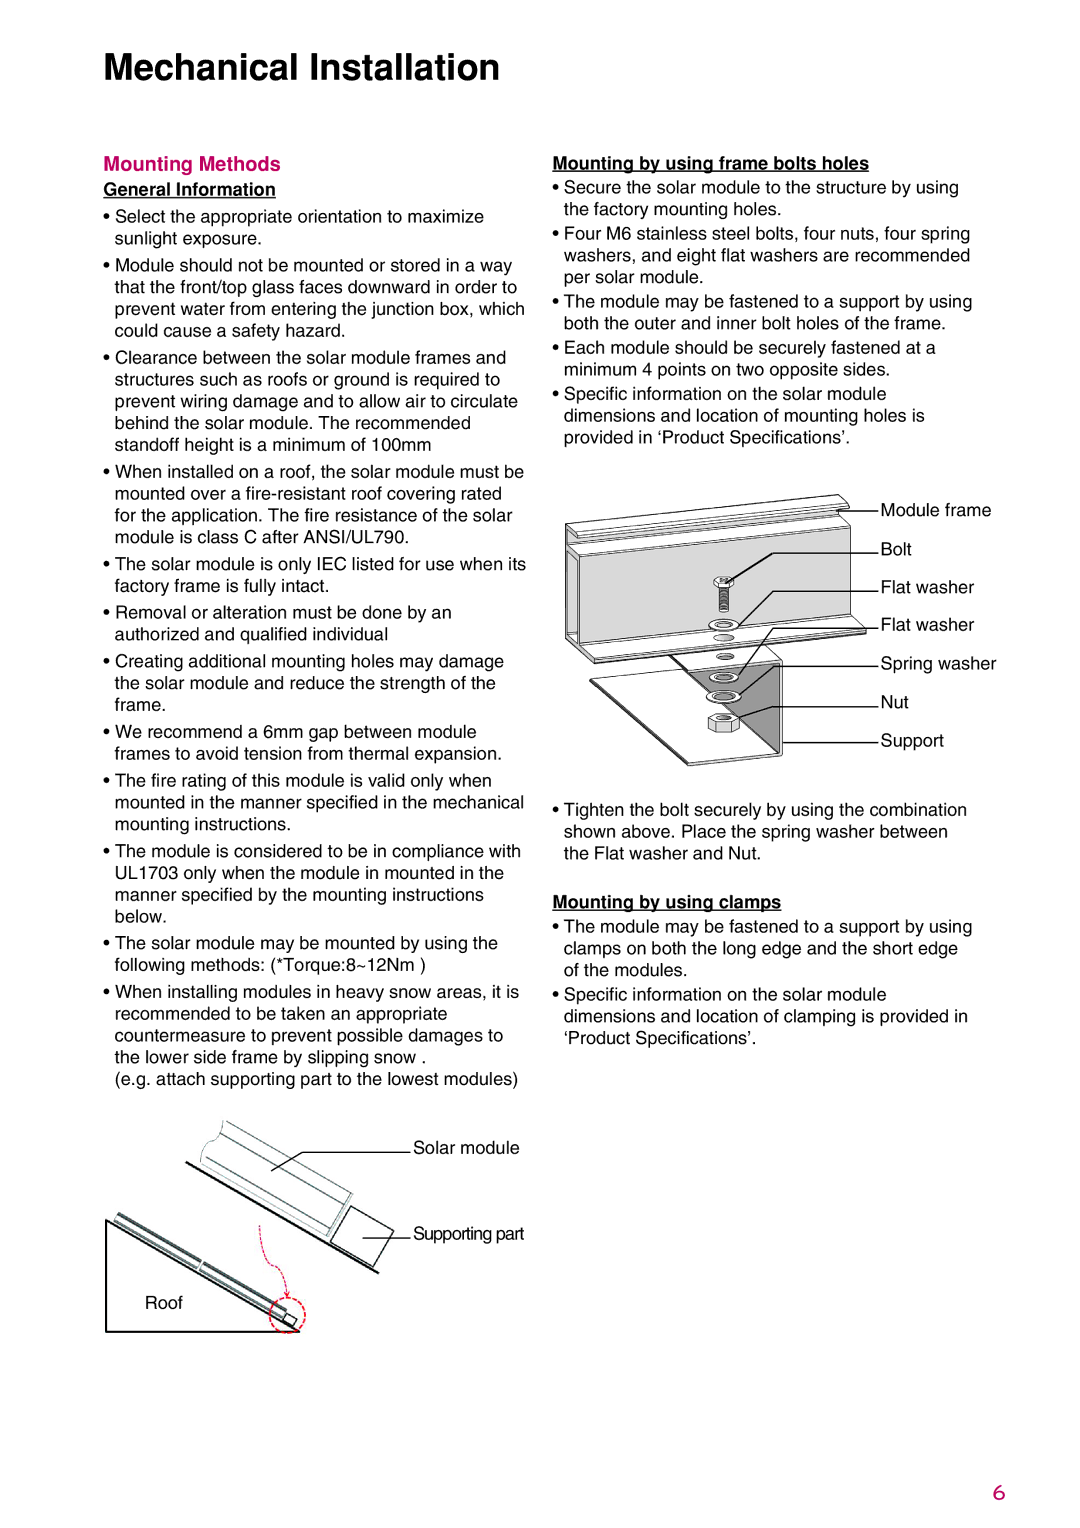
Mounting by using frame bolts holes
•Secure the solar module to the structure by using the factory mounting holes.
•Four M6 stainless steel bolts, four nuts, four spring washers, and eight flat washers are recommended per solar module.
•The module may be fastened to a support by using both the outer and inner bolt holes of the frame.
•Each module should be securely fastened at a minimum 4 points on two opposite sides.
•Specific information on the solar module dimensions and location of mounting holes is provided in ‘Product Specifications’.
Module frame
Bolt
Flat washer
Flat washer
Spring washer
Nut
Support
•Tighten the bolt securely by using the combination shown above. Place the spring washer between the Flat washer and Nut.
Mounting by using clamps
•The module may be fastened to a support by using clamps on both the long edge and the short edge of the modules.
•Specific information on the solar module dimensions and location of clamping is provided in ‘Product Specifications’.
6