OPERATING INSTRUCTIONS
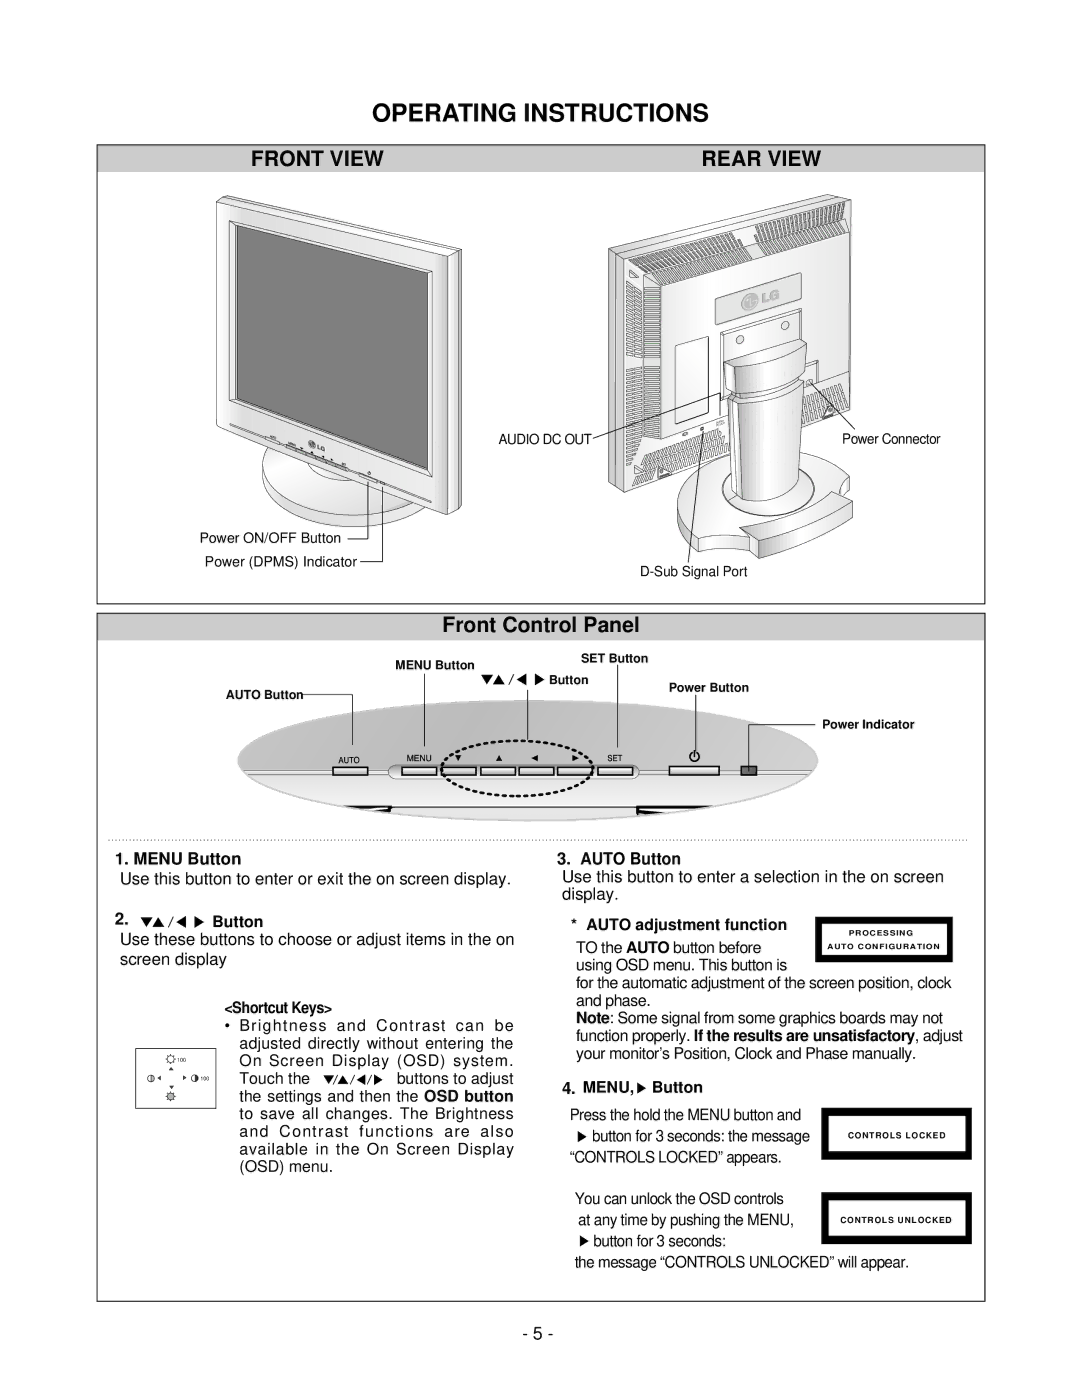
FRONT VIEW | REAR VIEW |
|
| AUDIO |
|
| DC OUT |
|
AUDIO DC OUT | D | Power Connector |
| ||
Power ON/OFF Button |
|
|
Power (DPMS) Indicator |
| |
|
|
Front Control Panel
MENU Button
SET Button
AUTO Button
Button | Power Button |
|
Power Indicator
1. MENU Button
Use this button to enter or exit the on screen display.
2.![]()
![]()
![]()
![]() Button
Button
Use these buttons to choose or adjust items in the on screen display
<Shortcut Keys>
• Brightness and Contrast can be
|
| adjusted directly without entering the | |
100 |
| On Screen Display (OSD) system. | |
| 100 | Touch the | buttons to adjust |
|
| the settings and then the OSD button | |
|
| to save all changes. The Brightness | |
|
| ||
|
| and Contrast functions are also | |
|
| available in the On Screen Display | |
|
| (OSD) menu. |
|
3. AUTO Button
Use this button to enter a selection in the on screen display.
* AUTO adjustment function
TO the AUTO button before using OSD menu. This button is
for the automatic adjustment of the screen position, clock and phase.
Note: Some signal from some graphics boards may not function properly. If the results are unsatisfactory, adjust your monitor’s Position, Clock and Phase manually.
4. MENU, Button |
|
Press the hold the MENU button and |
|
| |
button for 3 seconds: the message | CONTROLS LOCKED |
“CONTROLS LOCKED” appears. |
|
| |
You can unlock the OSD controls |
|
| |
at any time by pushing the MENU, | CONTROLS UNLOCKED |
button for 3 seconds: |
|
|
the message “CONTROLS UNLOCKED” will appear.
- 5 -