Remove old air conditioner from existing wall sleeve.

Installation

INSTALLATION

We strongly recommend the removal of the old wall sleeve and the installation of a new LGE Wall Sleeve.

If you decide to keep the existing wall sleeve, you have to redirect the louvers at the back of the wall sleeve illustration. The use of pliers is recommended. If you DO NOT redirect, you run the risk of poor performance or product failure. This is not covered under the terms of the LGE warranty.

Pick a location which will allow the conditioned air to blow into the area you want. Good installation with special attention to the proper position of the unit will lessen the chance that service will be needed.

ITEMS IN INSTALLATION HARDWARE

You may not need all parts in the kit. Discard unused parts

ITEM (inches)

Qty.

Plastic grille

263/4 x 161/2

1

Vertical insulation strip

159/16 x 13/8 x 13/8

1

Around Insulation Strips

671/8 x 13/8 x 25/32

1

5927/32 x 13/8 x 13/8

1


Horizontal Insulation Strip

237/32 x 13/8 x 13/16

1

Support Block

13/4 x 13/8 x 45/16

2

Baffle

14 x 41/2 x 1/8

1

Shim

1113/16 x 1 x 3/4

2

Trim Frame


2

Washer Screw


4

Nuts(Plastic)


4

Grille Rear


1

HOW TO INSTALL

1

Identify the existing wall sleeve before installing


the unit from the listed below.


Brand

Wall Sleeve Dimensions (inches)


Width

Height

Depth


White-Westinghouse


16, 17-1/2

Frigidaire

25-1/2

15-1/4

or 22

Carrier (52F series)


General Electric

26

15-5/8

16-7/8

/Hotpoint


Whirlpool

25-7/8

16-1/2

17-1/8

or 23


Fedders/Emerson

27

16-3/4

16-3/4

or 19-3/4


LGE

25-7/8

15-17/32

16-23/32

Emerson/Fedders

26-3/4

15-3/4

15

Carrier (51S Series)

25-3/4

16-7/8

18-5/8

Friedrich

27

16-3/4

16-3/4

NOTICE

All wall sleeves used to mount the new Air Conditioner must be in sound structural condition and have a rear grille that securely attaches to sleeve, or rear flange that serves as a stop for the Air Conditioner.

2

3 Clean the interior of an existing sleeve. (Do not disturb seals.)

4 Wall sleeve must be securely fastened in wall before installing the air conditioner. Use the nails or screws through sleeve into wall, if needed. Repaint sleeve if needed.

5 Prepare the wall sleeve for installation of the unit. If you plan to use your existing wall sleeve, and it is not LGE, use procedure B or C below.

Procedure

Brand

Depth(inches)

A

LGE

16-23/32


White-Westinghouse

16, 17-1/2


Frigidaire Carrier


or 22


(52F series)


B

General Electric

16-7/8


/Hotpoint


Whirlpool

17-1/8 or 23


Carrier (51S series)

18-5/8


Fedders/Emerson

16-3/4


or 19-3/4

C


Emerson/Fedders

15


Friedrich

16-3/4

6 Install new unit into wall sleeve.

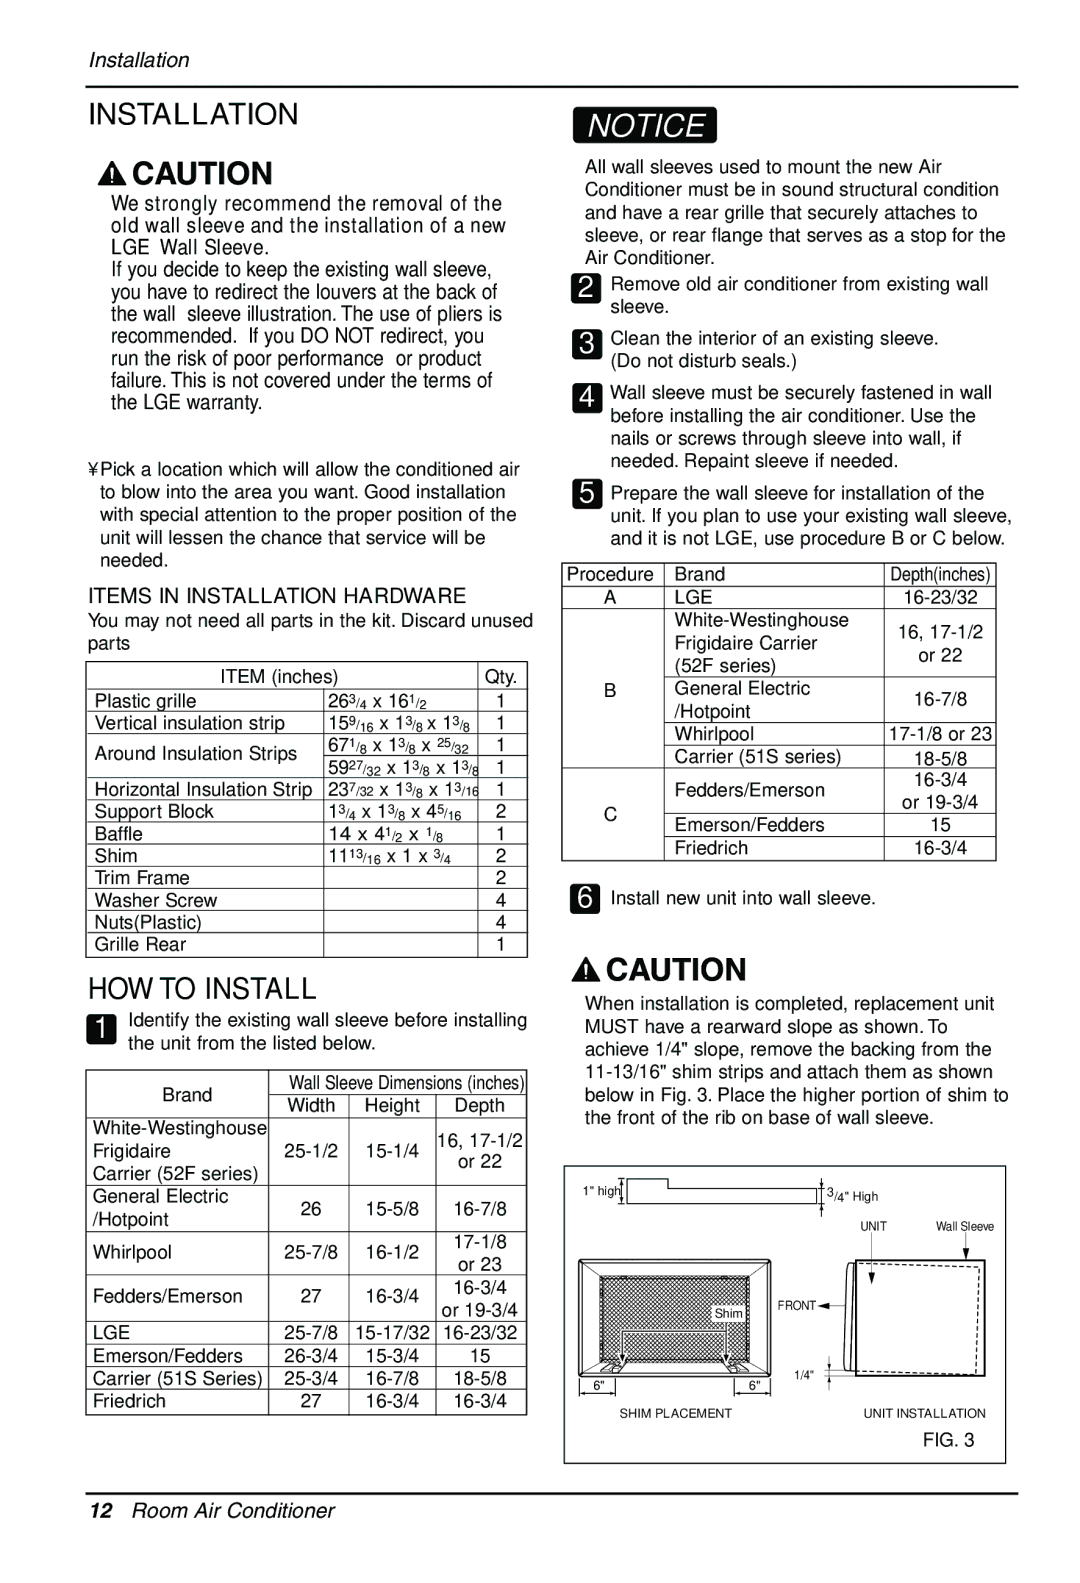
When installation is completed, replacement unit MUST have a rearward slope as shown. To achieve 1/4" slope, remove the backing from the 11-13/16" shim strips and attach them as shown below in Fig. 3. Place the higher portion of shim to the front of the rib on base of wall sleeve.

1" high

3/4" High


UNIT

Wall Sleeve

Shim

FRONT


6"

1/4"


6"


SHIM PLACEMENT

UNIT INSTALLATION


FIG. 3

12Room Air Conditioner

Page 12
Image 12
LG Electronics LT1430CR owner manual Installation, HOW to Install

LT1430CR specifications

The LG Electronics LT1430CR is an impressive window air conditioning unit designed to deliver optimal cooling in various small to medium indoor spaces. With its compact design and energy-efficient performance, the LT1430CR has become a popular choice among consumers looking for relief from the summer heat.

One of the standout features of the LT1430CR is its powerful cooling capability. With a cooling capacity of 14,000 BTU, this unit can effectively cool areas of up to 600 square feet, making it suitable for living rooms, bedrooms, and even small office spaces. LG has integrated innovative cooling technologies, ensuring that the air conditioner maintains your desired temperature with efficiency and precision.

Energy efficiency is a key consideration in today's market, and the LT1430CR excels in this respect. It is equipped with an Energy Efficiency Ratio (EER) that allows users to save on energy bills while still enjoying a comfortable environment. The unit also features multiple fan speeds and cooling settings, allowing for personalized climate control to suit various preferences and needs.

The LT1430CR is designed for easy installation, featuring a window mounting kit as part of the package. Its lightweight build ensures that homeowners can manage installation without professional help, saving both time and money. Furthermore, the air conditioner’s sleek and modern design makes it a stylish addition to any room decor.

Ease of use is enhanced with the inclusion of a remote control, enabling users to adjust settings from a distance. Additionally, the programmable timer allows users to set the unit to operate at specific times, promoting energy savings even when the unit is not in use. The air conditioner also incorporates an auto-restart function that ensures the unit resumes previous settings after a power outage.

Another significant characteristic of the LT1430CR is its quiet operation, which is particularly appreciated in residential settings. The low noise levels enable users to enjoy a peaceful environment while the unit efficiently cools the space.

In summary, the LG Electronics LT1430CR embodies advanced cooling technology, remarkable energy efficiency, and user-friendly features. With its powerful performance, easy installation process, and stylish aesthetics, it stands out as a reliable option for those looking to beat the heat and enhance their indoor comfort. The LT1430CR remains a noteworthy contender in the competitive air conditioning market, and its features reflect LG’s commitment to quality and consumer satisfaction.