ASS
r ,,,,...........,,, ,,,,,_ | ...............i , ,,,................i |
CAUTION: ALWAYS WEAR SAFETY GLASSES OR EYE SHIELDS WHILE
ASSEMBLING TILLER/ MINI TILLER/ CULTIVATOR.
IH HI I | i II,HI |
TOOLS REQUIRED FOR ASSEMBLY
1 - 5/16 inch Wrench (or adjustable wrench)
2 _ 7/16 inch Wrenches (or adjustable wrenches)
1 - Regular Screwdriver
1 - Pair Scissors
1- Hammer
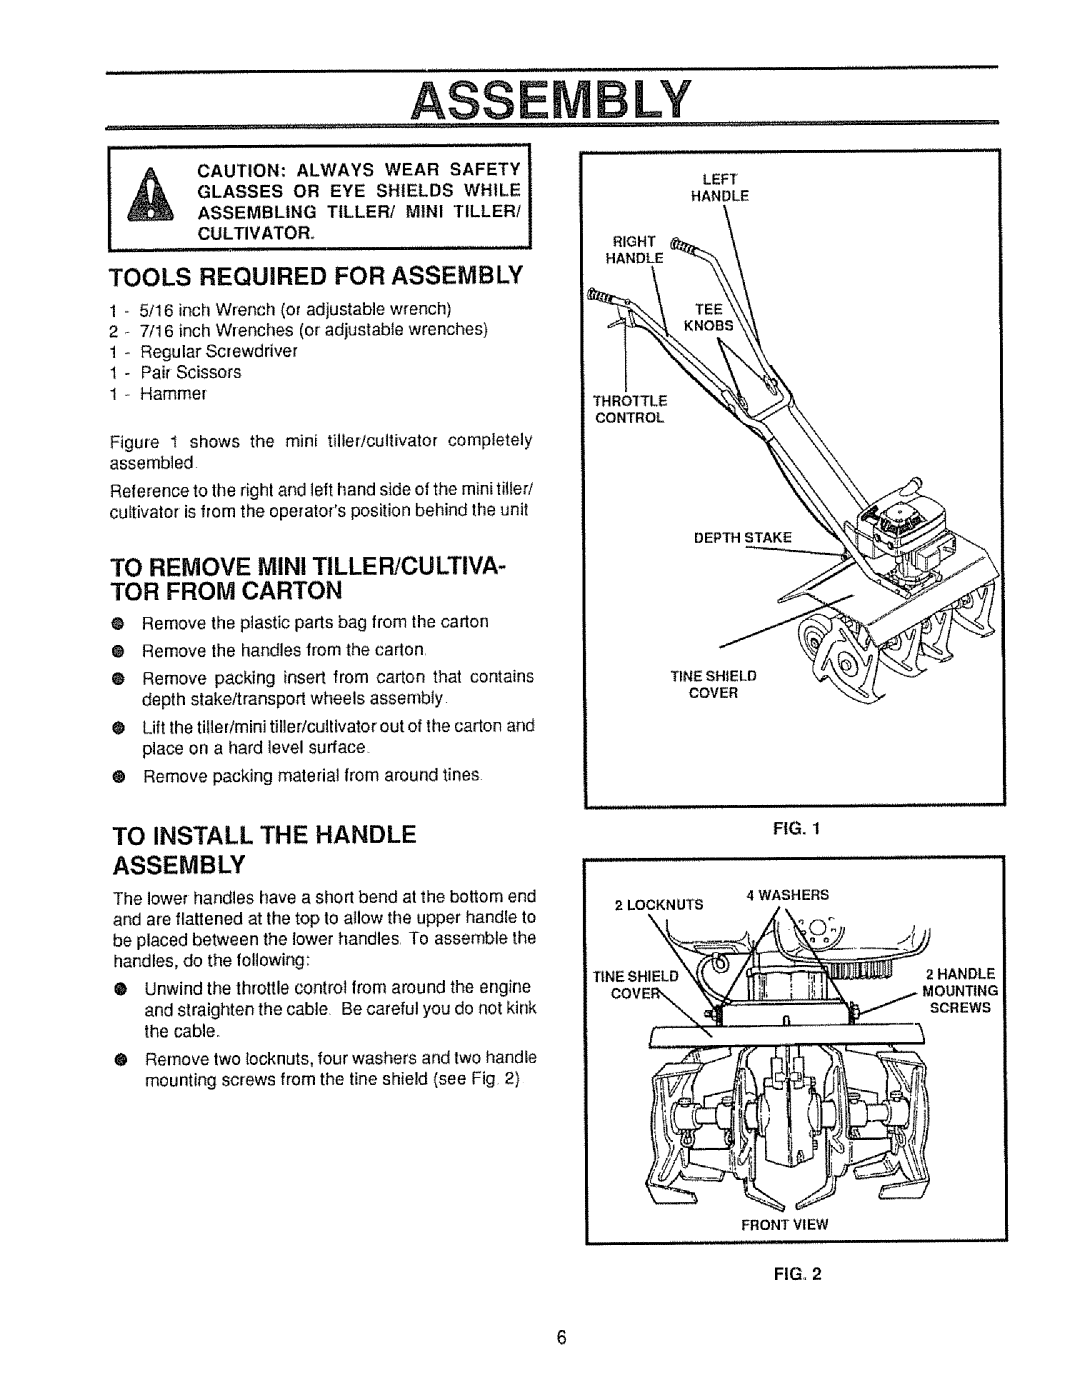
Figure 1 shows the mini tiller/cultivator completely assembled
Reference to the right and left hand side of the mini tiller/ cultivator is from the operator's position behind the unit
LEFT
HANDLE
RIGHT _
THROITLE _ _
TO REMOVE MIN! TILLER/CULTIVA-
TOR FROM CARTON
ORemove the plastic parts bag from the carton ® Remove the handles from the carton,
@Remove packing insert from carton that contains depth stake/transport wheels assembly
@Lift the tiller/mini tillerlcuitivator out of the carton and place on a hard level surface
®Remove packing material from around tines
DEPTH _ | __ |
TO INSTALL THE HANDLE
ASSEMBLY
The lower handles have a short bend at the bottom end and are flattened at the top to allow the upper handle to be placed between the lower handles To assemble the handles, do the following:
2 LOCKNUTS
FIG. 1
4 WASHERS
•Unwind the throttle control from around the engine and straighten the cable. Be careful you do not kink the cable.
®Remove two {ocknuts, four washers and two handle mounting screws from the tine shield (see Fig 2)
TINESHIELDNt.'_/_ |
|
| 2 HANDLE |
COVER... _Z'_ |
| I!i_il.___ _ MOUNTING | |
=_- | n | ._.../ | , SCREWS |
FRONT VI EW
iiNIHI
FIG,. 2