SECTION
Installing/Removing the T-arms
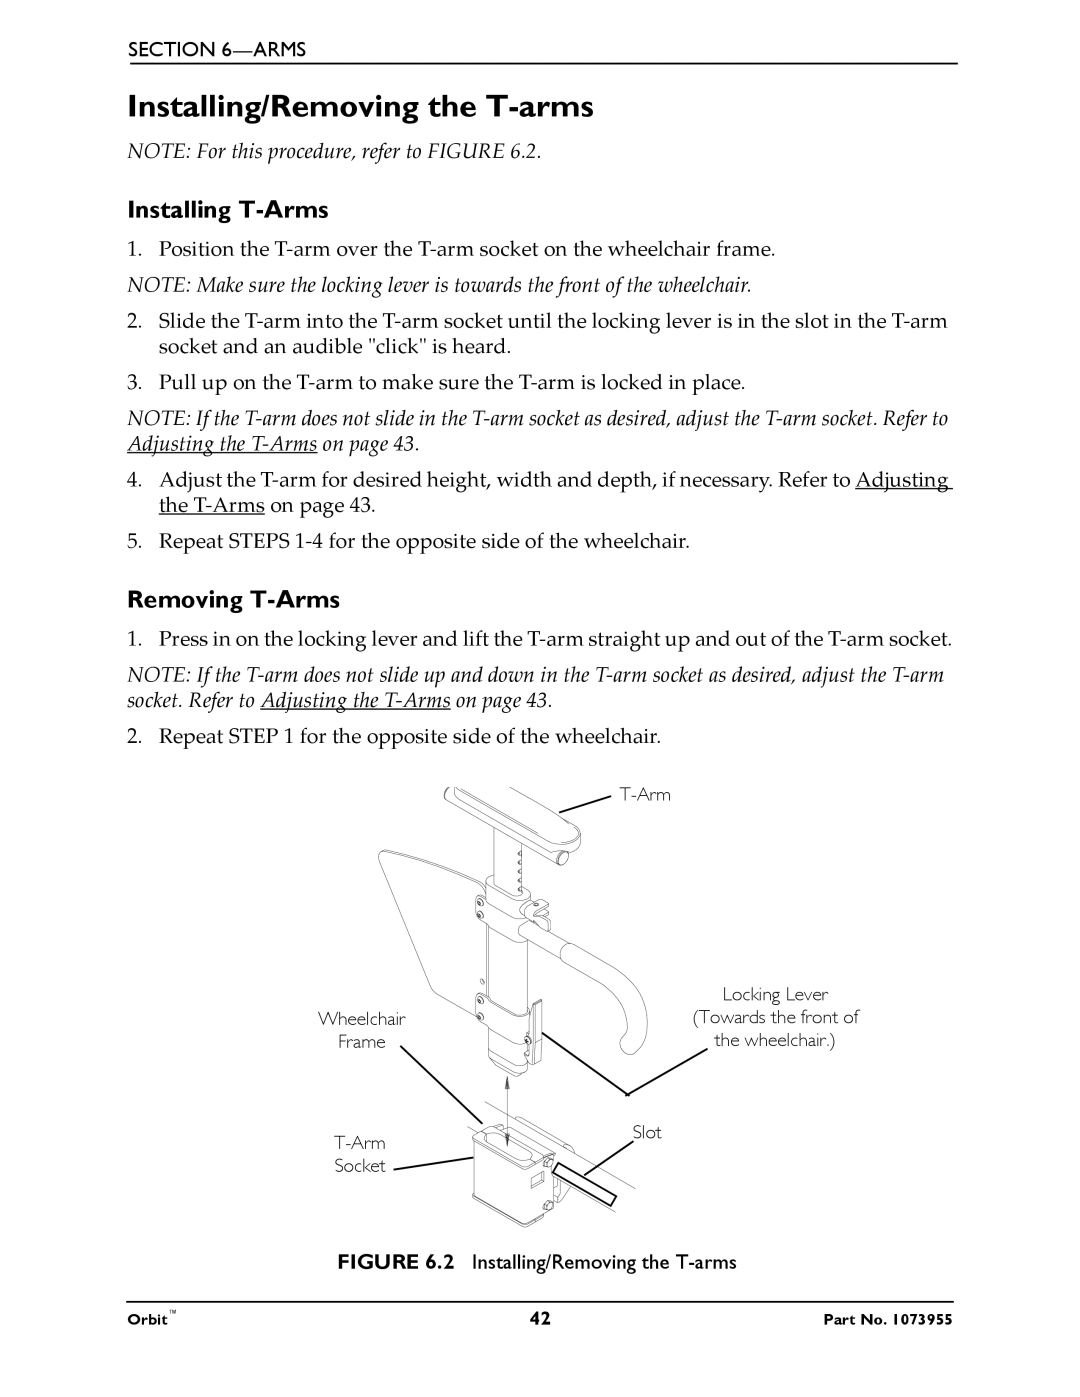
NOTE: For this procedure, refer to FIGURE 6.2.
Installing T-Arms
1. Position the T‐arm over the T‐arm socket on the wheelchair frame.
NOTE: Make sure the locking lever is towards the front of the wheelchair.
2.Slide the T‐arm into the T‐arm socket until the locking lever is in the slot in the T‐arm socket and an audible ʺclickʺ is heard.
3.Pull up on the T‐arm to make sure the T‐arm is locked in place.
NOTE: If the T‐arm does not slide in the T‐arm socket as desired, adjust the T‐arm socket. Refer to Adjusting the T‐Arms on page 43.
4.Adjust the T‐arm for desired height, width and depth, if necessary. Refer to Adjusting the T‐Arms on page 43.
5.Repeat STEPS 1‐4 for the opposite side of the wheelchair.
Removing T-Arms
1. Press in on the locking lever and lift the T‐arm straight up and out of the T‐arm socket.
NOTE: If the T‐arm does not slide up and down in the T‐arm socket as desired, adjust the T‐arm socket. Refer to Adjusting the T‐Arms on page 43.
2. Repeat STEP 1 for the opposite side of the wheelchair.
![]()
| Locking Lever |
Wheelchair | (Towards the front of |
Frame | the wheelchair.) |
Slot | |
| |
Socket |
|