SECTION
SECTION 6—ARMS
WARNING
After any adjustments, repair or service and before use, make sure all attaching hardware is tightened securely. Otherwise injury or damage may occur.
Installing the T-Arm Sockets
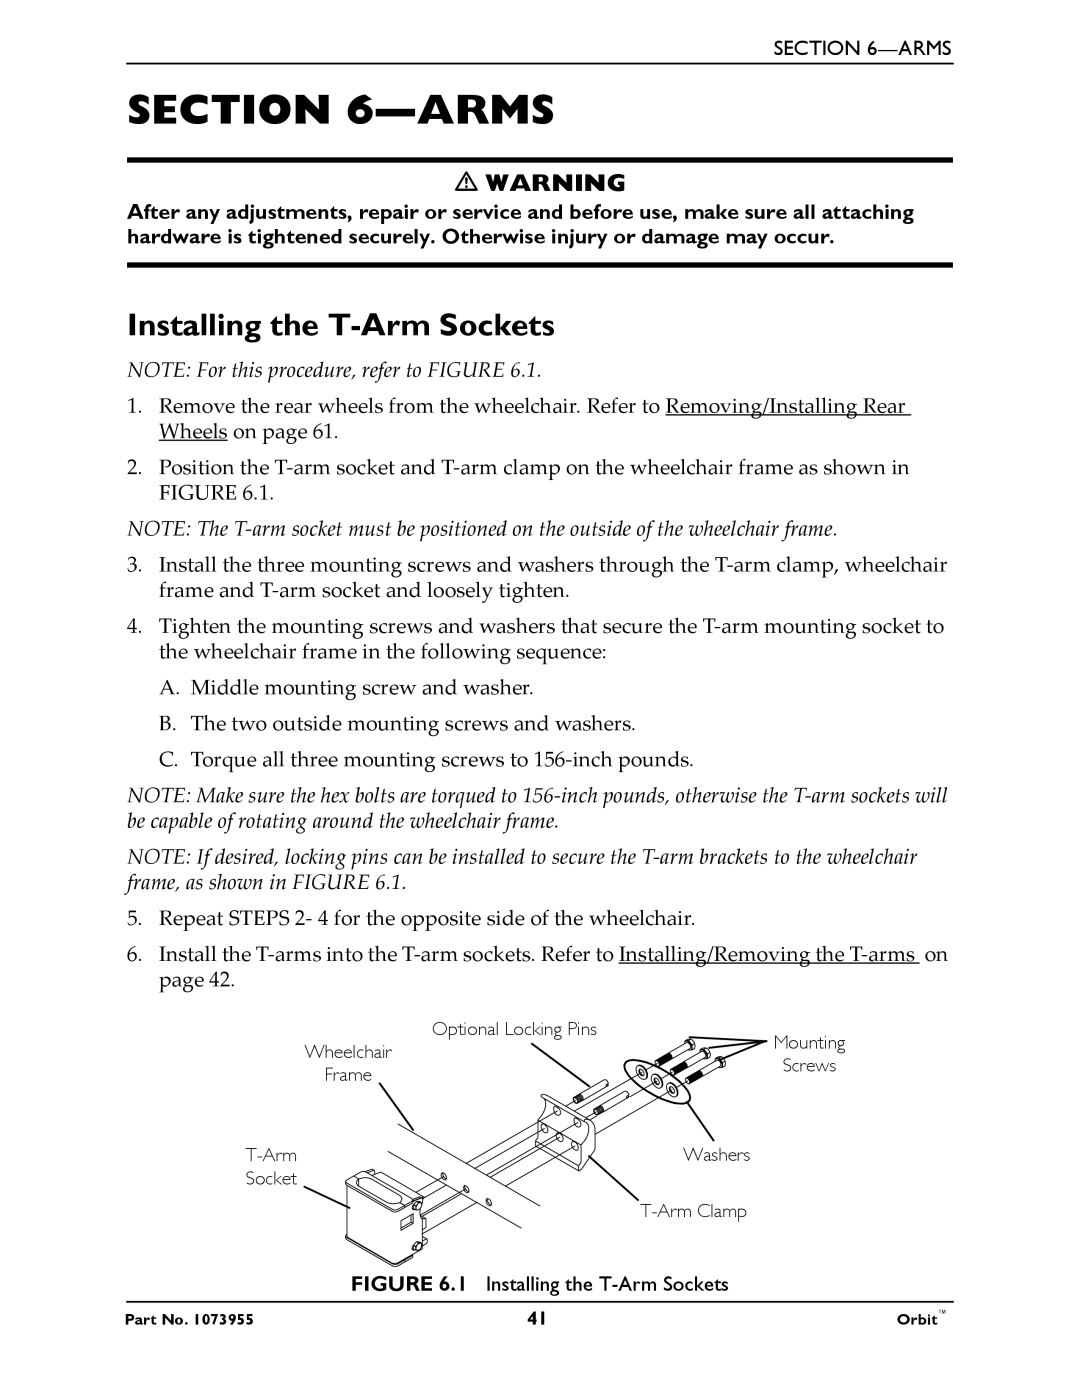
NOTE: For this procedure, refer to FIGURE 6.1.
1.Remove the rear wheels from the wheelchair. Refer to Removing/Installing Rear Wheels on page 61.
2.Position the T‐arm socket and T‐arm clamp on the wheelchair frame as shown in FIGURE 6.1.
NOTE: The T‐arm socket must be positioned on the outside of the wheelchair frame.
3.Install the three mounting screws and washers through the T‐arm clamp, wheelchair frame and T‐arm socket and loosely tighten.
4.Tighten the mounting screws and washers that secure the T‐arm mounting socket to the wheelchair frame in the following sequence:
A.Middle mounting screw and washer.
B.The two outside mounting screws and washers.
C.Torque all three mounting screws to 156‐inch pounds.
NOTE: Make sure the hex bolts are torqued to 156‐inch pounds, otherwise the T‐arm sockets will be capable of rotating around the wheelchair frame.
NOTE: If desired, locking pins can be installed to secure the T‐arm brackets to the wheelchair frame, as shown in FIGURE 6.1.
5.Repeat STEPS 2‐ 4 for the opposite side of the wheelchair.
6.Install the T‐arms into the T‐arm sockets. Refer to Installing/Removing the T‐arms on page 42.
|
| Optional Locking Pins | Mounting |
| Wheelchair |
| |
|
| Screws | |
| Frame |
| |
|
|
| |
|
| Washers | |
Socket |
|
|
|
|
|
|