
 Fig. 1
 Fig. 2
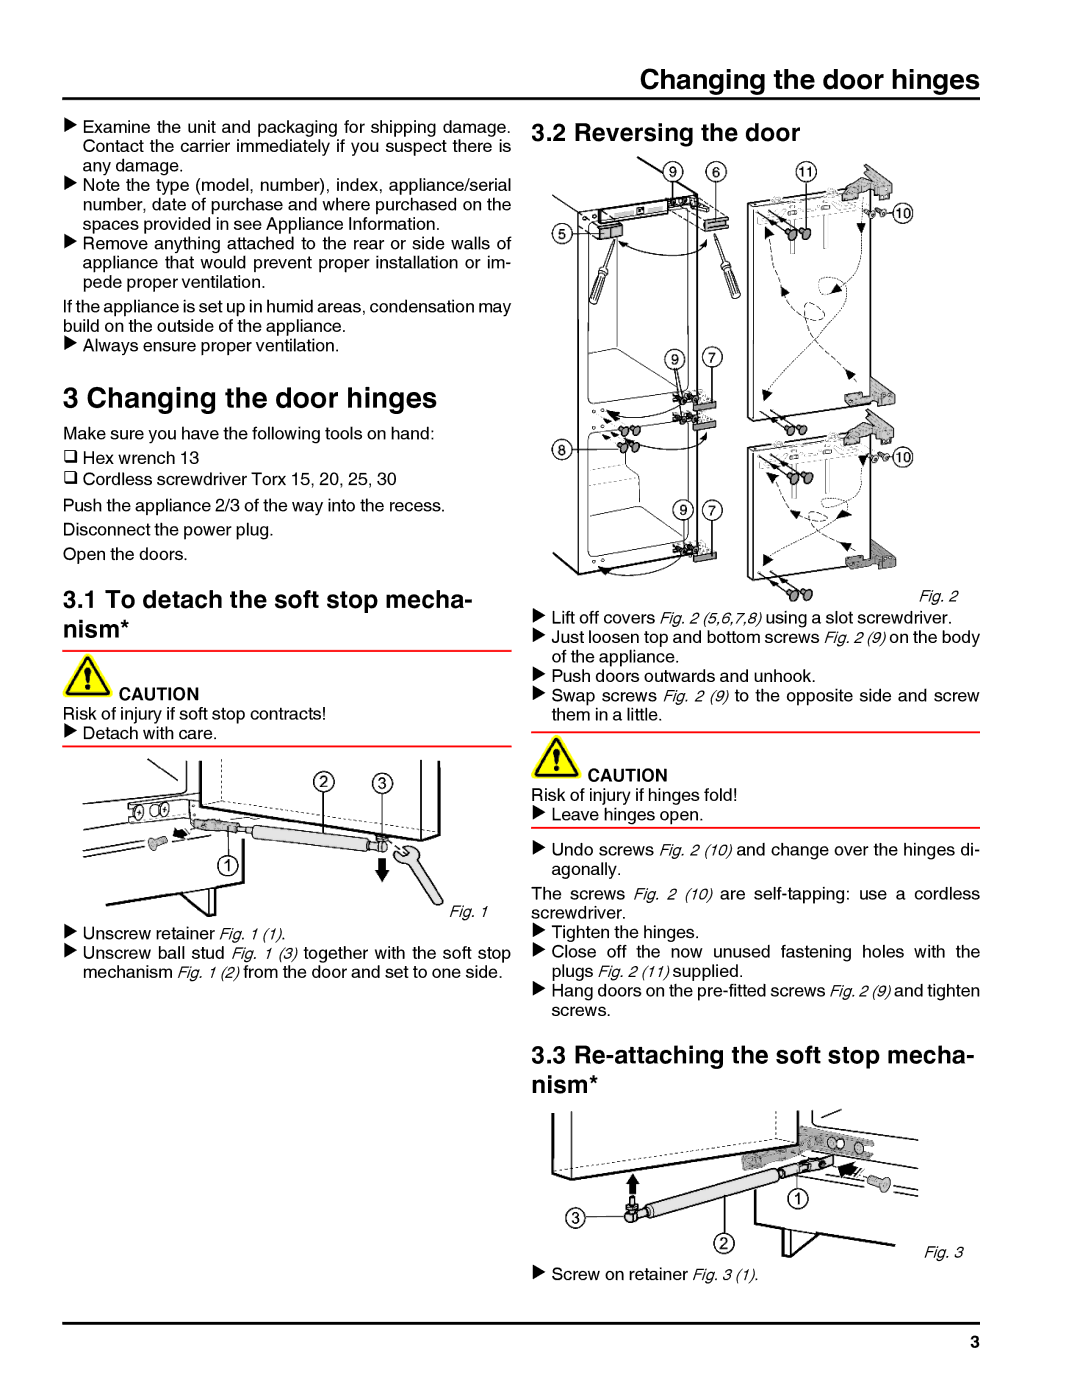
HC1060, HC1011 specifications
The Liebherr HC1011 and HC1060 are advanced tower cranes known for their exceptional performance and reliability in construction projects. These models are part of Liebherr's commitment to engineering excellence, providing efficient solutions for high-rise building and heavy lifting tasks.The Liebherr HC1011 crane features a maximum lifting capacity of 10 tons and a jib length of 50 meters, making it ideal for a wide range of construction applications. It is equipped with a robust hoisting mechanism that ensures smooth and precise lifting operations. The crane's modular design allows for easy assembly and dismantling, reducing setup time on construction sites.
One of the standout features of the HC1011 is its advanced control system, which integrates modern technology to enhance operational efficiency. The crane is equipped with Liebherr’s innovative Litronic control system, providing real-time monitoring and diagnostics. This system enables operators to make informed decisions based on live data, optimizing performance and safety.
The Liebherr HC1060, on the other hand, is designed for larger projects with a maximum lifting capacity of 12 tons and an impressive jib length of 60 meters. This model delivers exceptional reach and versatility, accommodating the needs of complex construction sites. Similar to the HC1011, the HC1060 also features the Litronic control system, enabling operators to manage lifting operations with precision.
Both models are distinguished by their high-quality materials and cutting-edge engineering. The cranes are built to withstand harsh weather conditions and heavy-duty use, ensuring durability and longevity. The ergonomic design of the operator’s cabin provides comfort and visibility, allowing for efficient monitoring of lifting operations.
In terms of technology, the Liebherr HC series incorporates advanced safety features, including overload protection and automatic lubrication systems. These innovations ensure safe operation and reduce maintenance requirements, allowing construction teams to focus on their projects.
In summary, the Liebherr HC1011 and HC1060 tower cranes are exemplary machines in the construction industry, characterized by their heavy lifting capabilities, innovative control systems, and robust construction. Their combination of technology and design makes them ideal for handling demanding construction tasks, ensuring that projects are completed safely and efficiently.