OPERATION
Additional Functions - Figures 9 - 12
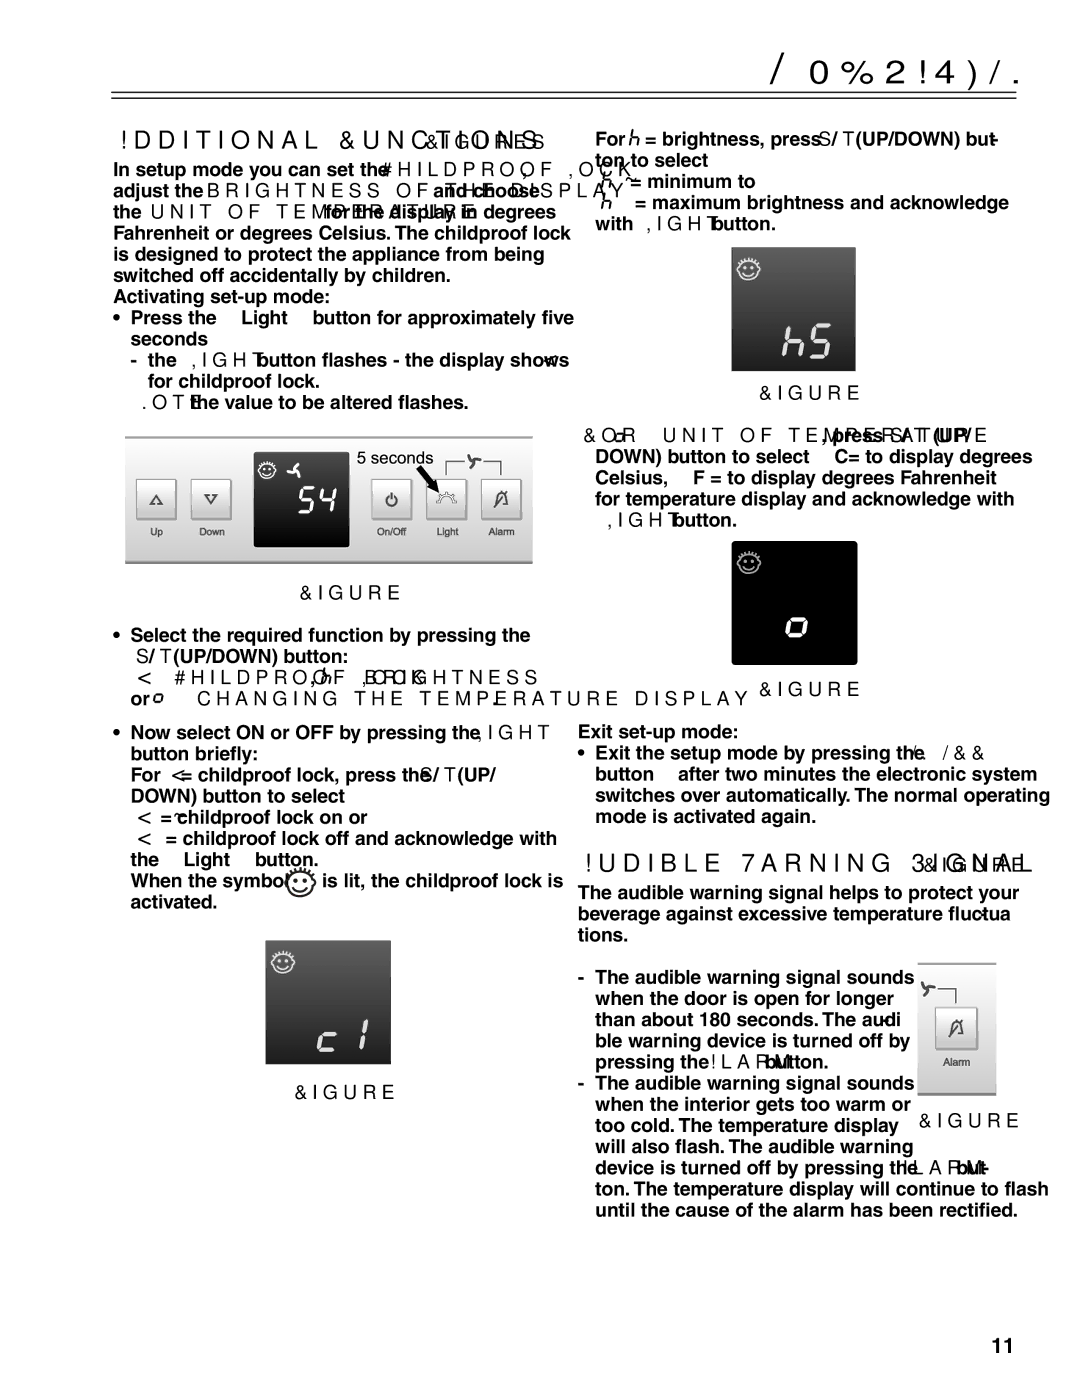
In setup mode you can set the Childproof Lock, adjust the brightness of the display and choose the unit of temperature for the display in degrees Fahrenheit or degrees Celsius. The childproof lock is designed to protect the appliance from being switched off accidentally by children.
Activating
•Press the “Light“ button for approximately five seconds
-the “Light“ button flashes - the display shows C for childproof lock.
Note: the value to be altered flashes.
Figure 9
•Select the required function by pressing the /(UP/DOWN) button:
C = Childproof Lock, ![]()
![]() = brightness
= brightness
or ![]()
![]() = changing the temperature display.
= changing the temperature display.
•Now select ON or OFF by pressing the “Light“ button briefly:
For C = childproof lock, press the /(UP/ DOWN) button to select
C 1 = childproof lock on or
C 0 = childproof lock off and acknowledge with the “Light“ button.
When the symbol ![]()
![]()
![]()
![]()
![]() is lit, the childproof lock is activated.
is lit, the childproof lock is activated.
Figure 10
For ![]()
![]() = brightness, press /(UP/DOWN) but- ton to select
= brightness, press /(UP/DOWN) but- ton to select
![]()
![]() 1 = minimum to
1 = minimum to
![]()
![]() 5 = maximum brightness and acknowledge with “Light“ button.
5 = maximum brightness and acknowledge with “Light“ button.
Figure 11
For ![]()
![]() = unit of temperature, press / (UP/ DOWN) button to select °C= to display degrees Celsius, °F = to display degrees Fahrenheit for temperature display and acknowledge with “Light“ button.
= unit of temperature, press / (UP/ DOWN) button to select °C= to display degrees Celsius, °F = to display degrees Fahrenheit for temperature display and acknowledge with “Light“ button.
Figure 12
Exit
•Exit the setup mode by pressing the ON/OFF button; after two minutes the electronic system switches over automatically. The normal operating mode is activated again.
Audible Warning Signal - Figure 13
The audible warning signal helps to protect your beverage against excessive temperature fluctua- tions.
- The audible warning signal sounds when the door is open for longer than about 180 seconds. The audi- ble warning device is turned off by pressing the Alarm button.
- The audible warning signal sounds when the interior gets too warm or
too cold. The temperature display will also flash. The audible warning
device is turned off by pressing the Alarm but- ton. The temperature display will continue to flash until the cause of the alarm has been rectified.
11
