FIGURE 42 | 92 | 25 |
|
|
|
| |
|
| 103 AB CABLE | |
| 42 |
| 91 |
|
|
| |
SEE DETAIL 39 |
| 49 |
|
|
|
| |
|
| 3/8 X | 85 |
|
|
| DETAIL 42 |
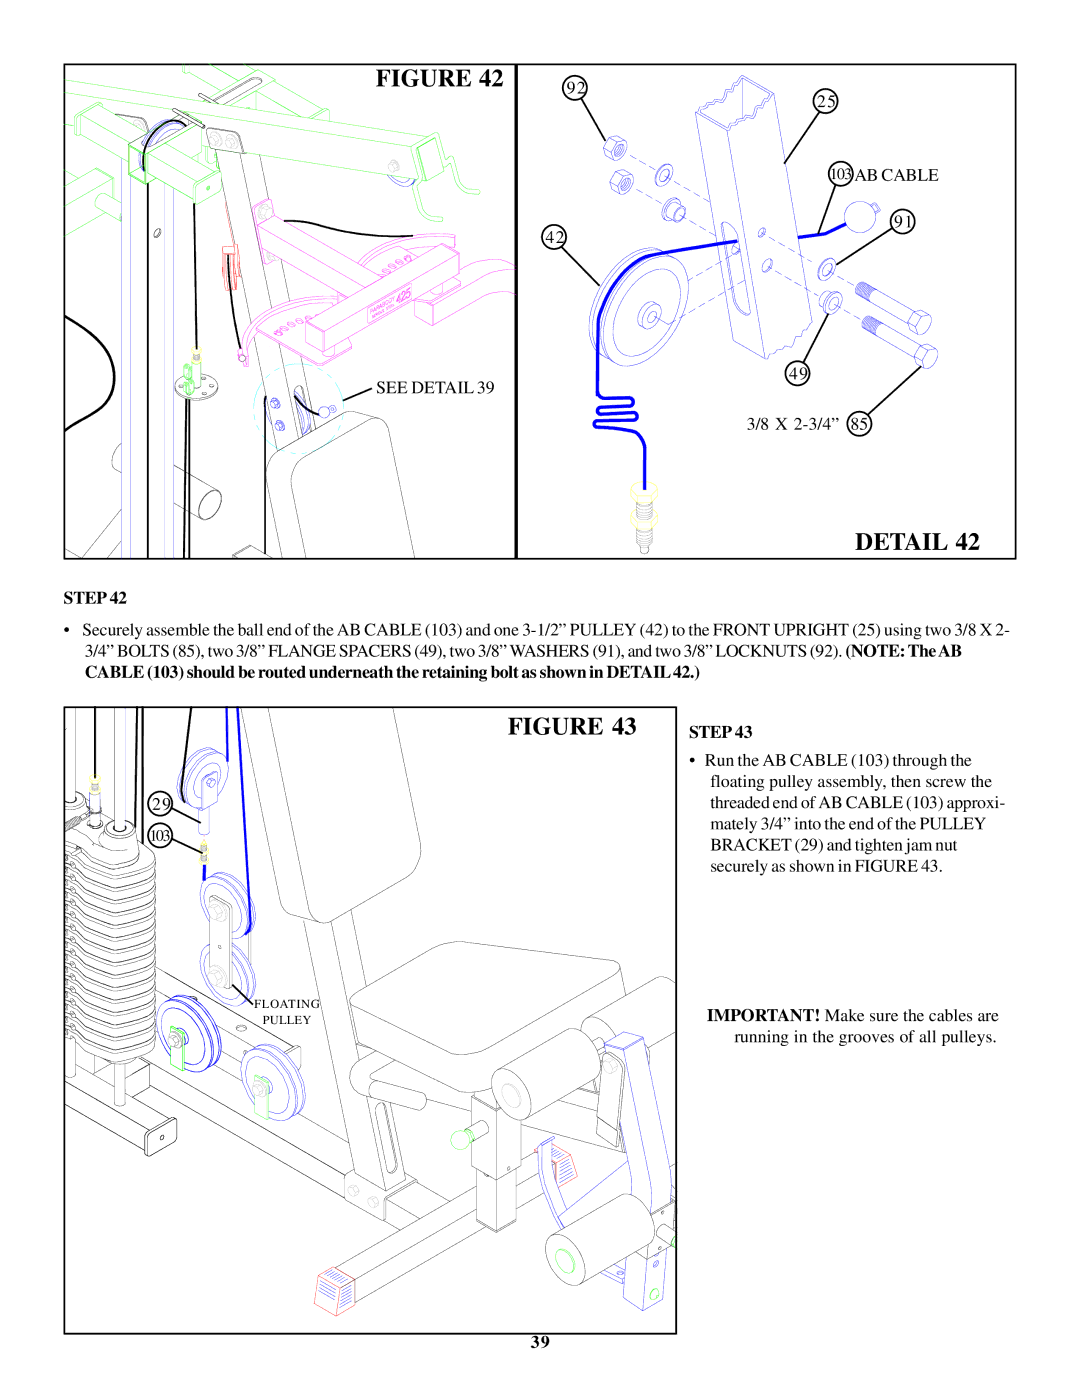
STEP 42
•Securely assemble the ball end of the AB CABLE (103) and one
CABLE (103) should be routed underneath the retaining bolt as shown in DETAIL42.)
FIGURE 43 |
29 |
103 |
FLOATING |
PULLEY |
39 |
STEP 43
•Run the AB CABLE (103) through the floating pulley assembly, then screw the threaded end of AB CABLE (103) approxi- mately 3/4” into the end of the PULLEY BRACKET (29) and tighten jam nut securely as shown in FIGURE 43.
IMPORTANT! Make sure the cables are running in the grooves of all pulleys.
