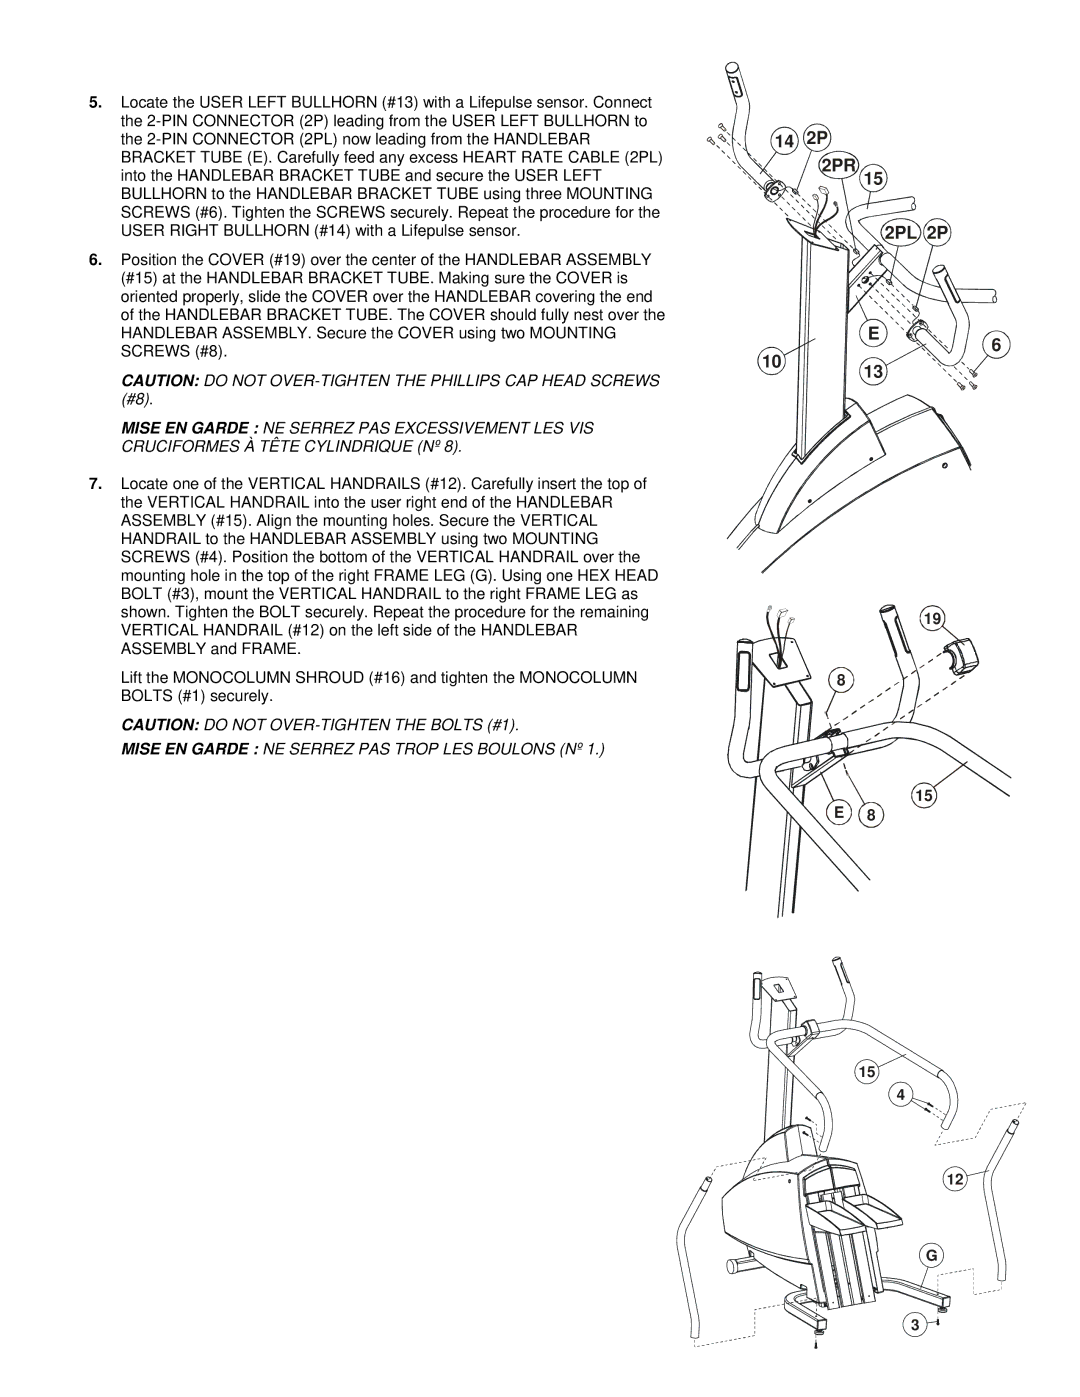
5.Locate the USER LEFT BULLHORN (#13) with a Lifepulse sensor. Connect the
6.Position the COVER (#19) over the center of the HANDLEBAR ASSEMBLY (#15) at the HANDLEBAR BRACKET TUBE. Making sure the COVER is oriented properly, slide the COVER over the HANDLEBAR covering the end of the HANDLEBAR BRACKET TUBE. The COVER should fully nest over the HANDLEBAR ASSEMBLY. Secure the COVER using two MOUNTING SCREWS (#8).
CAUTION: DO NOT
MISE EN GARDE : NE SERREZ PAS EXCESSIVEMENT LES VIS CRUCIFORMES À TÊTE CYLINDRIQUE (Nº 8).
7.Locate one of the VERTICAL HANDRAILS (#12). Carefully insert the top of the VERTICAL HANDRAIL into the user right end of the HANDLEBAR ASSEMBLY (#15). Align the mounting holes. Secure the VERTICAL HANDRAIL to the HANDLEBAR ASSEMBLY using two MOUNTING SCREWS (#4). Position the bottom of the VERTICAL HANDRAIL over the mounting hole in the top of the right FRAME LEG (G). Using one HEX HEAD BOLT (#3), mount the VERTICAL HANDRAIL to the right FRAME LEG as shown. Tighten the BOLT securely. Repeat the procedure for the remaining VERTICAL HANDRAIL (#12) on the left side of the HANDLEBAR ASSEMBLY and FRAME.
Lift the MONOCOLUMN SHROUD (#16) and tighten the MONOCOLUMN BOLTS (#1) securely.
CAUTION: DO NOT
MISE EN GARDE : NE SERREZ PAS TROP LES BOULONS (Nº 1.)
14 2P
2PR 15


 2PL 2P
E | 6 |
|
10 13
19
8
15
E 8
15
4
12
G
3