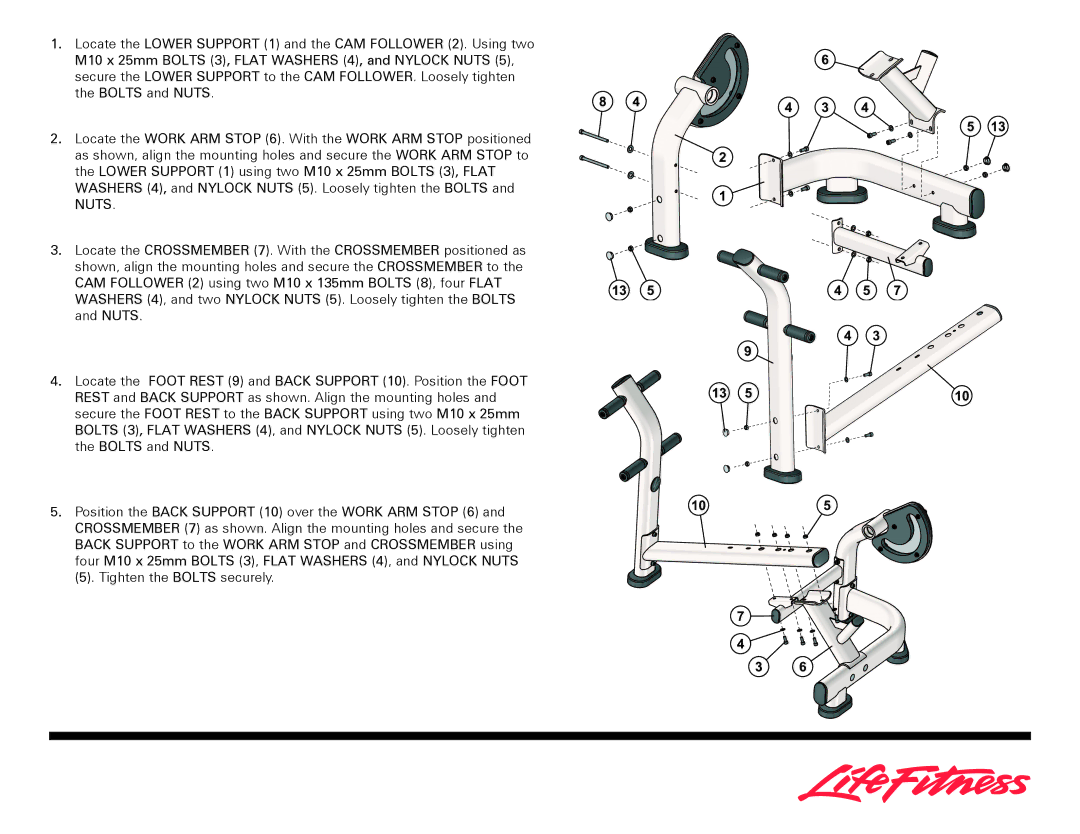
1.Locate the LOWER SUPPORT (1) and the CAM FOLLOWER (2). Using two M10 x 25mm BOLTS (3), FLAT WASHERS (4), and NYLOCK NUTS (5), secure the LOWER SUPPORT to the CAM FOLLOWER. Loosely tighten the BOLTS and NUTS.
2.Locate the WORK ARM STOP (6). With the WORK ARM STOP positioned as shown, align the mounting holes and secure the WORK ARM STOP to the LOWER SUPPORT (1) using two M10 x 25mm BOLTS (3), FLAT WASHERS (4), and NYLOCK NUTS (5). Loosely tighten the BOLTS and NUTS.
3.Locate the CROSSMEMBER (7). With the CROSSMEMBER positioned as shown, align the mounting holes and secure the CROSSMEMBER to the CAM FOLLOWER (2) using two M10 x 135mm BOLTS (8), four FLAT WASHERS (4), and two NYLOCK NUTS (5). Loosely tighten the BOLTS and NUTS.
4.Locate the FOOT REST (9) and BACK SUPPORT (10). Position the FOOT REST and BACK SUPPORT as shown. Align the mounting holes and secure the FOOT REST to the BACK SUPPORT using two M10 x 25mm BOLTS (3), FLAT WASHERS (4), and NYLOCK NUTS (5). Loosely tighten the BOLTS and NUTS.
5.Position the BACK SUPPORT (10) over the WORK ARM STOP (6) and CROSSMEMBER (7) as shown. Align the mounting holes and secure the BACK SUPPORT to the WORK ARM STOP and CROSSMEMBER using four M10 x 25mm BOLTS (3), FLAT WASHERS (4), and NYLOCK NUTS
(5). Tighten the BOLTS securely.
