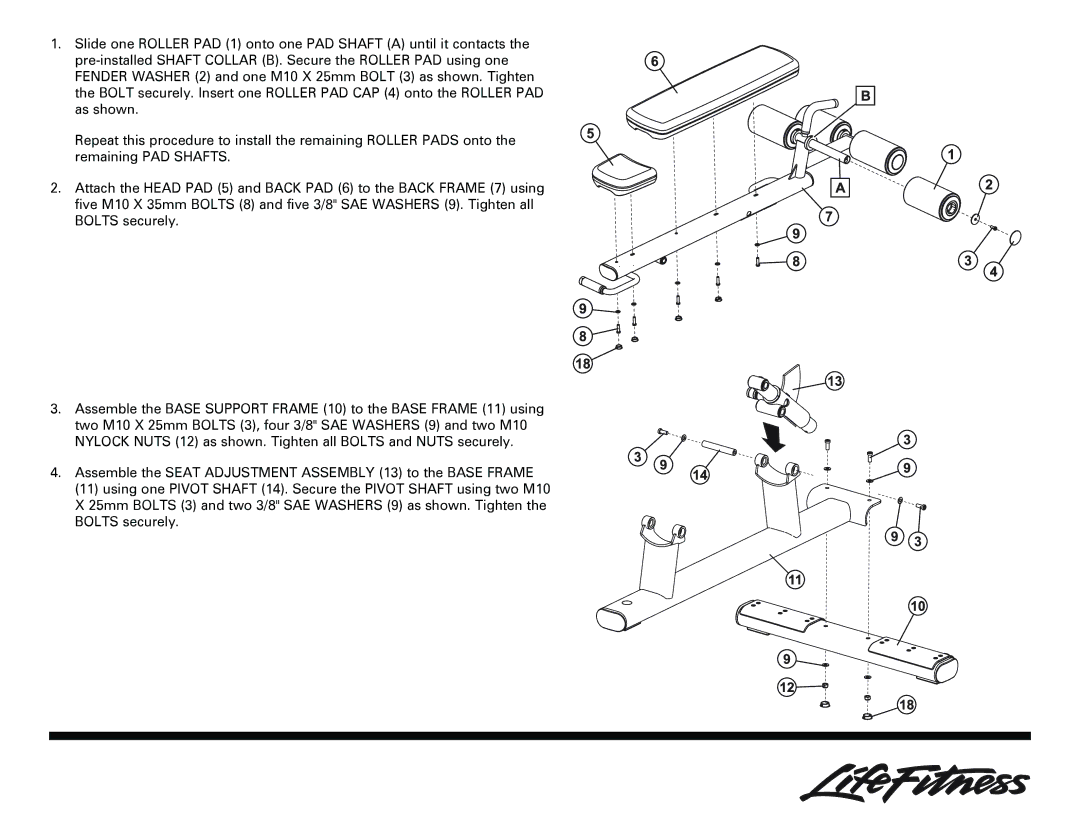
1.Slide one ROLLER PAD (1) onto one PAD SHAFT (A) until it contacts the
Repeat this procedure to install the remaining ROLLER PADS onto the remaining PAD SHAFTS.
2.Attach the HEAD PAD (5) and BACK PAD (6) to the BACK FRAME (7) using five M10 X 35mm BOLTS (8) and five 3/8" SAE WASHERS (9). Tighten all BOLTS securely.
3.Assemble the BASE SUPPORT FRAME (10) to the BASE FRAME (11) using two M10 X 25mm BOLTS (3), four 3/8" SAE WASHERS (9) and two M10 NYLOCK NUTS (12) as shown. Tighten all BOLTS and NUTS securely.
4.Assemble the SEAT ADJUSTMENT ASSEMBLY (13) to the BASE FRAME (11) using one PIVOT SHAFT (14). Secure the PIVOT SHAFT using two M10 X 25mm BOLTS (3) and two 3/8" SAE WASHERS (9) as shown. Tighten the BOLTS securely.
