2 |
5 |
1 |
3 |
FIGURE 3 |
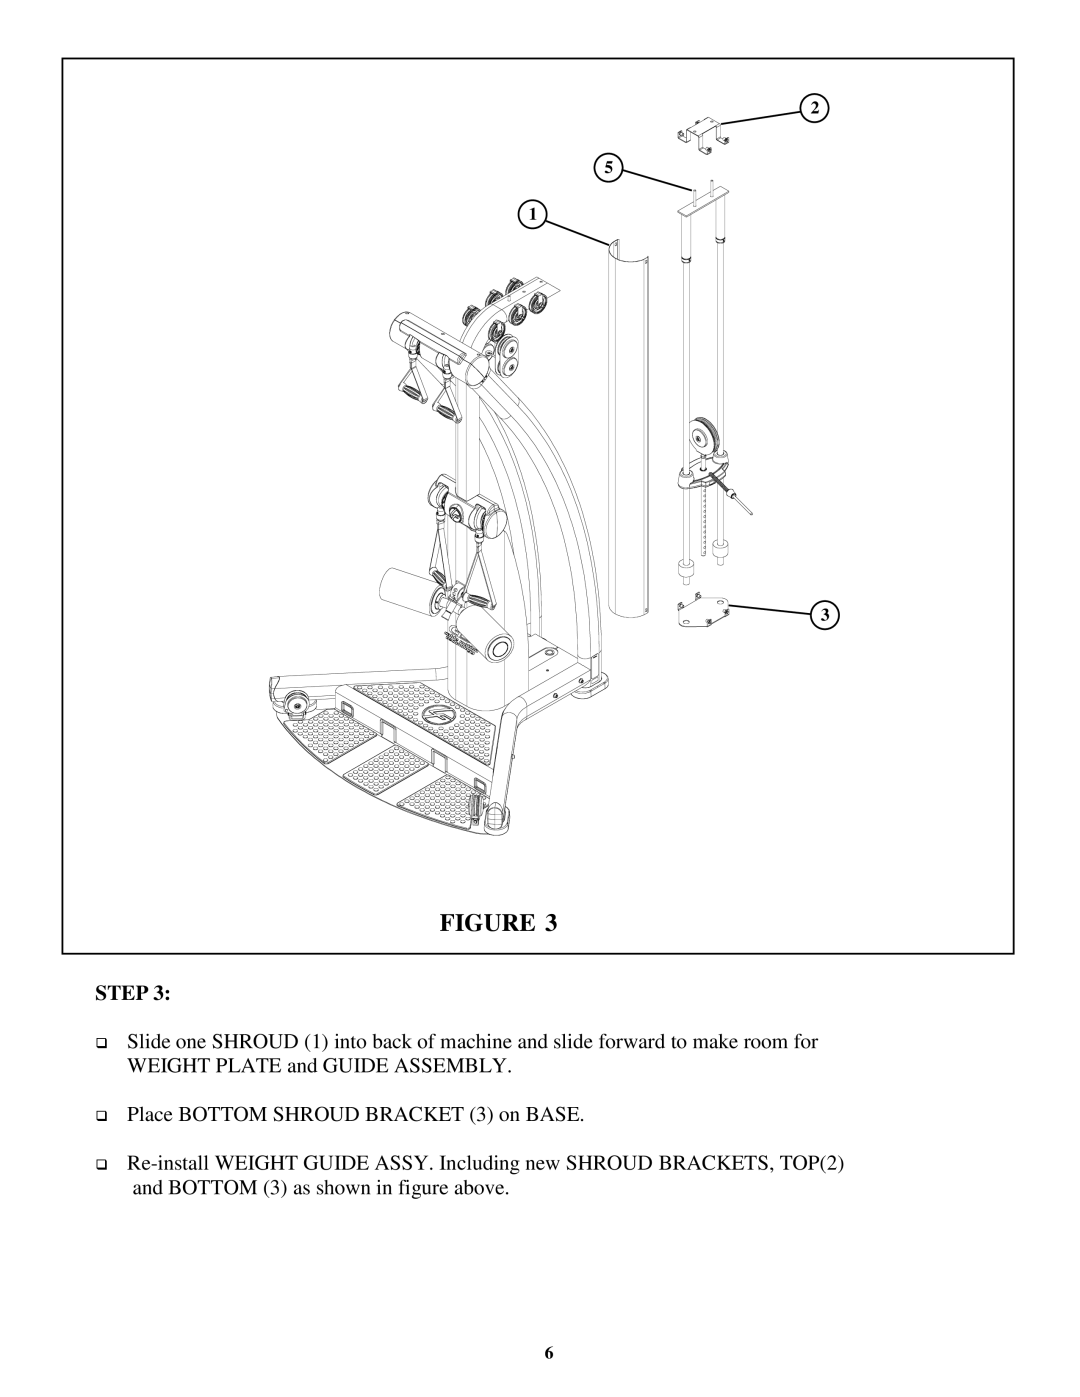
STEP 3:
Slide one SHROUD (1) into back of machine and slide forward to make room for WEIGHT PLATE and GUIDE ASSEMBLY.
Place BOTTOM SHROUD BRACKET (3) on BASE.
6
2 |
5 |
1 |
3 |
FIGURE 3 |
Slide one SHROUD (1) into back of machine and slide forward to make room for WEIGHT PLATE and GUIDE ASSEMBLY.
Place BOTTOM SHROUD BRACKET (3) on BASE.
6