R100APM Premier Rower ASSEMBLY INSTRUCTIONS
STEP 1
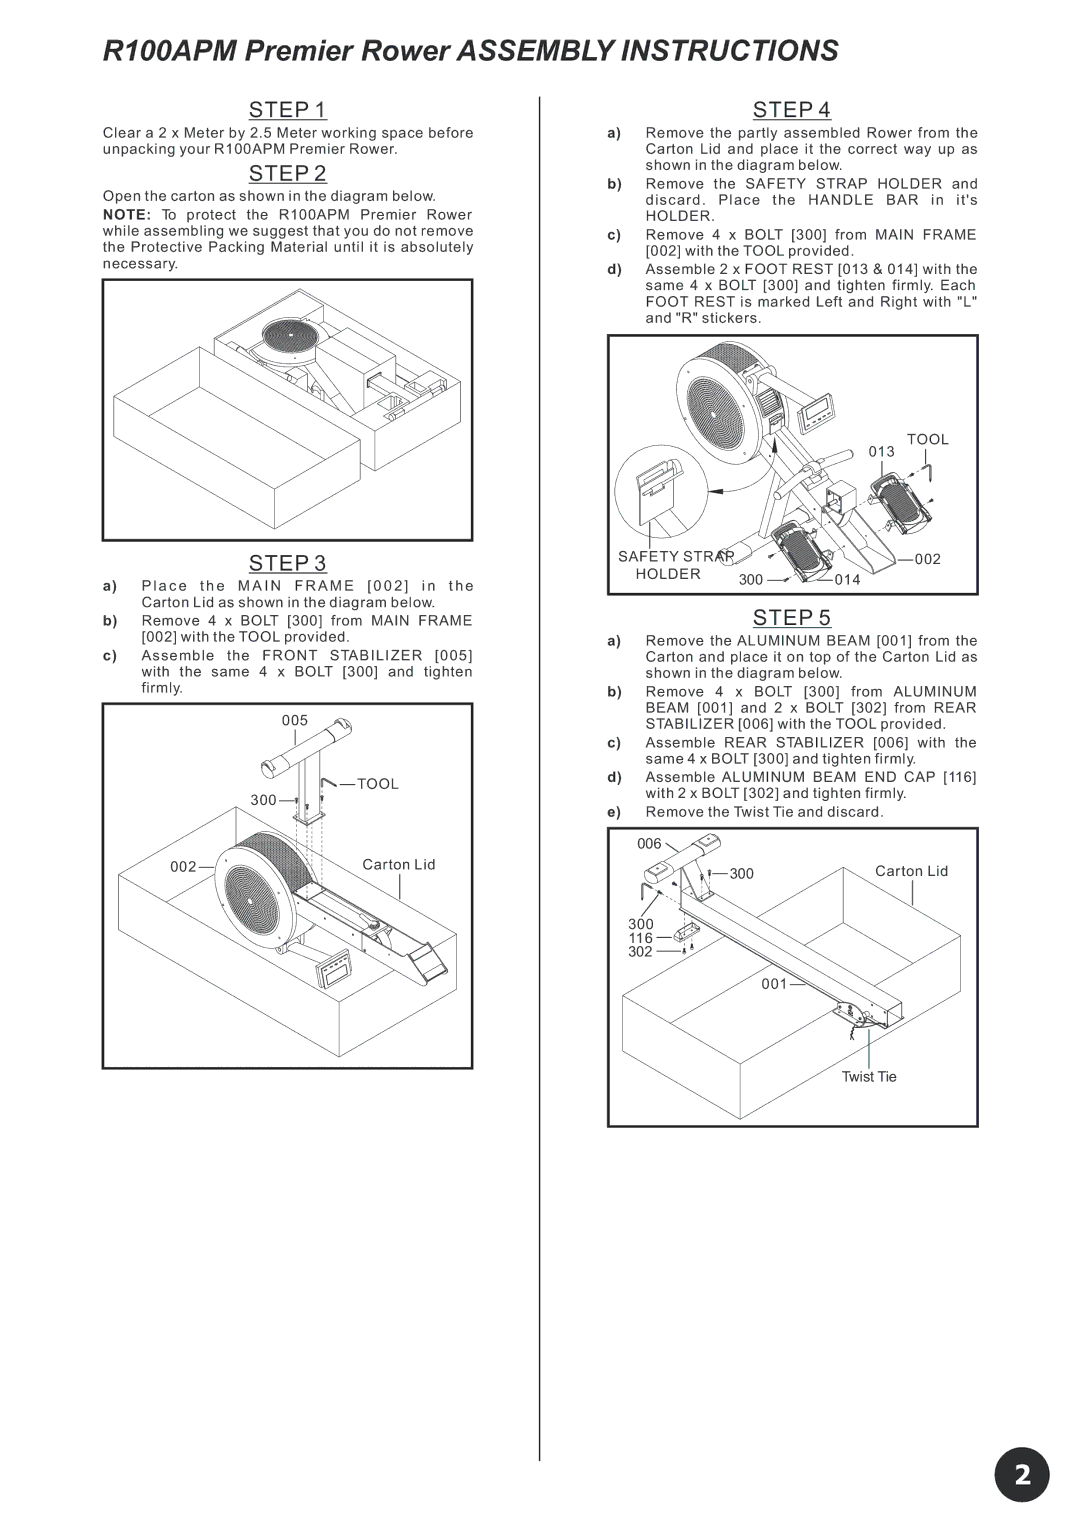
Clear a 2 x Meter by 2.5 Meter working space before unpacking your R100APM Premier Rower.
STEP 2
Open the carton as shown in the diagram below. NOTE: To protect the R100APM Premier Rower while assembling we suggest that you do not remove the Protective Packing Material until it is absolutely necessary.
STEP 3
a) | P l a c e t h e M A I N F R A M E [ 0 0 2 ] i n t h e | |
| Carton Lid as shown in the diagram below. | |
b) Remove 4 x BOLT [300] from MAIN FRAME | ||
| [002] with the TOOL provided. | |
c) Assemble | the FRONT STABILIZER [005] | |
| with the same 4 x BOLT [300] and tighten | |
| firmly. |
|
|
| 005 |
|
| TOOL |
|
| 300 |
| 002 | Carton Lid |
STEP 4
a)Remove the partly assembled Rower from the Carton Lid and place it the correct way up as shown in the diagram below.
b)Remove the SAFETY STRAP HOLDER and discard . Place the HANDLE BAR in it's
HOLDER.
c)Remove 4 x BOLT [300] from MAIN FRAME [002] with the TOOL provided.
d)Assemble 2 x FOOT REST [013 & 014] with the same 4 x BOLT [300] and tighten firmly. Each FOOT REST is marked Left and Right with "L" and "R" stickers.
|
| TOOL |
|
| 013 |
SAFETY STRAP |
| 002 |
HOLDER | 300 | 014 |
|
STEP 5
a)Remove the ALUMINUM BEAM [001] from the Carton and place it on top of the Carton Lid as shown in the diagram below.
b)Remove 4 x BOLT [300] from ALUMINUM BEAM [001] and 2 x BOLT [302] from REAR STABILIZER [006] with the TOOL provided.
c)Assemble REAR STABILIZER [006] with the same 4 x BOLT [300] and tighten firmly.
d)Assemble ALUMINUM BEAM END CAP [116] with 2 x BOLT [302] and tighten firmly.
e)Remove the Twist Tie and discard.
006 |
|
300 | Carton Lid |
300 |
|
116 |
|
302 |
|
| 001 |
| Twist Tie |
2
