SLOITED GRID CEILING CLIPS
lNSTRIJCTION SHEET NO,
IS:6088
0291
FOR USE WITH BASIC OR ADVENT L~ESPAN” TRACK SYSTEMS ONLY
READ AND UNDERSTAND THESE INSTRUCTIONS BEFORE INSTALLING FIXTURE.
This fixture is intended for installation in accordance with the National Electrical Code and local regulations. To assure full compliance with local codes and regulations, check with your local electrical inspector before installation. To prevent electrical shock, turn off electricity at fuse box before proceeding.
Retain these instructions for reference.
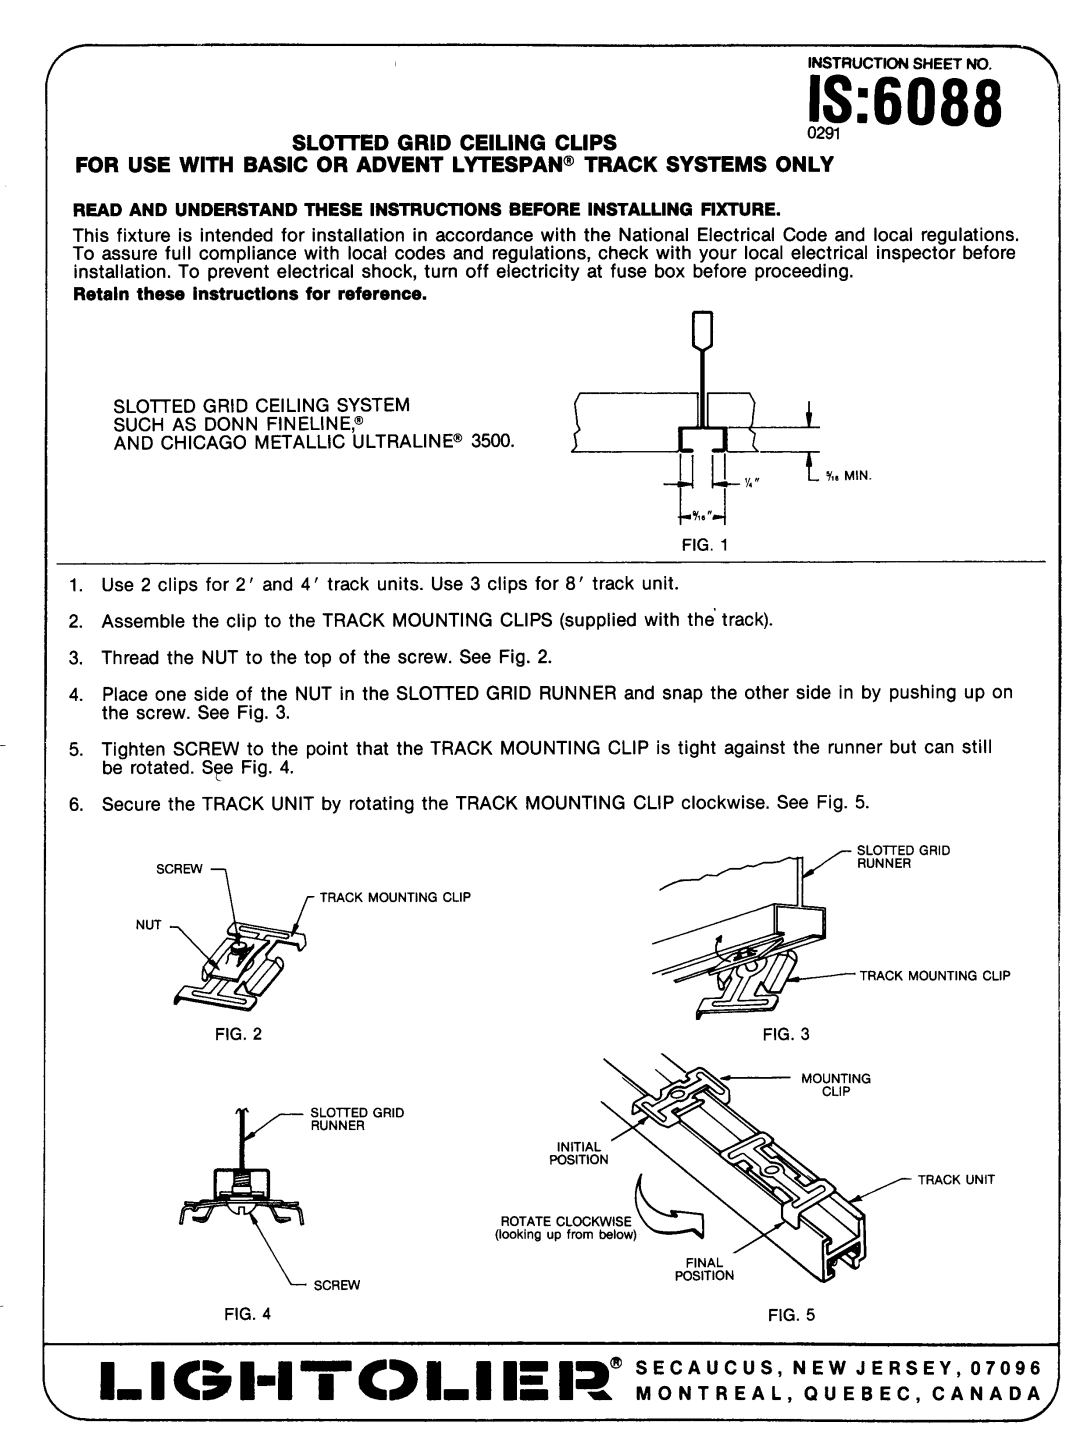
SLOITED GRID CEILING SYSTEM
SUCH AS DONN FINELINEP) 1
AND CHICAGO METALLIC ULTRALINE” 3500.
“ L<%,..
%8”
? J
FIG. 1
1.Use 2 clips for 2’ and 4’ track units. Use 3 clips for 8’ track unit.
2.Assemble the clip to the TRACK MOUNTING CLIPS (supplied with the track).
3.Thread the NUT to the top of the screw. See Fig. 2.
4.Place one side of the NUT in the SLOTTED GRID RUNNER and snap the other side in by pushing up on the screw. See Fig. 3.
5.Tighten SCREW to the point that the TRACK MOUNTING CLIP is tight against the runner but can still be rotated. S~e Fig. 4.
6.Secure the TRACK UNIT by rotating the TRACK MOUNTING CLIP clockwise. See Fig. 5.
| SLOITED GRID |
SCREW | RUNNER |
|
TRACK MOUNTING CLIP
NUT
TRACK MOUNTING CLIP
&
FIG. 2 | FIG. 3 |
—MOUNTING
SLOITED GRID
RUNNER
INITIAL
POSITION
TRACK UNIT
ROTATE CLOCKWISE (looking up from below)
FINAL
4POSITION SCREW
FIG. 4 | FIG. 5 |
1- I <5