C12 specifications
Lightolier C12 is a remarkable lighting solution that has made a significant impact in various commercial and residential settings. Known for its contemporary design and advanced features, the C12 series is engineered to deliver high-performance lighting with versatility and efficiency.One of the standout characteristics of the Lightolier C12 is its sleek and modern aesthetic. The fixture boasts a minimalist design that seamlessly integrates into a wide range of architectural styles. Whether installed in offices, retail spaces, or homes, the C12 enhances the ambiance without overwhelming the décor. The flush mount option adds to its adaptability, making it suitable for low ceilings while providing adequate illumination.
The C12 is equipped with advanced LED technology, which significantly reduces energy consumption compared to traditional lighting solutions. This not only translates into lower utility bills but also contributes to a smaller carbon footprint. The longevity of LED lights ensures that maintenance and replacement costs are minimized, offering a smart investment for users in both the short and long term.
Another impressive feature of the Lightolier C12 is its customizable lighting options. Users can choose from a variety of color temperatures, offering the flexibility to create the desired mood and atmosphere for any setting. From warm white for cozy living spaces to cool white for active work environments, the C12 can adapt to meet specific lighting needs.
Moreover, the C12 incorporates dimming capabilities, allowing for precise control over brightness levels. This feature not only enhances energy efficiency by providing the ability to adjust light output according to necessity but also supports the creation of personalized environments suited to different activities, whether it be reading, working, or entertaining guests.
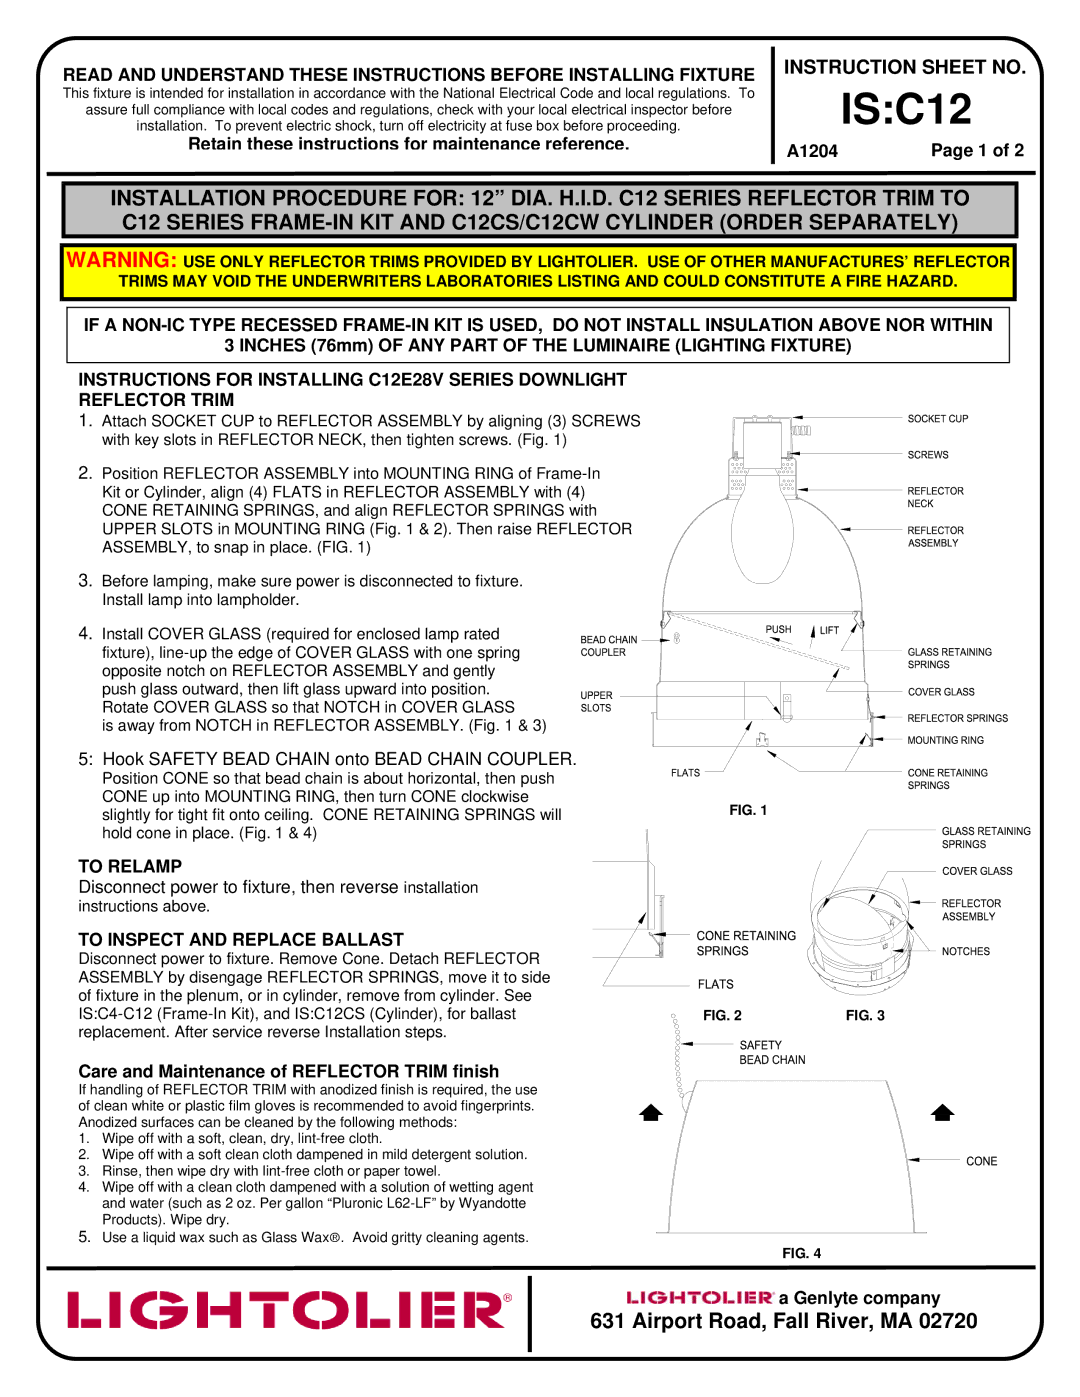
The installation of the C12 is straightforward, with a design that accommodates easy mounting and integration into existing systems. Its durable construction ensures long-lasting performance, making it a reliable choice for various applications.
In summary, the Lightolier C12 represents a blend of style, technology, and functionality. With its sleek design, energy-efficient LED technology, customizable options, and ease of installation, the C12 exemplifies modern lighting solutions that cater to both aesthetic and practical requirements. Its contribution to creating vibrant, adaptable spaces makes it a standout choice for those seeking quality lighting solutions.