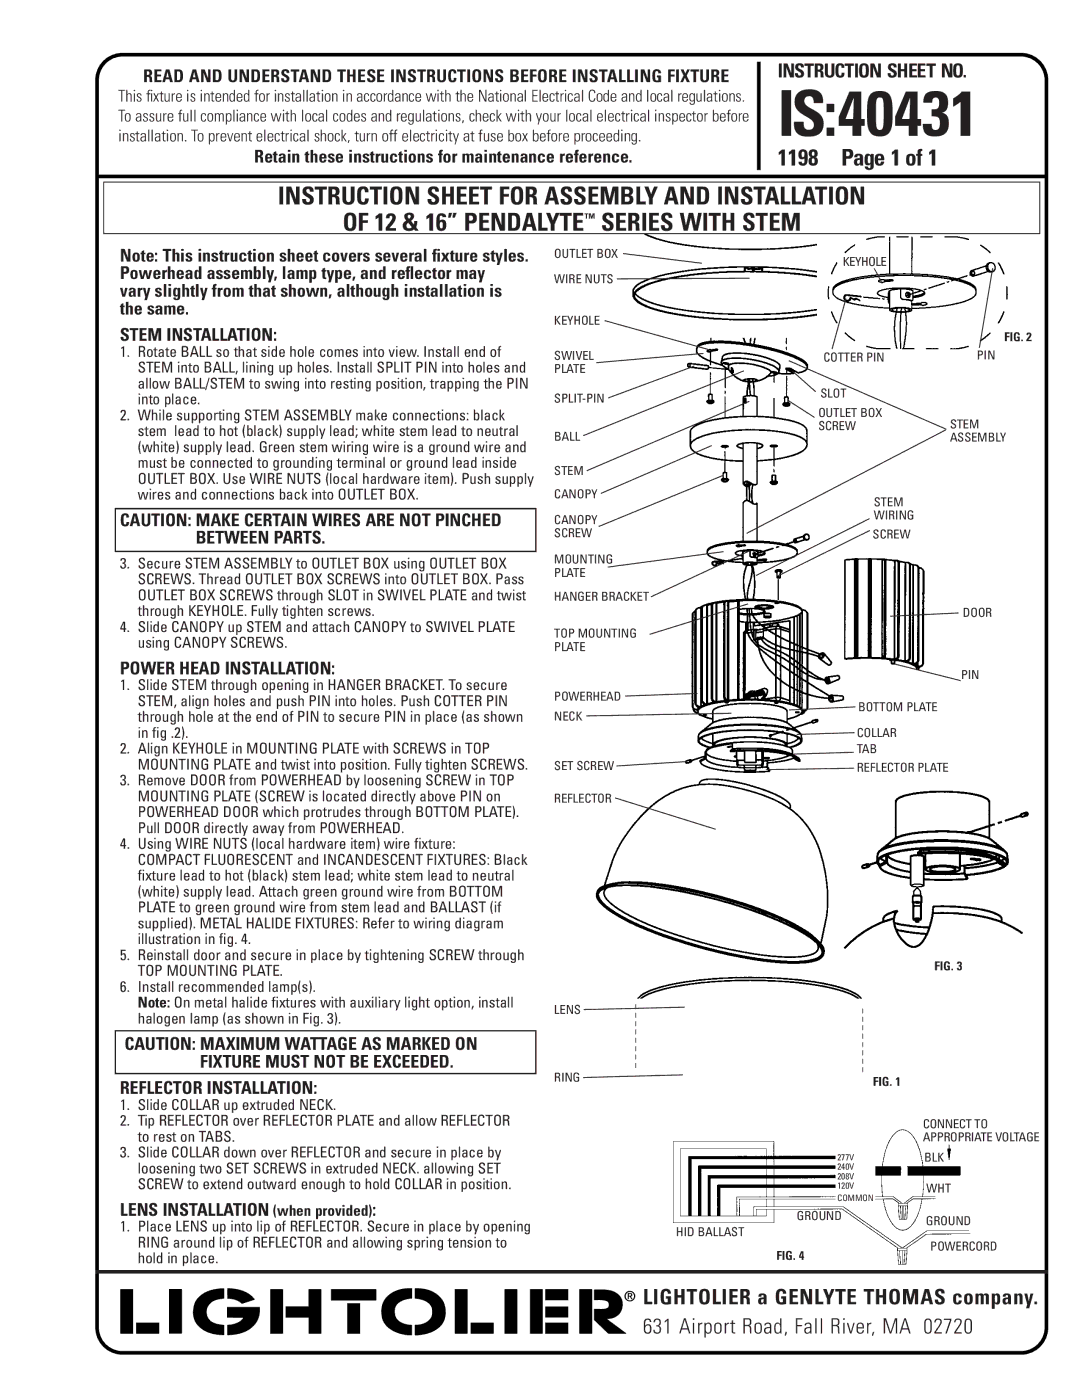
IS:40431 specifications
Lightolier IS:40431 is an advanced lighting solution designed to enhance both residential and commercial environments. This innovative fixture integrates contemporary design with cutting-edge technology, making it a versatile choice for a variety of applications.One of the key features of the IS:40431 is its energy efficiency. This fixture utilizes advanced LED technology, which not only reduces energy consumption but also prolongs the lifespan of the lighting. With a lifespan of up to 50,000 hours, users can enjoy significant cost savings while minimizing the frequency of replacements.
The design of the Lightolier IS:40431 is sleek and modern, making it a perfect fit for both minimalist and traditional settings. Its low-profile design allows it to blend seamlessly with the ceiling, providing an unobtrusive lighting solution that does not compromise on aesthetics. The fixture is available in various finishes, allowing for customization to match the decor of any space.
In terms of functionality, the IS:40431 boasts adjustable color temperatures. With a simple adjustment, users can switch between warm and cool light, providing flexibility to create the desired ambiance for any occasion. This feature is especially beneficial in settings such as offices, where different lighting atmospheres may be needed throughout the day.
The Lightolier IS:40431 is also designed with ease of installation in mind. The fixture comes with a user-friendly mounting system that simplifies the installation process, allowing both professionals and DIY enthusiasts to set it up with relative ease. Moreover, the fixture is compatible with most dimmer switches, enabling users to easily control the brightness to suit their preferences.
Another significant characteristic of the IS:40431 is its excellent lumen output. This ensures that spaces are adequately illuminated, enhancing visibility and comfort. The fixture is suitable for various mounting applications, including recessed ceiling mounts, making it highly adaptable for different room layouts.
Overall, the Lightolier IS:40431 stands out as an exemplary lighting solution that combines modern design, energy efficiency, and versatile functionality. Whether illuminating a workspace, enhancing a retail environment, or creating an inviting home atmosphere, this fixture delivers on all fronts, making it a worthwhile investment for anyone seeking quality lighting.