IS-LSA specifications
Lightolier IS-LSA is an innovative lighting solution designed to enhance both the functionality and aesthetics of various spaces. This product is engineered with advanced technologies and features that make it a preferred choice for both commercial and residential applications.At the core of the Lightolier IS-LSA is its exceptional LED technology. LEDs are known for their energy efficiency, longer lifespan, and superior brightness. The Lightolier IS-LSA utilizes high-quality LED components that deliver substantial energy savings compared to traditional incandescent or fluorescent lighting. This attribute not only reduces energy costs but also contributes to a smaller carbon footprint, aligning with sustainability goals increasingly prioritized by businesses and homeowners alike.
One of the standout features of the Lightolier IS-LSA is its versatility in design. Available in various styles and finishes, the product can be seamlessly integrated into a wide range of interior designs, from modern and minimalist to more traditional aesthetics. This adaptability makes it an ideal choice for offices, retail spaces, galleries, and residential environments. The sleek design also ensures that the luminaires do not overwhelm the space, providing subtle yet effective illumination.
The Lightolier IS-LSA also boasts excellent color rendering capabilities. With a high CRI (Color Rendering Index), the fixture ensures that colors appear vibrant and true to life when illuminated. This characteristic is particularly beneficial in retail settings where displaying products accurately can influence purchasing decisions, as well as in art galleries where the true colors of artworks need to be showcased.
Another important aspect of the Lightolier IS-LSA is its advanced dimming capabilities. The fixture is compatible with various dimming systems, allowing users to easily adjust the brightness level according to their preferences or to suit different activities and moods. This feature enhances the overall user experience, enabling personalized lighting control.
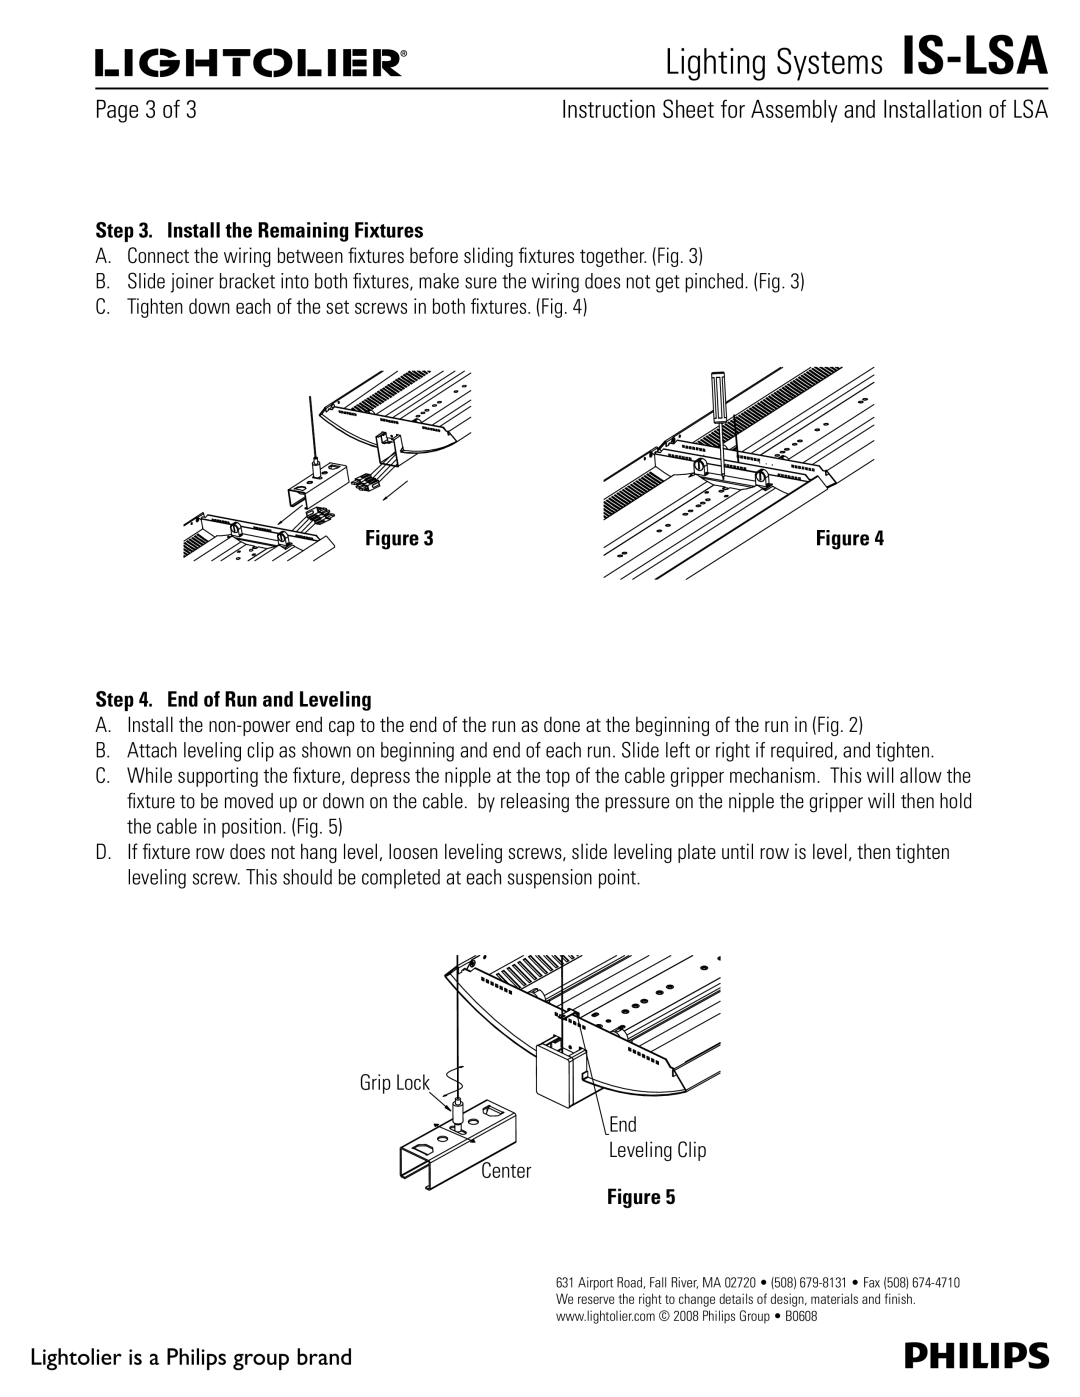
Moreover, the Lightolier IS-LSA is designed for easy installation and maintenance. Its lightweight structure and user-friendly mounting system simplify the installation process, making it an attractive option for contractors and DIY enthusiasts alike. Maintenance is also hassle-free, with the long lifespan of the LED components reducing the frequency of replacements.
In summary, the Lightolier IS-LSA represents a blend of innovative technology, aesthetic versatility, and user-friendly features. With its energy-efficient LED technology, excellent color rendering, dimming capabilities, and easy installation, it is a standout choice for individuals and businesses aiming to improve their lighting solutions while promoting sustainability and functionality. With the growing demand for efficient lighting, the Lightolier IS-LSA is poised to meet these needs effectively.

