User Manual KVM Terminal LCD
2-3 The Display Controls
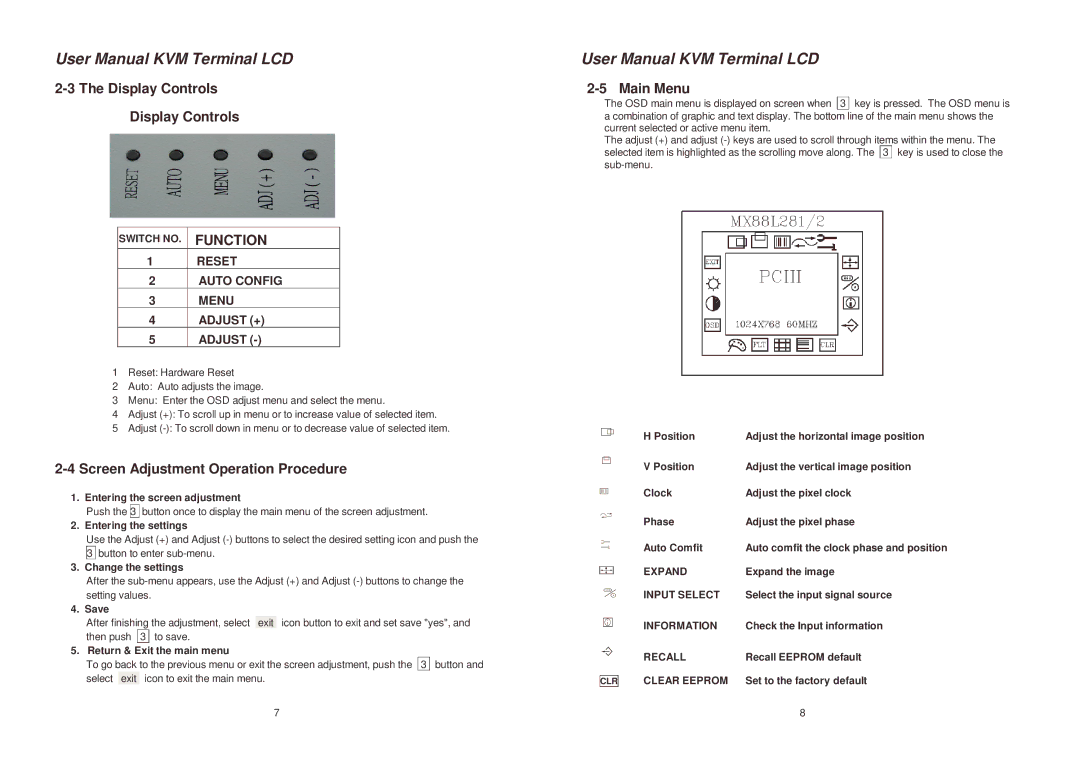
Display Controls
SWITCH NO. | FUNCTION |
1 | RESET |
2 | AUTO CONFIG |
3 | MENU |
4 | ADJUST (+) |
5 | ADJUST |
1Reset: Hardware Reset
2Auto: Auto adjusts the image.
3Menu: Enter the OSD adjust menu and select the menu.
4Adjust (+): To scroll up in menu or to increase value of selected item.
5Adjust
2-4 Screen Adjustment Operation Procedure
1. Entering the screen adjustment
Push the 3 button once to display the main menu of the screen adjustment.
2. Entering the settings
Use the Adjust (+) and Adjust
3button to enter
3.Change the settings
After the
4. Save
After finishing the adjustment, select exit icon button to exit and set save "yes", and
then push 3 to save.
5. Return & Exit the main menu
To go back to the previous menu or exit the screen adjustment, push the 3 button and select exit icon to exit the main menu.
User Manual KVM Terminal LCD
2-5 Main Menu
The OSD main menu is displayed on screen when 3 key is pressed. The OSD menu is a combination of graphic and text display. The bottom line of the main menu shows the current selected or active menu item.
The adjust (+) and adjust
| H Position | Adjust the horizontal image position |
| V Position | Adjust the vertical image position |
| Clock | Adjust the pixel clock |
| Phase | Adjust the pixel phase |
| Auto Comfit | Auto comfit the clock phase and position |
| EXPAND | Expand the image |
| INPUT SELECT | Select the input signal source |
| INFORMATION | Check the Input information |
| RECALL | Recall EEPROM default |
| CLEAR EEPROM | Set to the factory default |
CLR |
7 | 8 |
