Button Locations and Functions
1 | 2 | 3 | 4 | 5 |
| 28 |
|
27 | EQ | 1 |
| ||
| 26 |
|
25 | AS/PS 2 | |
SPK |
| FM | ST |
|
PUSH |
|
|
SPEAKER |
| |
A | B | 6 |
|
| 7 |
AUX | AM/FM DISC | 8 |
24
23 ![]() SLP 3
SLP 3
22
21 ![]() ALM 4
ALM 4
20
19 ![]() DISP 5
DISP 5
18
17 ![]() DIM 6
DIM 6
RESET AV HEADPHONES
16 15 14
9
10
11
12
13
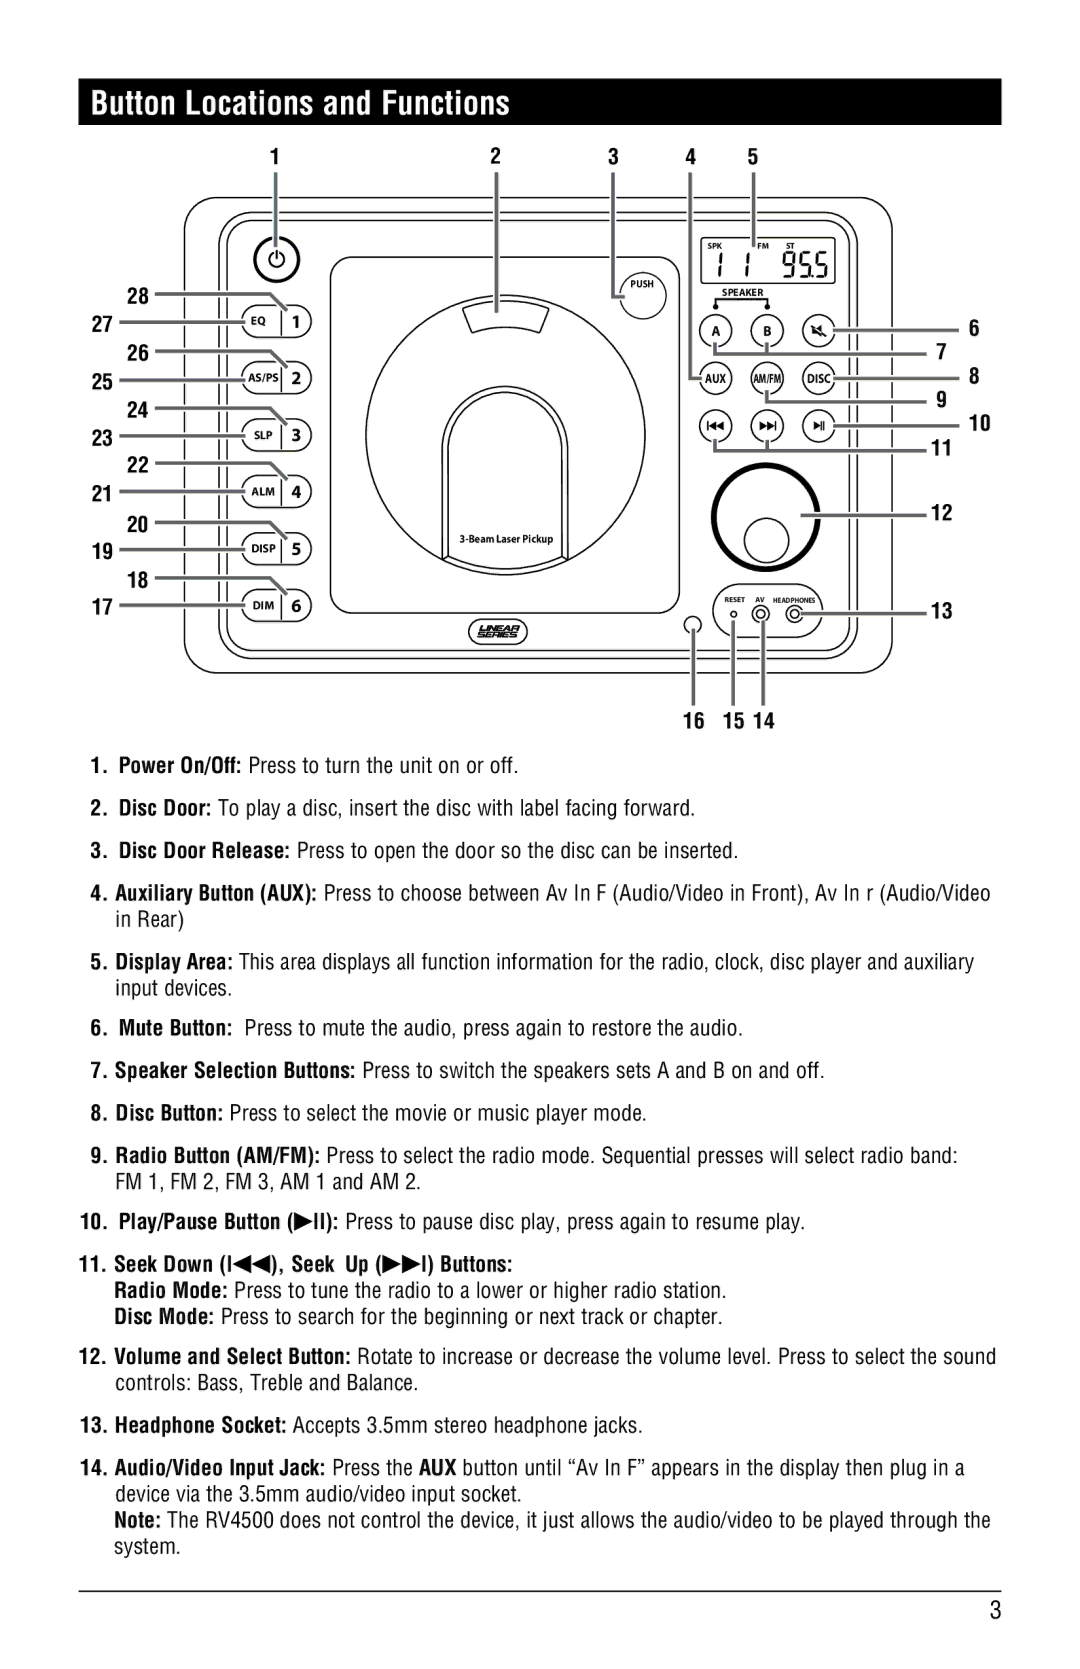
1.Power On/Off: Press to turn the unit on or off.
2.Disc Door: To play a disc, insert the disc with label facing forward.
3.Disc Door Release: Press to open the door so the disc can be inserted.
4.Auxiliary Button (AUX): Press to choose between Av In F (Audio/Video in Front), Av In r (Audio/Video in Rear)
5.Display Area: This area displays all function information for the radio, clock, disc player and auxiliary input devices.
6.Mute Button: Press to mute the audio, press again to restore the audio.
7.Speaker Selection Buttons: Press to switch the speakers sets A and B on and off.
8.Disc Button: Press to select the movie or music player mode.
9.Radio Button (AM/FM): Press to select the radio mode. Sequential presses will select radio band: FM 1, FM 2, FM 3, AM 1 and AM 2.
10.Play/Pause Button (�ll): Press to pause disc play, press again to resume play.
11.Seek Down (l��), Seek Up (��l) Buttons:
Radio Mode: Press to tune the radio to a lower or higher radio station.
Disc Mode: Press to search for the beginning or next track or chapter.
12.Volume and Select Button: Rotate to increase or decrease the volume level. Press to select the sound
controls: Bass, Treble and Balance.
13.Headphone Socket: Accepts 3.5mm stereo headphone jacks.
14.Audio/Video Input Jack: Press the AUX button until “Av In F” appears in the display then plug in a device via the 3.5mm audio/video input socket.
Note: The RV4500 does not control the device, it just allows the audio/video to be played through the system.
3