Linksys AE1000
Chapter 3: Wireless Network
Configuration
To configure the Adapter’s wireless connection settings, use a wireless network configuration utility. If you have installed such a utility on your computer, or if your computer came with one already installed, refer to that utility’s documentation for instructions on use. Otherwise, follow the instructions in the appropriate section below to use your operating system’s
Windows 7
After you have installed the Adapter, the Wireless Network Configuration utility icon appears on your computer’s system tray.
Wireless Network Configuration Utility Icon
(If you do not see the icon, click the Show hidden icons arrow ![]() in the system tray.)
in the system tray.)
When your mouse pointer hovers over the icon, the status information of your wireless connection appears.
Wireless Connection Status
New Wireless Connection
To connect to a different wireless network:
1.Click the Wireless Network Configuration utility icon. A list of available wireless networks appears.
Available Wireless Networks
Chapter 3: Wireless Network Configuration
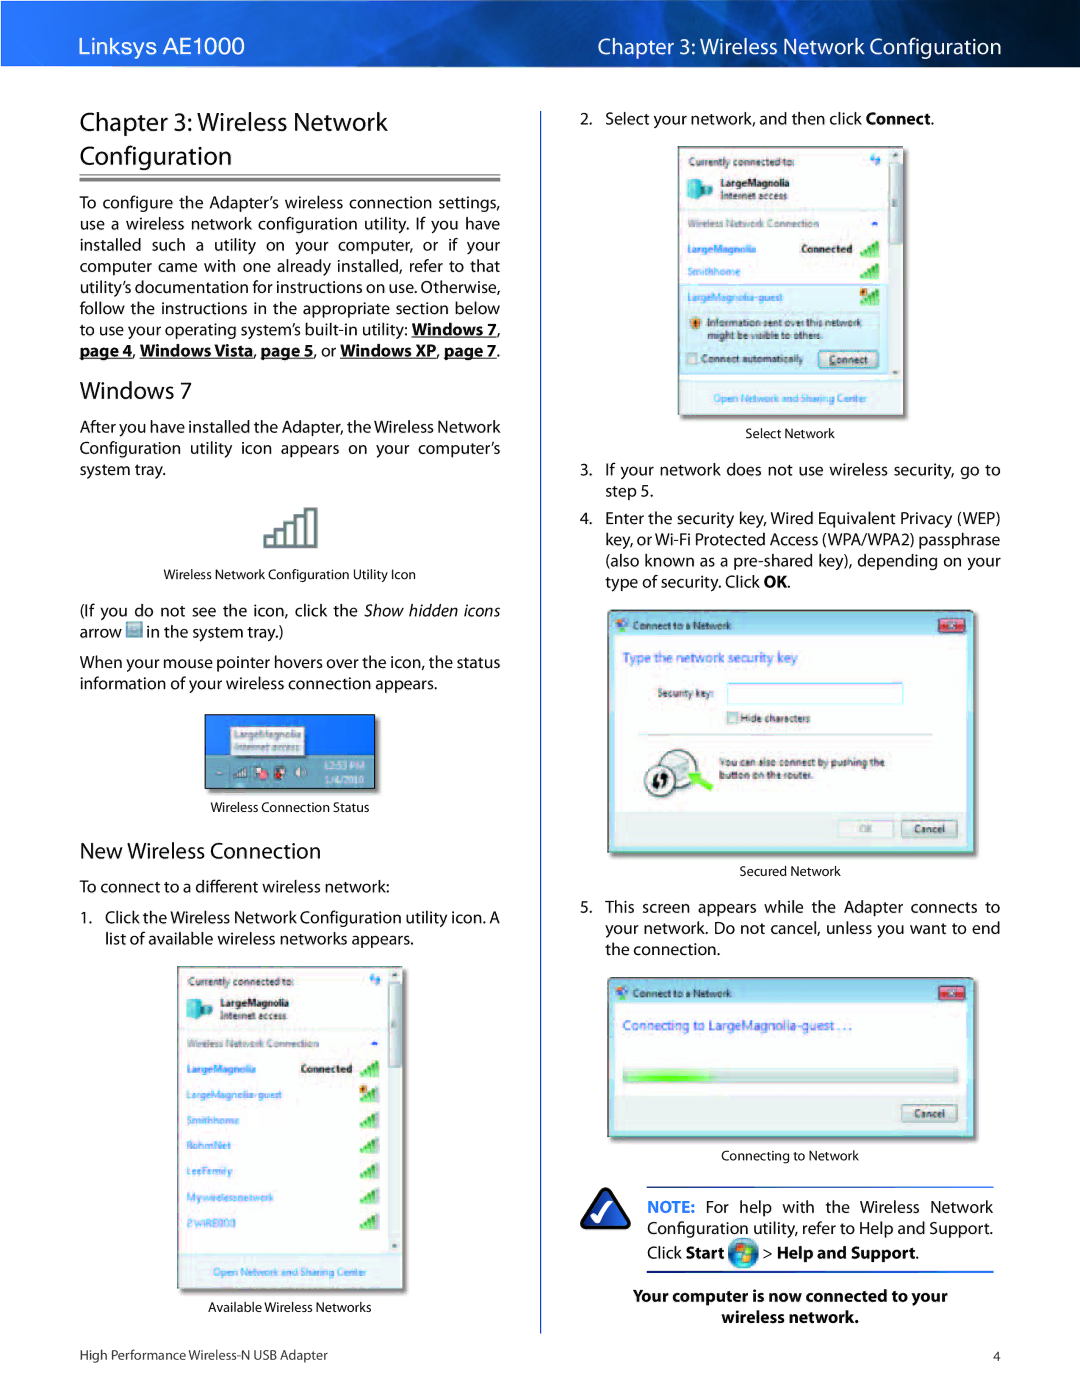
2. Select your network, and then click Connect.
Select Network
3.If your network does not use wireless security, go to step 5.
4.Enter the security key, Wired Equivalent Privacy (WEP) key, or
Secured Network
5.This screen appears while the Adapter connects to your network. Do not cancel, unless you want to end the connection.
Connecting to Network
NOTE: For help with the Wireless Network Configuration utility, refer to Help and Support.
Click Start ![]() > Help and Support.
> Help and Support.
Your computer is now connected to your wireless network.
High Performance | 4 |