
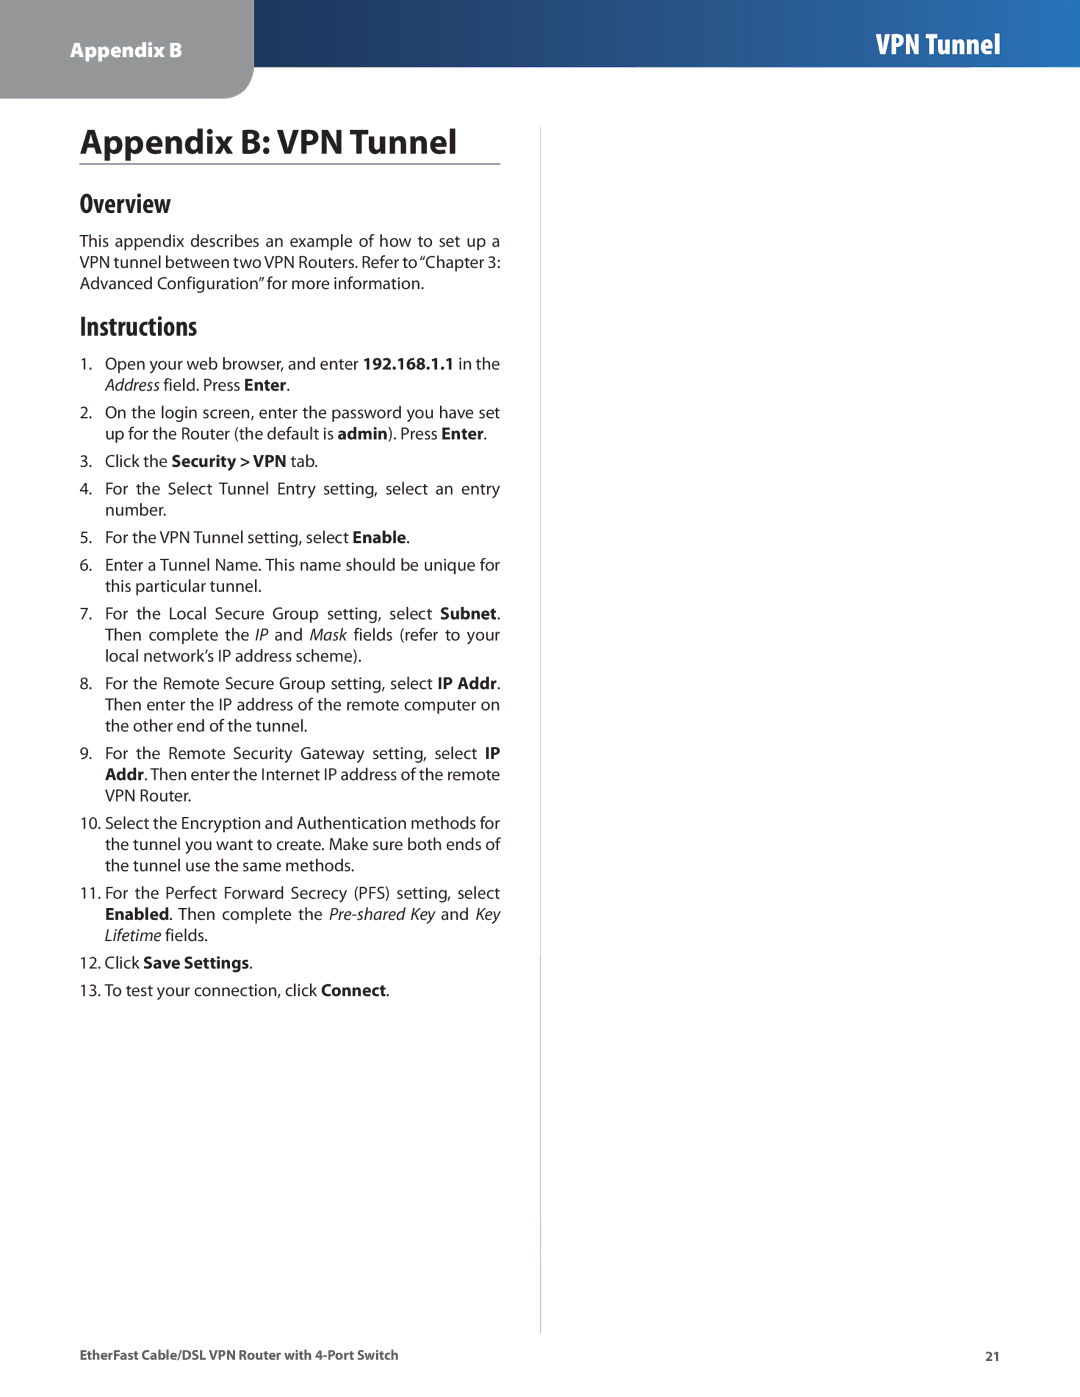
BEFVP41 specifications
The Linksys BEFVP41 is a sophisticated yet user-friendly VPN router designed primarily for small office and home office networks. Known for its robust performance and versatility, it stands out as a solid choice for users looking to enhance their network security and connectivity.One of its key features is the built-in VPN support, which allows users to establish secure connections to remote networks or clients. The BEFVP41 supports up to 50 simultaneous VPN connections, making it an excellent option for small businesses that require secure remote access for their employees without compromising on speed or reliability.
The router employs advanced security protocols including IPsec, which is well-known for ensuring encrypted communication over the internet. This level of security enables users to safeguard sensitive data and maintain privacy while accessing their networks remotely, critical for businesses that handle confidential information.
In terms of connectivity, the BEFVP41 is equipped with four Ethernet ports that support 10/100 Mbps speeds, allowing for high-speed wired connections. It also features a WAN port for connection to a broadband modem, ensuring a fast and stable internet connection. The router supports various connection types, including DHCP, static IP, and PPPoE, making it versatile for different networking environments.
Additional features include a user-friendly web-based interface, which simplifies the setup and configuration process for users. This intuitive design is combined with powerful QoS (Quality of Service) capabilities, enabling prioritized bandwidth allocation to specific applications or users, ensuring that critical business applications have the necessary speeds and reliability.
The BEFVP41 also offers dynamic DNS support, which allows users to access their home or office network using a domain name instead of remembering an IP address. Moreover, it includes a DHCP server for automated IP address assignment, making network management more streamlined.
Overall, the Linksys BEFVP41 combines essential networking technologies and security features into a compact design suitable for any small business or home office environment. With its robust performance, extensive VPN capabilities, and user-friendly interface, it caters effectively to the diverse needs of modern network requirements. The BEFVP41 is a reliable solution for those looking to enhance their connectivity while maintaining security and ease of use.