Placement Options
There are three ways to physically install the Switch: set the Switch on its four rubber feet, mount the Switch in a
To rack mount the Switch, follow these instructions:
1.The Switch has four mounting holes on each side. Screw an included mounting bracket into each side.
2.Place the Switch in the rack, and secure the brackets with additional screws.
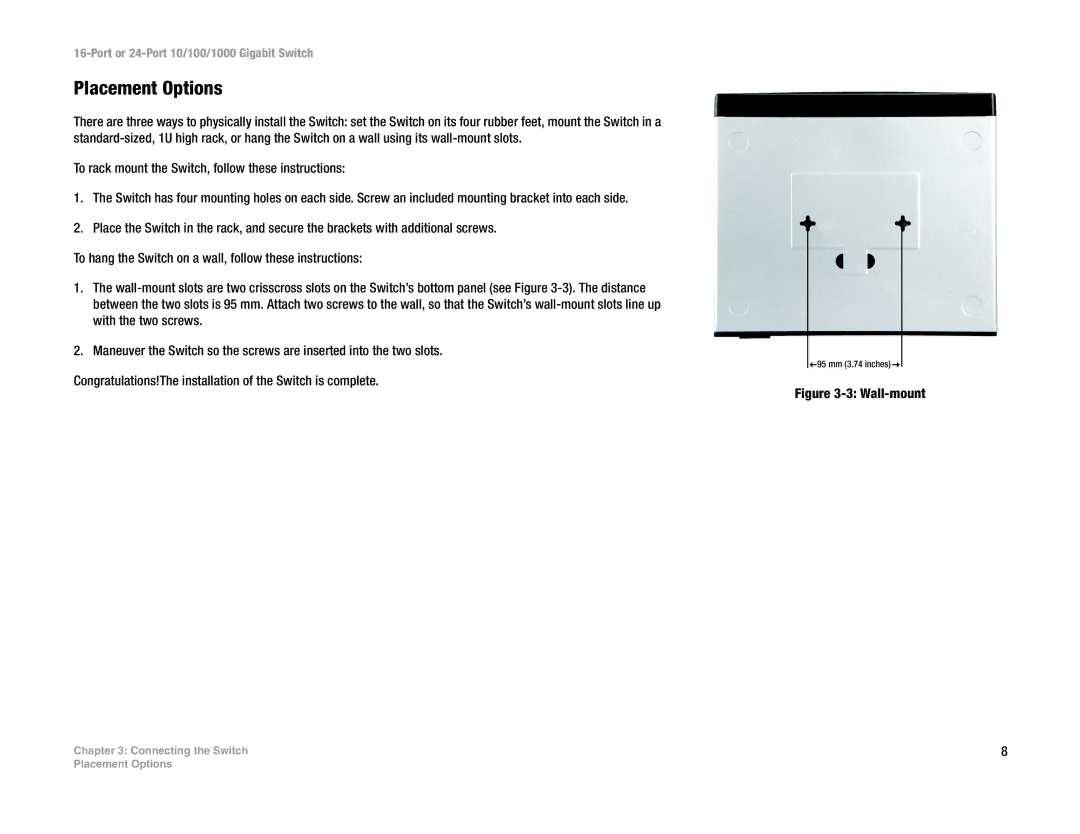
To hang the Switch on a wall, follow these instructions:
1.The
2.Maneuver the Switch so the screws are inserted into the two slots.
Congratulations!The installation of the Switch is complete.
Chapter 3: Connecting the Switch
Figure 3-3: Wall-mount
8
Placement Options