Gigabit USB Adapter
Chapter 3: Setup Utility for the Gigabit USB Adapter
Overview
This chapter will take you through all the steps necessary to set up, configure, and install the Gigabit USB Adapter. The steps are also available to use the Utility to uninstall the driver from the Adapter, if you should ever need to do so. After you set up the Adapter with the Setup Utility, you will install the Adapter into your Notebook PC.
IMPORTANT: Make sure that you don’t connect the Adapter until instructed to do so or the setup won’t work.
Setup Utility
1.Insert the Setup Utility CD into your PC's
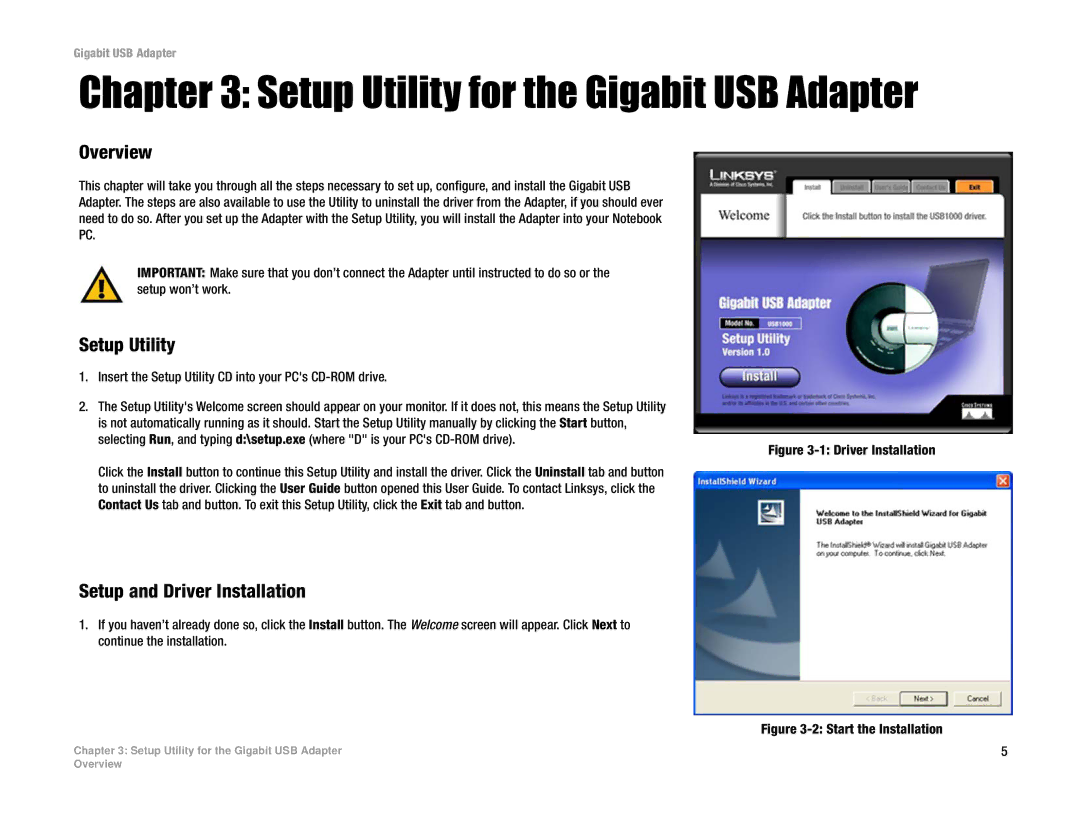
2.The Setup Utility's Welcome screen should appear on your monitor. If it does not, this means the Setup Utility is not automatically running as it should. Start the Setup Utility manually by clicking the Start button, selecting Run, and typing d:\setup.exe (where "D" is your PC's
Figure 3-1: Driver Installation
Click the Install button to continue this Setup Utility and install the driver. Click the Uninstall tab and button to uninstall the driver. Clicking the User Guide button opened this User Guide. To contact Linksys, click the Contact Us tab and button. To exit this Setup Utility, click the Exit tab and button.
Setup and Driver Installation
1.If you haven’t already done so, click the Install button. The Welcome screen will appear. Click Next to continue the installation.
Figure 3-2: Start the Installation
Chapter 3: Setup Utility for the Gigabit USB Adapter | 5 |
Overview