Instruction Manual | PRECISION SANDER ELITE | Model | |
|
|
|
|
Cleaning
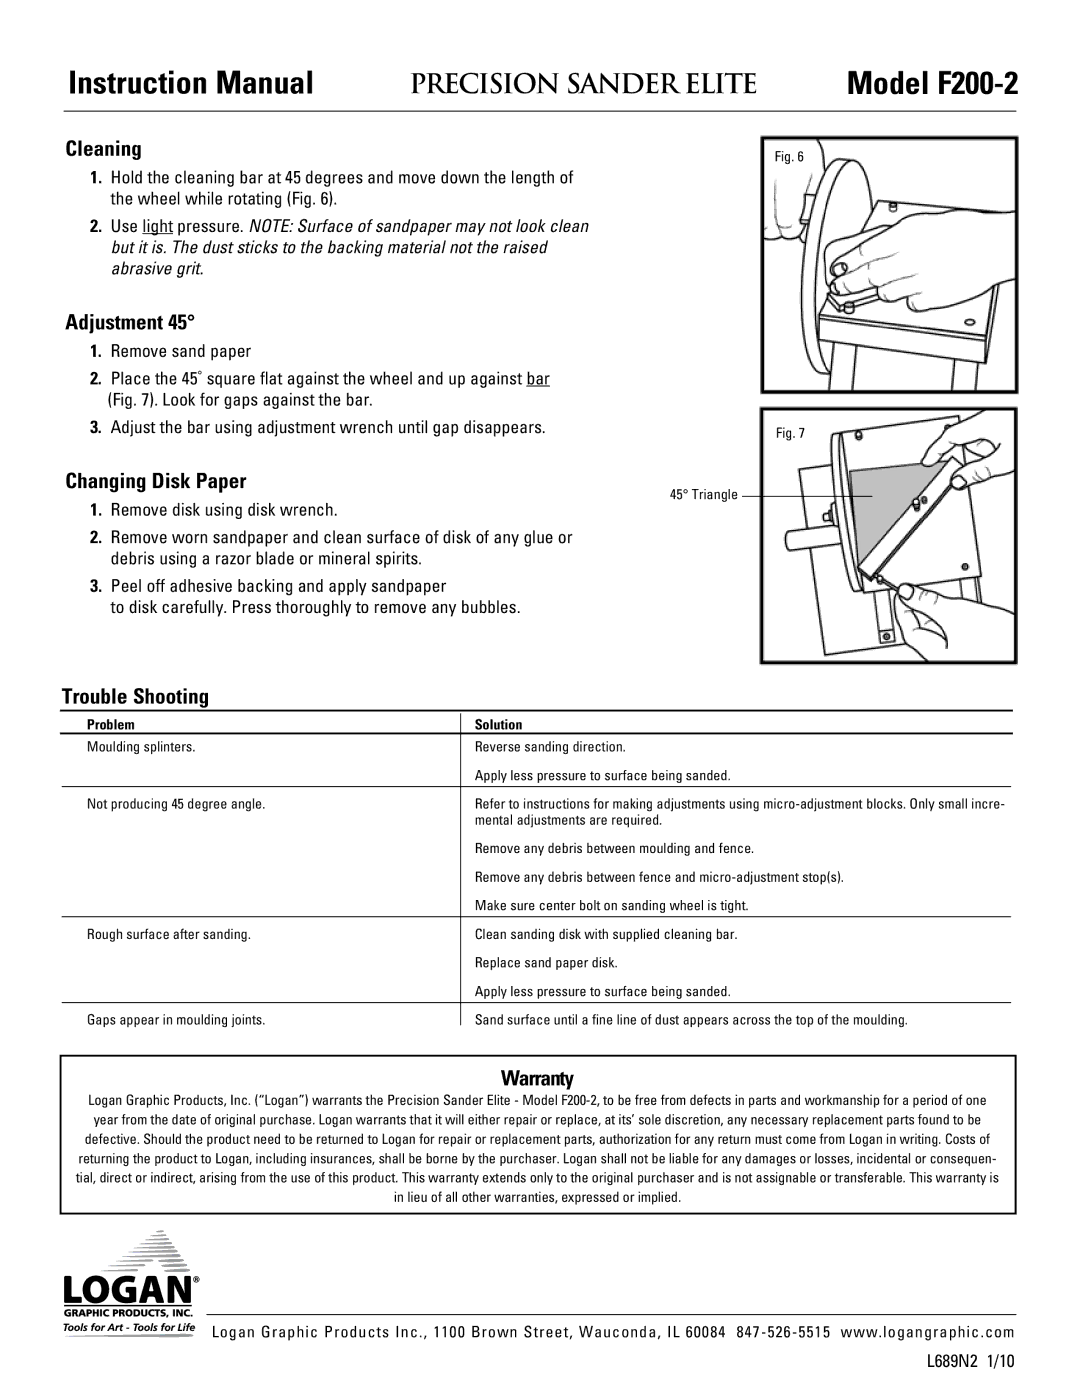
1.Hold the cleaning bar at 45 degrees and move down the length of the wheel while rotating (Fig. 6).
2.Use light pressure. NOTE: Surface of sandpaper may not look clean but it is. The dust sticks to the backing material not the raised abrasive grit.
Adjustment 45°
1.Remove sand paper
2.Place the 45˚ square flat against the wheel and up against bar (Fig. 7). Look for gaps against the bar.
3.Adjust the bar using adjustment wrench until gap disappears.
Changing Disk Paper
1.Remove disk using disk wrench.
2.Remove worn sandpaper and clean surface of disk of any glue or debris using a razor blade or mineral spirits.
3.Peel off adhesive backing and apply sandpaper
to disk carefully. Press thoroughly to remove any bubbles.
Fig. 6
Fig. 7
45° Triangle
Trouble Shooting
| Problem | Solution |
|
| Moulding splinters. | Reverse sanding direction. |
|
|
| Apply less pressure to surface being sanded. |
|
|
|
|
|
| Not producing 45 degree angle. | Refer to instructions for making adjustments using |
|
|
| mental adjustments are required. |
|
|
| Remove any debris between moulding and fence. |
|
|
| Remove any debris between fence and |
|
|
| Make sure center bolt on sanding wheel is tight. |
|
|
|
|
|
| Rough surface after sanding. | Clean sanding disk with supplied cleaning bar. |
|
|
| Replace sand paper disk. |
|
|
| Apply less pressure to surface being sanded. |
|
|
|
|
|
| Gaps appear in moulding joints. | Sand surface until a fine line of dust appears across the top of the moulding. |
|
Warranty
Logan Graphic Products, Inc. (“Logan”) warrants the Precision Sander Elite - Model
Logan Graphic Products Inc., 1100 Brown Street, Wauconda, IL 60084
L689N2 1/10