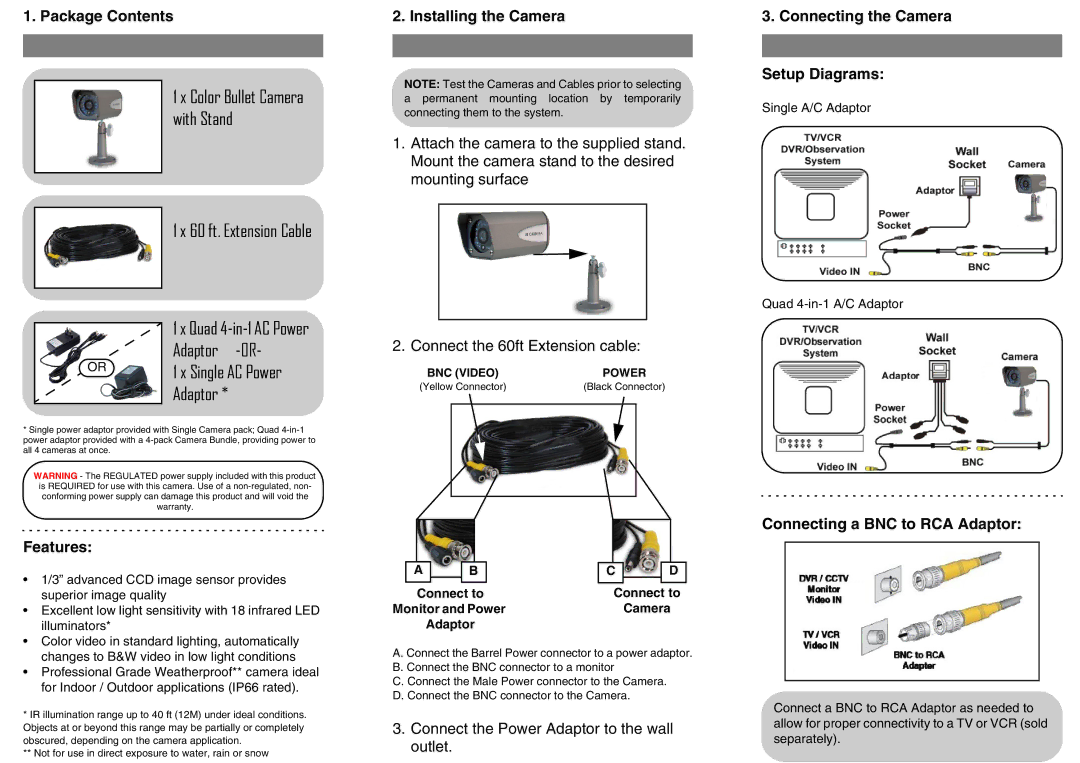
1. Package Contents
1 x Color Bullet Camera with Stand
1 x 60 ft. Extension Cable
|
|
| 1 x Quad |
|
|
| |
| OR |
| Adaptor |
|
| 1 x Single AC Power | |
|
|
| |
|
|
| Adaptor * |
|
|
|
|
*Single power adaptor provided with Single Camera pack; Quad
WARNING - The REGULATED power supply included with this product is REQUIRED for use with this camera. Use of a
Features:
•1/3” advanced CCD image sensor provides superior image quality
•Excellent low light sensitivity with 18 infrared LED illuminators*
•Color video in standard lighting, automatically changes to B&W video in low light conditions
•Professional Grade Weatherproof** camera ideal for Indoor / Outdoor applications (IP66 rated).
*IR illumination range up to 40 ft (12M) under ideal conditions. Objects at or beyond this range may be partially or completely obscured, depending on the camera application.
**Not for use in direct exposure to water, rain or snow
2. Installing the Camera
NOTE: Test the Cameras and Cables prior to selecting a permanent mounting location by temporarily connecting them to the system.
1.Attach the camera to the supplied stand. Mount the camera stand to the desired mounting surface
2. Connect the 60ft Extension cable:
BNC (VIDEO) | POWER | ||
(Yellow Connector) | (Black Connector) | ||
|
|
|
|
|
|
|
|
A | B | C | D |
Connect to | Connect to |
Monitor and Power | Camera |
Adaptor |
|
A. Connect the Barrel Power connector to a power adaptor. B. Connect the BNC connector to a monitor
C. Connect the Male Power connector to the Camera. D. Connect the BNC connector to the Camera.
3.Connect the Power Adaptor to the wall outlet.
3. Connecting the Camera
Setup Diagrams:
Single A/C Adaptor
Quad
Connecting a BNC to RCA Adaptor:
Connect a BNC to RCA Adaptor as needed to allow for proper connectivity to a TV or VCR (sold separately).
