Wireless Receiver
Wireless Receiver
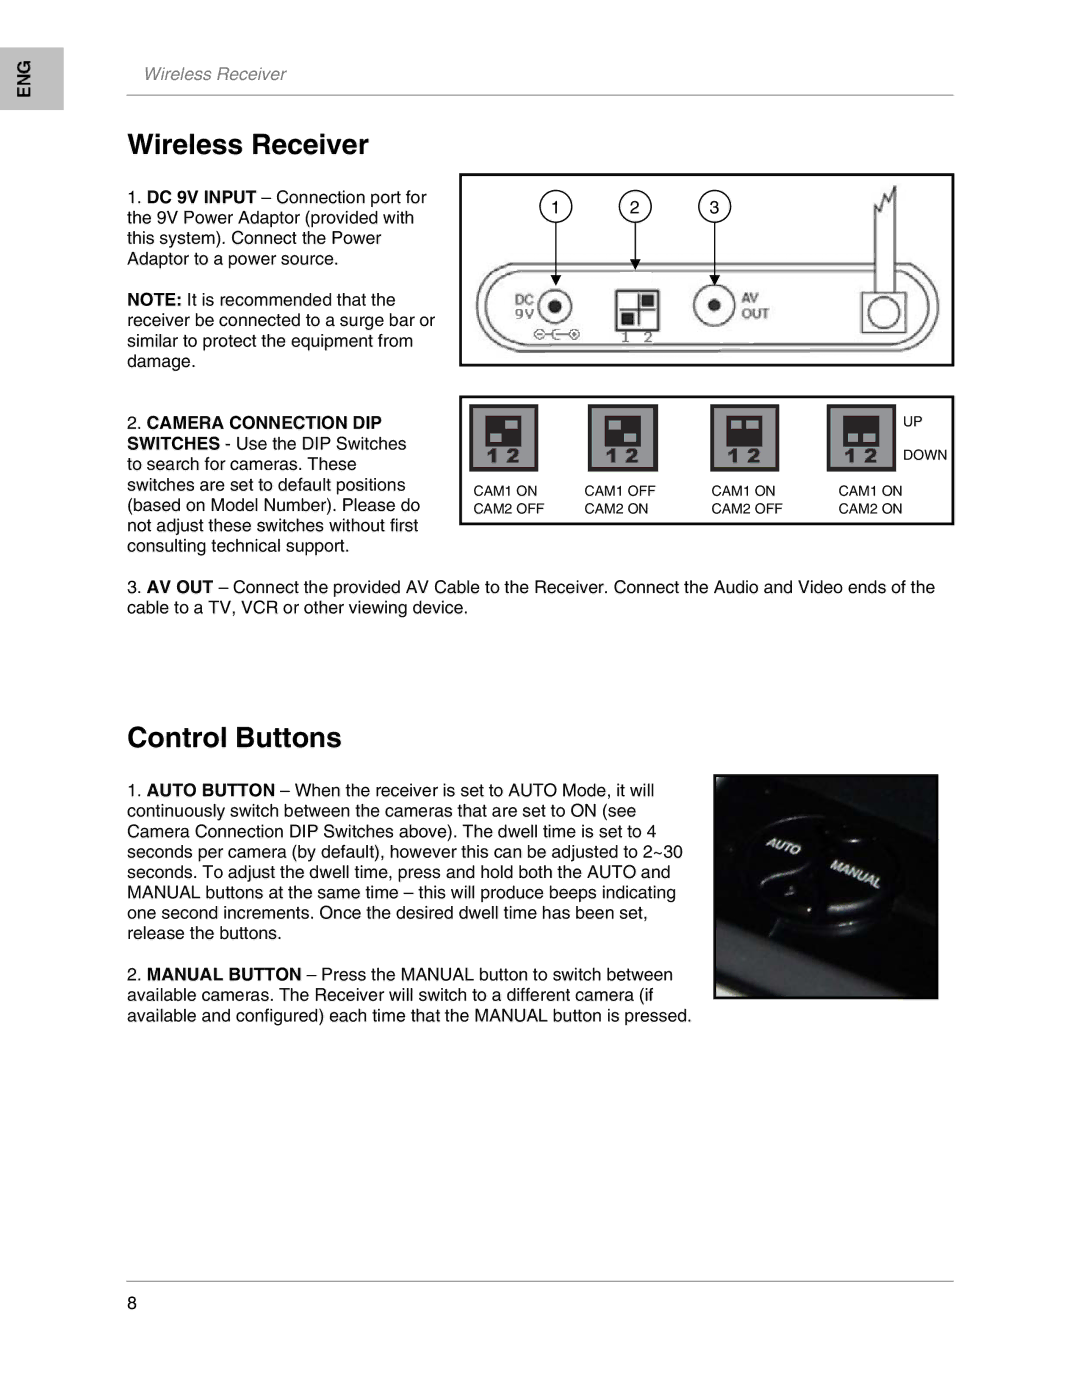
1.DC 9V INPUT – Connection port for the 9V Power Adaptor (provided with this system). Connect the Power Adaptor to a power source.
NOTE: It is recommended that the receiver be connected to a surge bar or similar to protect the equipment from damage.
2.CAMERA CONNECTION DIP SWITCHES - Use the DIP Switches to search for cameras. These switches are set to default positions (based on Model Number). Please do not adjust these switches without first consulting technical support.
1 2 3
UP
DOWN
CAM1 ON | CAM1 OFF | CAM1 ON | CAM1 ON |
CAM2 OFF | CAM2 ON | CAM2 OFF | CAM2 ON |
3.AV OUT – Connect the provided AV Cable to the Receiver. Connect the Audio and Video ends of the cable to a TV, VCR or other viewing device.
Control Buttons
1.AUTO BUTTON – When the receiver is set to AUTO Mode, it will continuously switch between the cameras that are set to ON (see Camera Connection DIP Switches above). The dwell time is set to 4 seconds per camera (by default), however this can be adjusted to 2~30 seconds. To adjust the dwell time, press and hold both the AUTO and MANUAL buttons at the same time – this will produce beeps indicating one second increments. Once the desired dwell time has been set, release the buttons.
2.MANUAL BUTTON – Press the MANUAL button to switch between available cameras. The Receiver will switch to a different camera (if available and configured) each time that the MANUAL button is pressed.
8