3. Installation
SContinued from the previous page
Computer
Computer
4. Start Using
Projector
Computer
Charge the unit for 3 hours before the first use. |
|
Switch power to [ON]. (Note: When the unit is fully charged, | indicator lights blue.) |
To start connection, please follow the steps of Section 5.1 Auto connection.
Modify SSID before the first use. Please follow the steps of 5.2 Change the SSID for modification.
Double click on [Ladibug] | icon to activate Ladibug™ Software. | |
Move the mouse to [Ladibug] | icon, and the main function menu will be displayed. | |
Place an object to be displayed under the camera. | ||
Press [Preview] | to display the setting screen of POWER Frequency, and | |
follow the screen instructions. A live image is displayed when the setting is finished.
(![]() This setting is required for the first use only.)
This setting is required for the first use only.)
Press [AUTO TUNE] | button to optimize the image. |
![]() For more information on the operation of DC120, please refer to DC120 User Manual.
For more information on the operation of DC120, please refer to DC120 User Manual. ![]() For more information on the setting of
For more information on the setting of
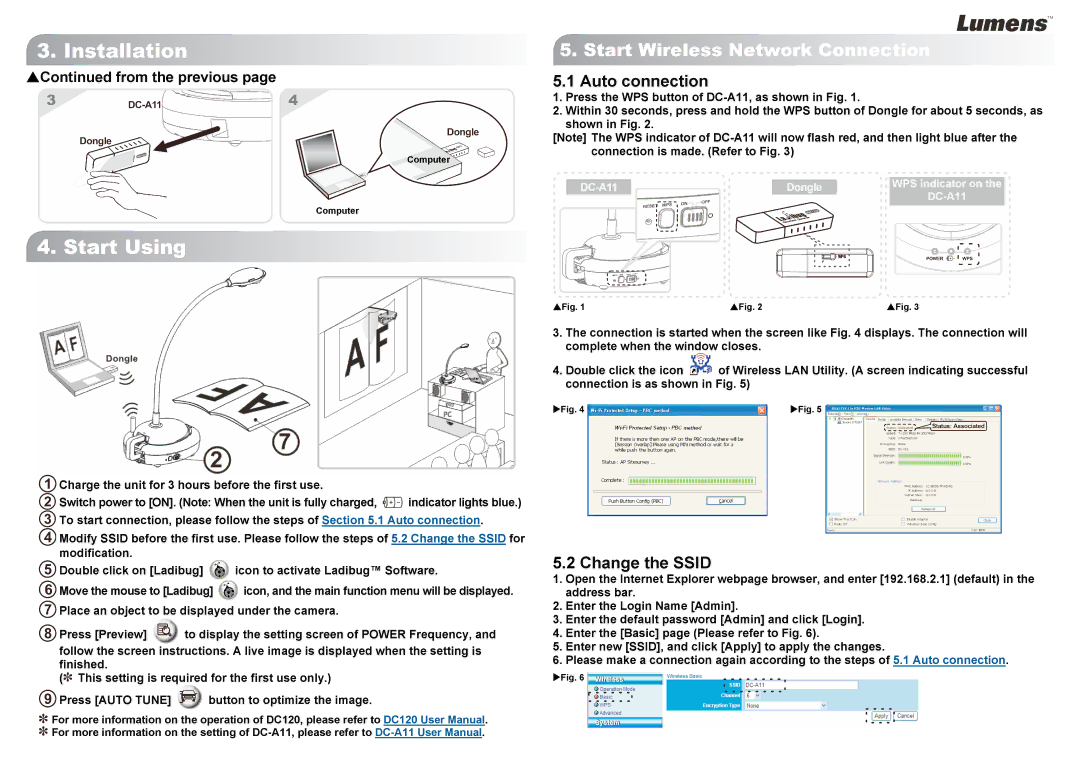
5.Start Wireless Network Connection
5.1Auto connection
1.Press the WPS button of
2.Within 30 seconds, press and hold the WPS button of Dongle for about 5 seconds, as shown in Fig. 2.
[Note] The WPS indicator of
WPS indicator on the
SFig. 1 | SFig. 2 | SFig. 3 |
3.The connection is started when the screen like Fig. 4 displays. The connection will complete when the window closes.
4.Double click the icon ![]() of Wireless LAN Utility. (A screen indicating successful connection is as shown in Fig. 5)
of Wireless LAN Utility. (A screen indicating successful connection is as shown in Fig. 5)
XFig. 4 | XFig. 5 |
5.2 Change the SSID
1.Open the Internet Explorer webpage browser, and enter [192.168.2.1] (default) in the address bar.
2.Enter the Login Name [Admin].
3.Enter the default password [Admin] and click [Login].
4.Enter the [Basic] page (Please refer to Fig. 6).
5.Enter new [SSID], and click [Apply] to apply the changes.
6.Please make a connection again according to the steps of 5.1 Auto connection.
XFig. 6