Rear Wheels
Rear Wheel Installation
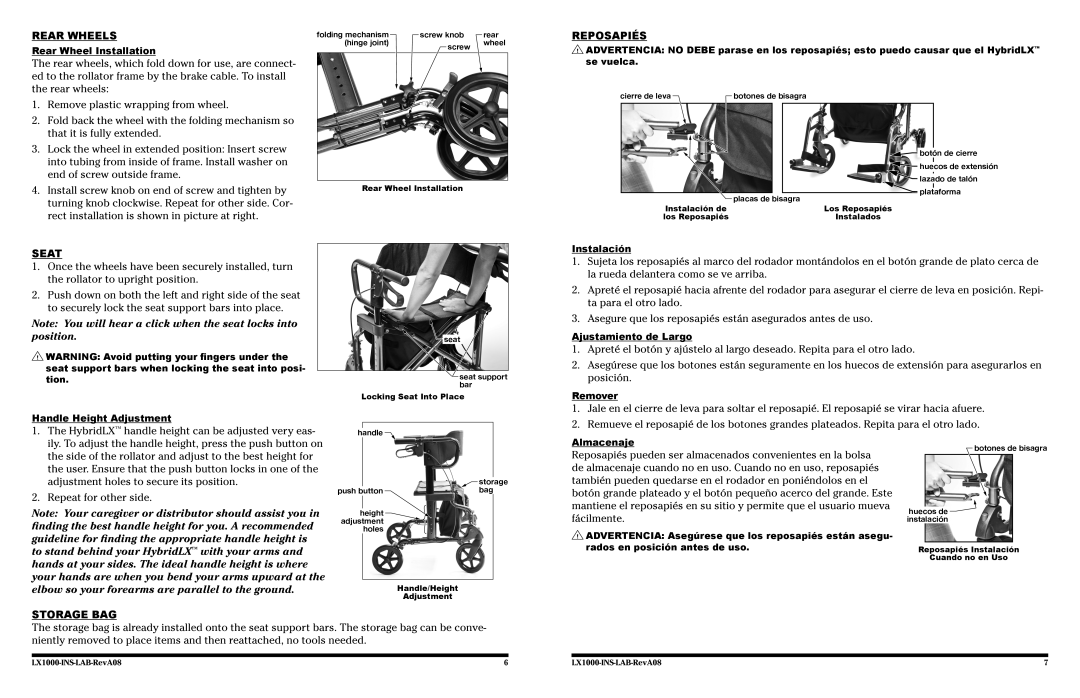
The rear wheels, which fold down for use, are connect- ed to the rollator frame by the brake cable. To install the rear wheels:
folding mechanism | screw knob | rear |
(hinge joint) | screw | wheel |
|
|
Reposapiés
![]() ADVERTENCIA: NO DEBE parase en los reposapiés; esto puedo causar que el HybridLX™ se vuelca.
ADVERTENCIA: NO DEBE parase en los reposapiés; esto puedo causar que el HybridLX™ se vuelca.
cierre de leva | botones de bisagra |
1. | Remove plastic wrapping from wheel. |
2. | Fold back the wheel with the folding mechanism so |
| that it is fully extended. |
3. | Lock the wheel in extended position: Insert screw |
| into tubing from inside of frame. Install washer on |
| end of screw outside frame. |
4. | Install screw knob on end of screw and tighten by |
| turning knob clockwise. Repeat for other side. Cor- |
| rect installation is shown in picture at right. |
Rear Wheel Installation
Instalación de los Reposapiés
botón de cierre |
huecos de extensión |
lazado de talón |
plataforma |
placas de bisagra |
Los Reposapiés |
Instalados |
Seat
1.Once the wheels have been securely installed, turn the rollator to upright position.
2.Push down on both the left and right side of the seat to securely lock the seat support bars into place.
Note: You will hear a click when the seat locks into position.
![]() WARNING: Avoid putting your fingers under the seat support bars when locking the seat into posi- tion.
WARNING: Avoid putting your fingers under the seat support bars when locking the seat into posi- tion.
![]() seat
seat
seat support bar
Locking Seat Into Place
Instalación
1.Sujeta los reposapiés al marco del rodador montándolos en el botón grande de plato cerca de la rueda delantera como se ve arriba.
2.Apreté el reposapié hacia afrente del rodador para asegurar el cierre de leva en posición. Repi- ta para el otro lado.
3.Asegure que los reposapiés están asegurados antes de uso.
Ajustamiento de Largo
1.Apreté el botón y ajústelo al largo deseado. Repita para el otro lado.
2.Asegúrese que los botones están seguramente en los huecos de extensión para asegurarlos en posición.
Remover
Handle Height Adjustment
1. The HybridLX™ handle height can be adjusted very eas- |
handle
1.Jale en el cierre de leva para soltar el reposapié. El reposapié se virar hacia afuere.
2.Remueve el reposapié de los botones grandes plateados. Repita para el otro lado.
ily. To adjust the handle height, press the push button on |
the side of the rollator and adjust to the best height for |
the user. Ensure that the push button locks in one of the |
adjustment holes to secure its position. |
2. Repeat for other side. |
Note: Your caregiver or distributor should assist you in finding the best handle height for you. A recommended guideline for finding the appropriate handle height is to stand behind your HybridLX™ with your arms and hands at your sides. The ideal handle height is where your hands are when you bend your arms upward at the elbow so your forearms are parallel to the ground.
|
|
|
|
|
|
|
| storage | |
push | button |
| bag |
|
|
|
|
|
|
height adjustment holes
Handle/Height
Adjustment
Almacenaje
Reposapiés pueden ser almacenados convenientes en la bolsa de almacenaje cuando no en uso. Cuando no en uso, reposapiés también pueden quedarse en el rodador en poniéndolos en el botón grande plateado y el botón pequeño acerco del grande. Este mantiene el reposapiés en su sitio y permite que el usuario mueva fácilmente.
![]() ADVERTENCIA: Asegúrese que los reposapiés están asegu- rados en posición antes de uso.
ADVERTENCIA: Asegúrese que los reposapiés están asegu- rados en posición antes de uso.
botones de bisagra
huecos de ![]() instalación
instalación
Reposapiés Instalación
Cuando no en Uso
Storage Bag
The storage bag is already installed onto the seat support bars. The storage bag can be conve- niently removed to place items and then reattached, no tools needed.
6 |
| 7 |
